
Instead of sending a feed from a physical encoder, SimLive allows you to use existing assets or playlists and stream them through Sardius as if they were happening in real time. This makes it ideal for scheduled services, replay events, premieres, or recurring broadcasts that need a live presentation without the complexity of live production. As the SimLive Event plays out, Viewers will be able to rewind, but they will not be able to skip ahead.
SimLive reduces setup risk, eliminates encoder configuration, and provides a consistent, repeatable workflow — all while maintaining full output distribution through Sardius Stream.
SimLive events can be set to repeat on your calendar, either using the same asset, or using the same feed which can be updated dynamically and automatically.
Should I Use an Asset or a Feed?
In order to be playable through SimLive, the Asset must be published using HLS. Using a single Asset for SimLive is ideal for one-off events.
Using a Feed, you are able to automate SimLive Events that repeat over an extended range of time. A Sardius SimLive Event will only play the most recent approved Asset in the Feed. Many clients use a Feed to rebroadcast their Sunday morning service automatically the same evening.
Prepare Your Feed
- Determine a category name that will you will attach to your SimLive Assets.
- Determine a name for the feed that all assets tagged with the category will be attached to.
Using both feeds and categories is essential to automating the creation and execution of your SimLive events.
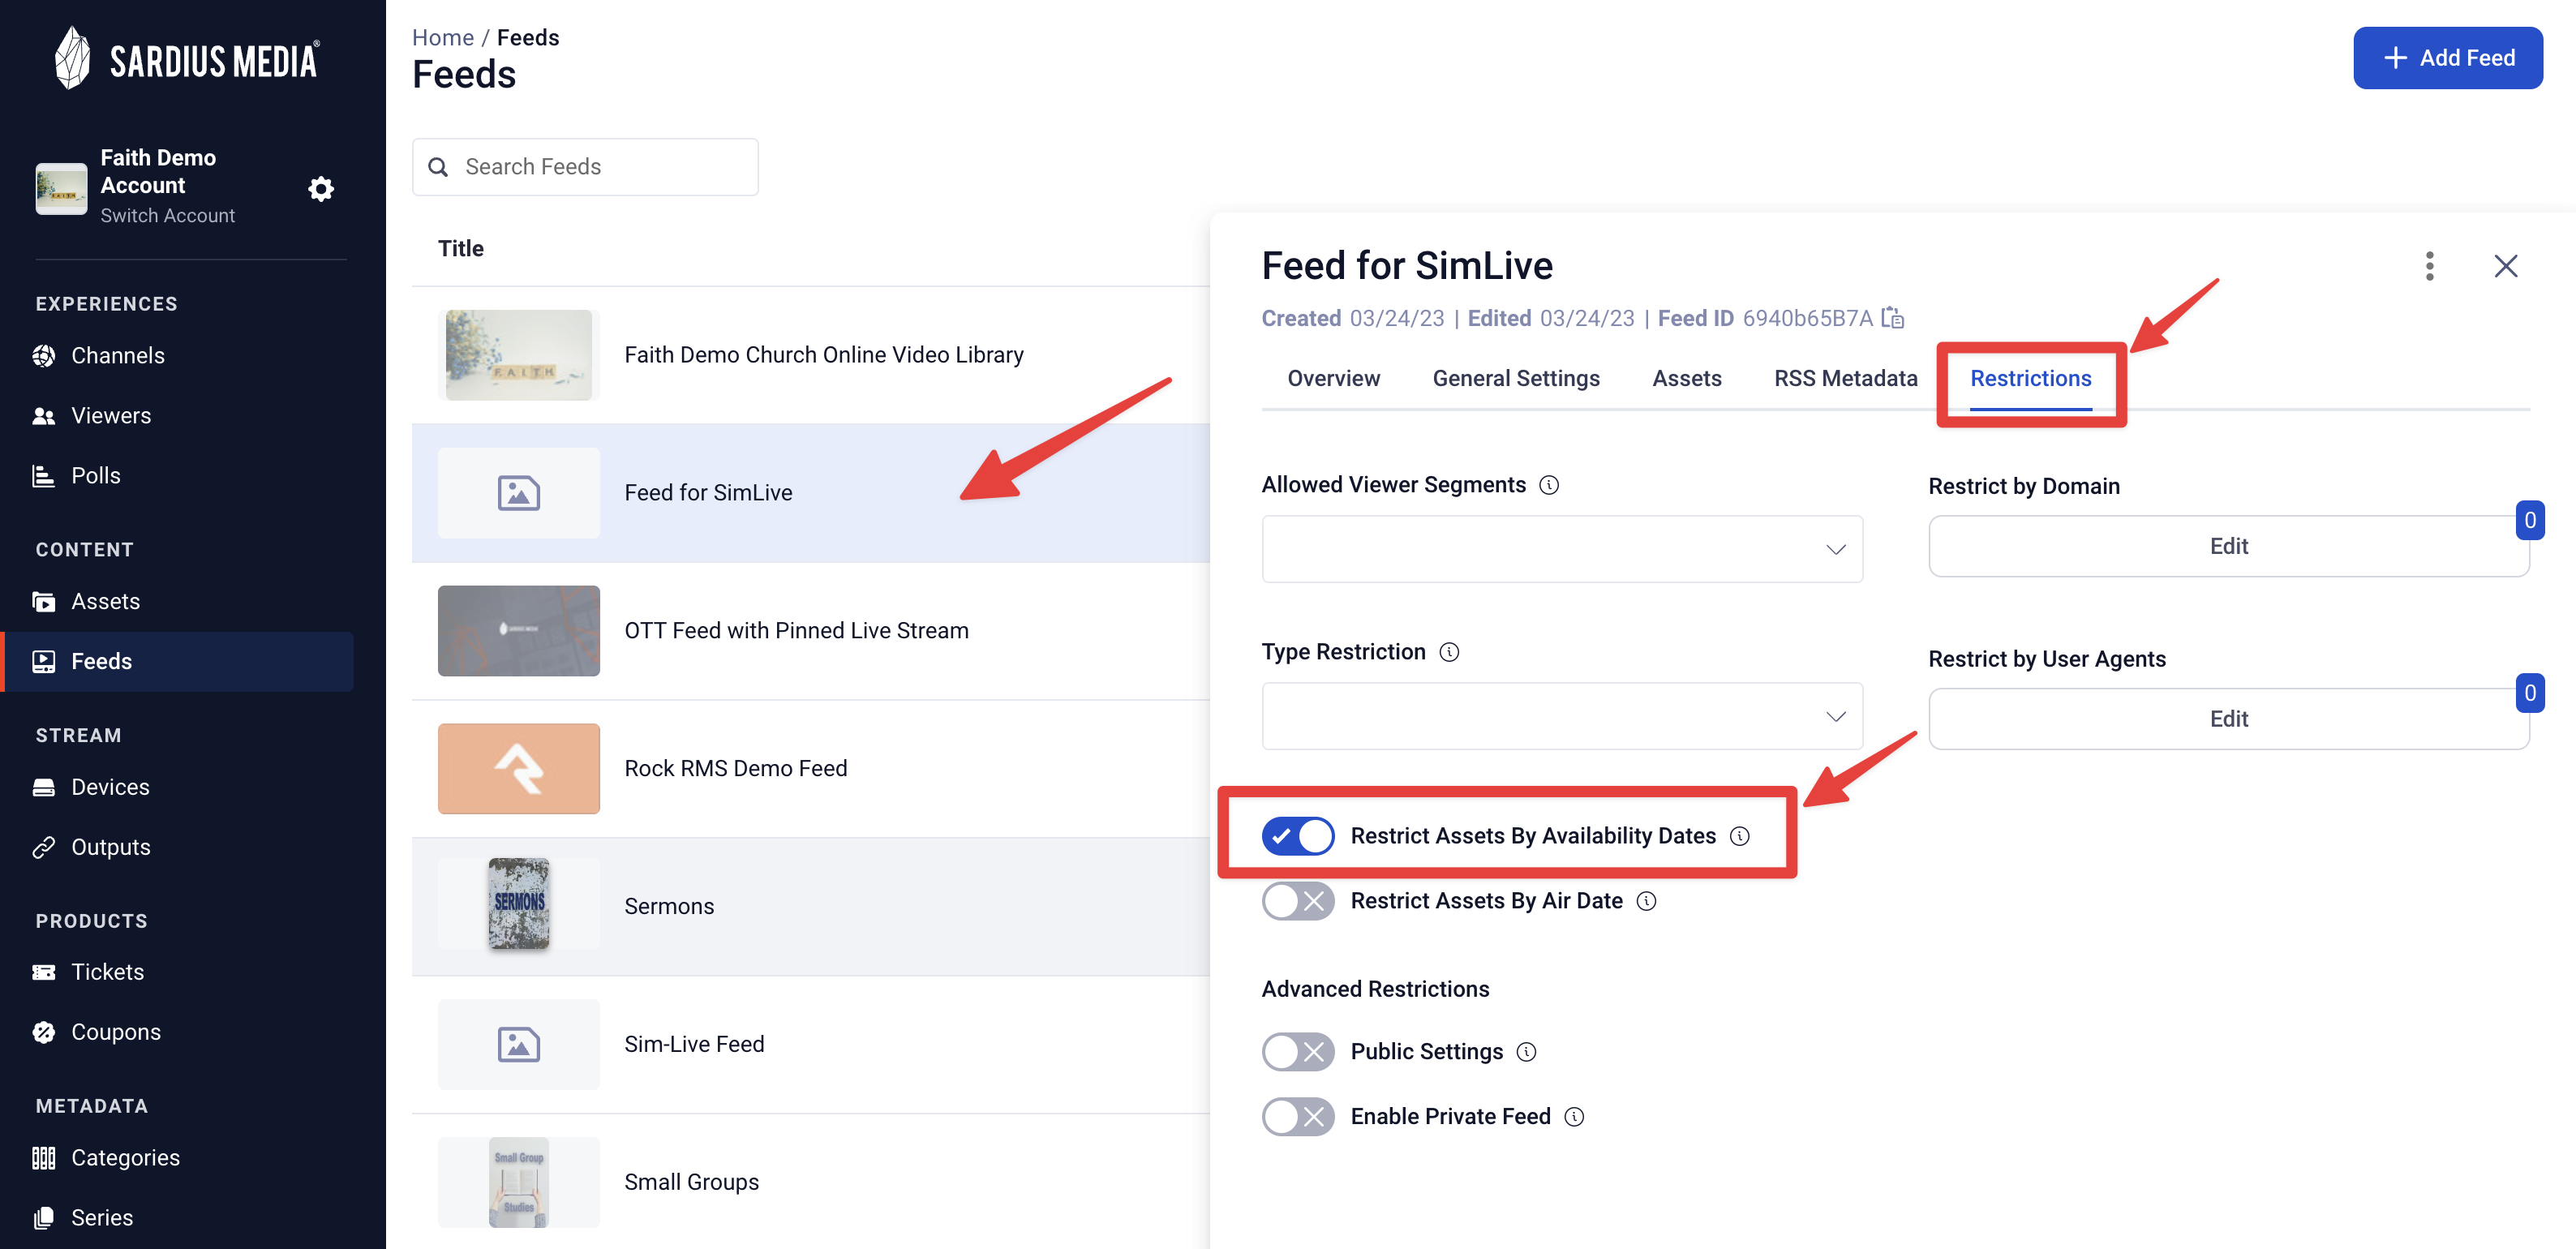
After creating your feed, take a moment to review your Feed’s restrictions. These are viewable by clicking on the Feed’s Restrictions tab.
Prepare Your Asset
SimLive only works with an Asset that is in an HLS format.
-
If you are streaming an Asset that was recorded from a live stream within the Control Panel, your file is already formatted for HLS.
-
If you are wanting to stream SimLive with an Asset or video that you have uploaded into the Control Panel, chances are you will need to republish the file into an HLS format. You can learn how to do that here.
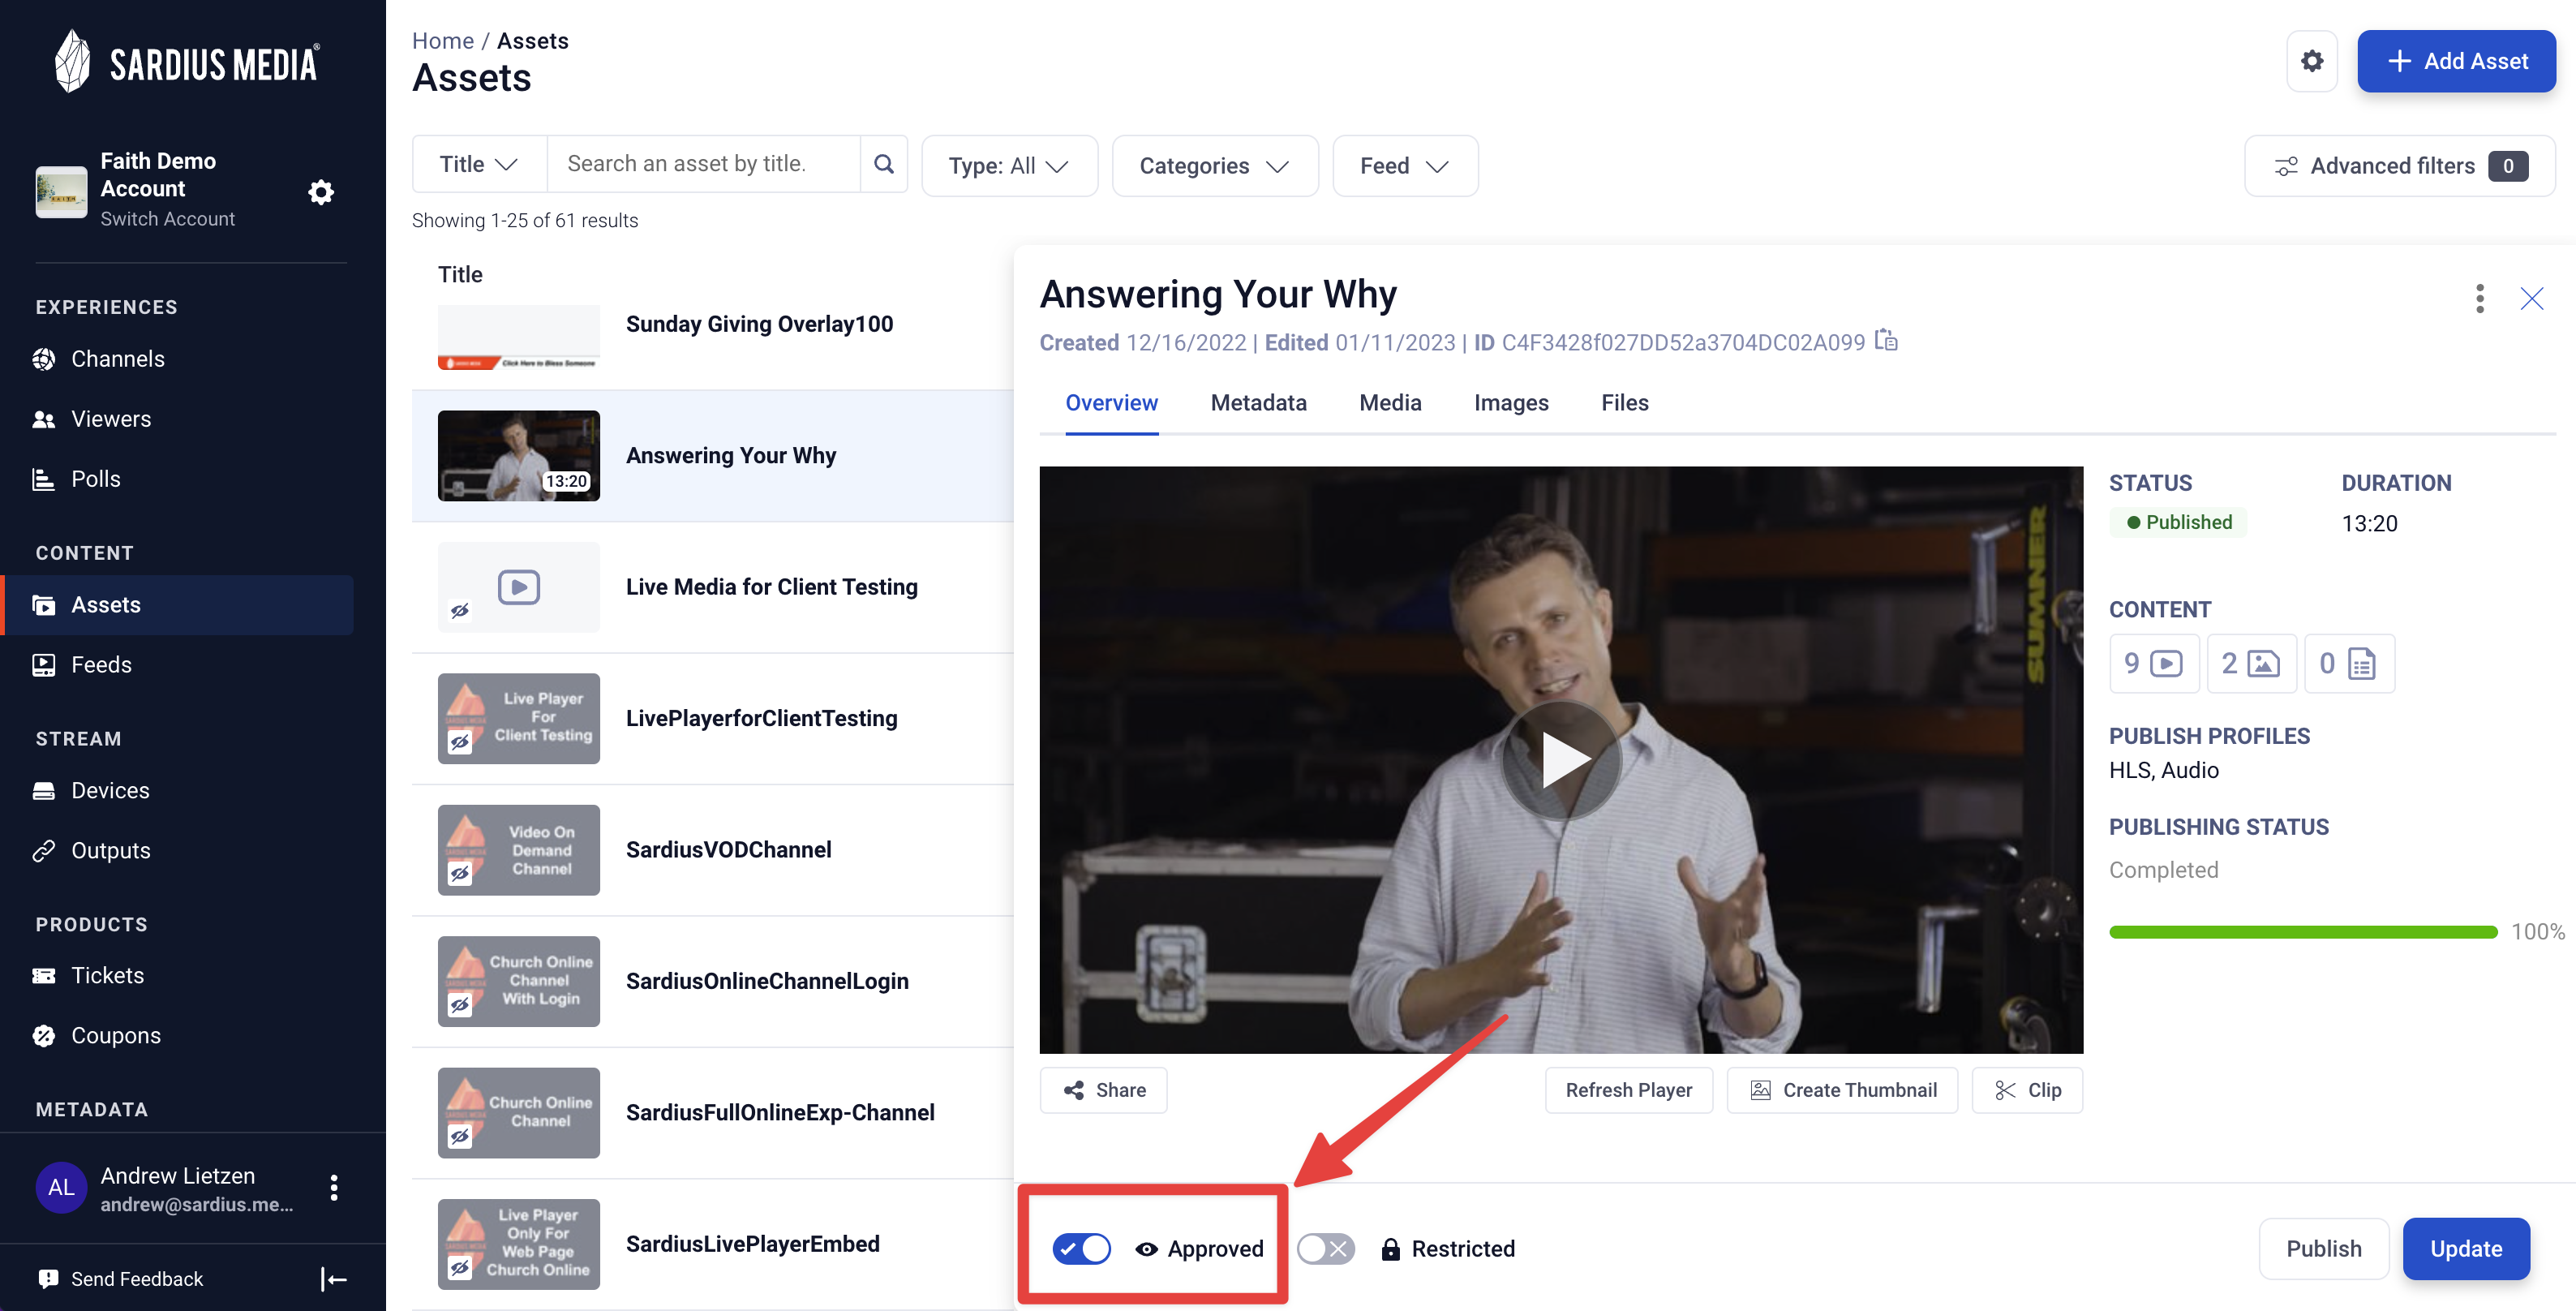
SimLive Assets must also be approved for playback. To do this,
1. Navigate to the "Asset" area of your Sardius Control Panel.
2. Select that Asset that you wish to use.
3. In the Asset's Overview tab, locate the toggle switch for “Approved” at the bottom left.
4. Click on the toggle to approve the asset.
5. Click “Update” to complete the process.
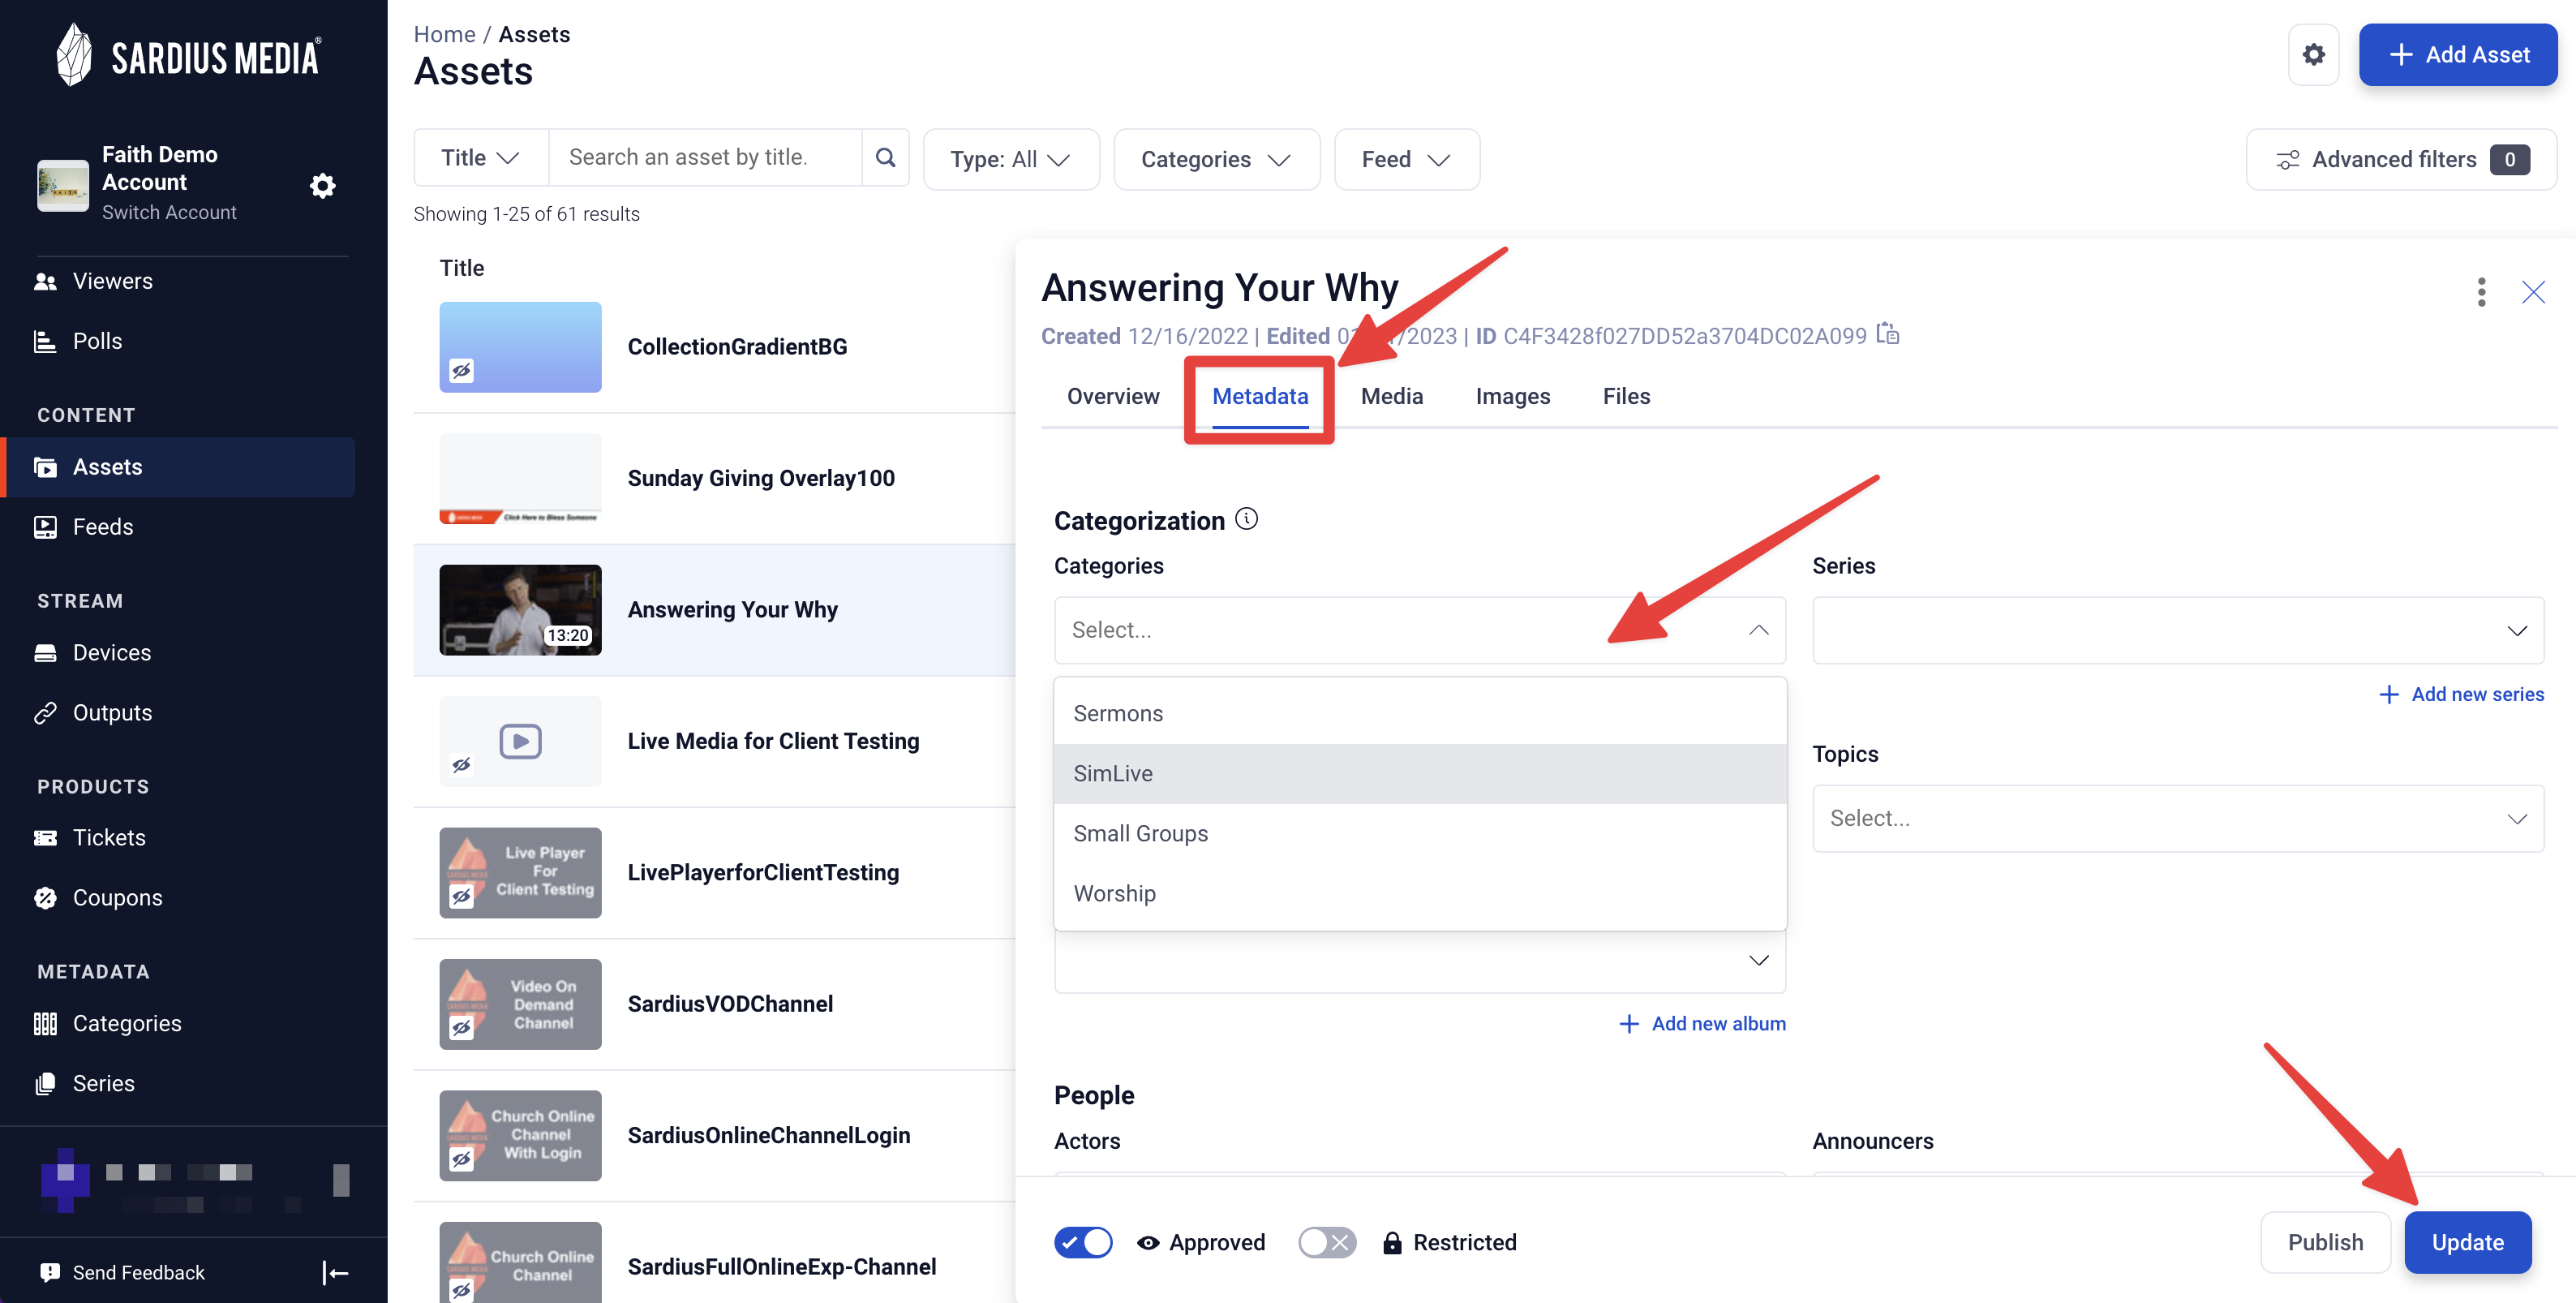
If recording a live service to restream later, you can add the Metadata and Auto-Approve the file from the Calendar event. You can learn how to do that here.
Set Up Your SimLive Event
To create a SimLive Event, you must create a new calendar event, given you have already set up your channel for streaming. If you have not yet created default stream settings for your account, start here, "Setup and Change Default Stream Settings"
And if you have not yet set up a calendar event before, please review the tutorial called “Adding a Calendar Event.”
Note: The following way is only used for clients streaming with the Sardius Stream protocol. For clients that have not enabled Default Stream Settings, please follow the walkthrough here
1. Locate the event you just created. Click on your event and click the Edit button. This will take you to the stream stepper overview that shows your default settings.


Note: If you are looking to use SimLive to stream to social media accounts, you will need to enable the “Advanced SimLive” feature on your account. This is not offered to everyone. To inquire about it, please reach out to your account manager. If you are already setup for Advanced SimLive, please click here to set that up.
Once you are satisfied, click “Save” in the top right corner.

Helpful Tip: If the duration of your Asset is shorter or longer than the scheduled SimLive event, the event’s duration will not be automatically adjusted to match the Asset’s actual duration. You will have to manually update this per each event.