Skip to content
  • There are no suggestions because the search field is empty.

Setup and Change Default Stream Settings

You can configure default stream settings for any channel in your account. This ability will help save you precious time when creating new events for your channel as these defaults will automatically be applied. Your default settings can be changed at any time, and they can also be overridden if an event needs a different source and/or outputs.


Note: While this setup is similar for those using Linked Assets or Sardius HLS Entrypoint, the majority of this article will follow setup for those using Sardius Stream. Alternate steps for Linked Assets or Entrypoint will be notated throughout. 


Creating Your Default Settings Enable Streaming for Your Channel
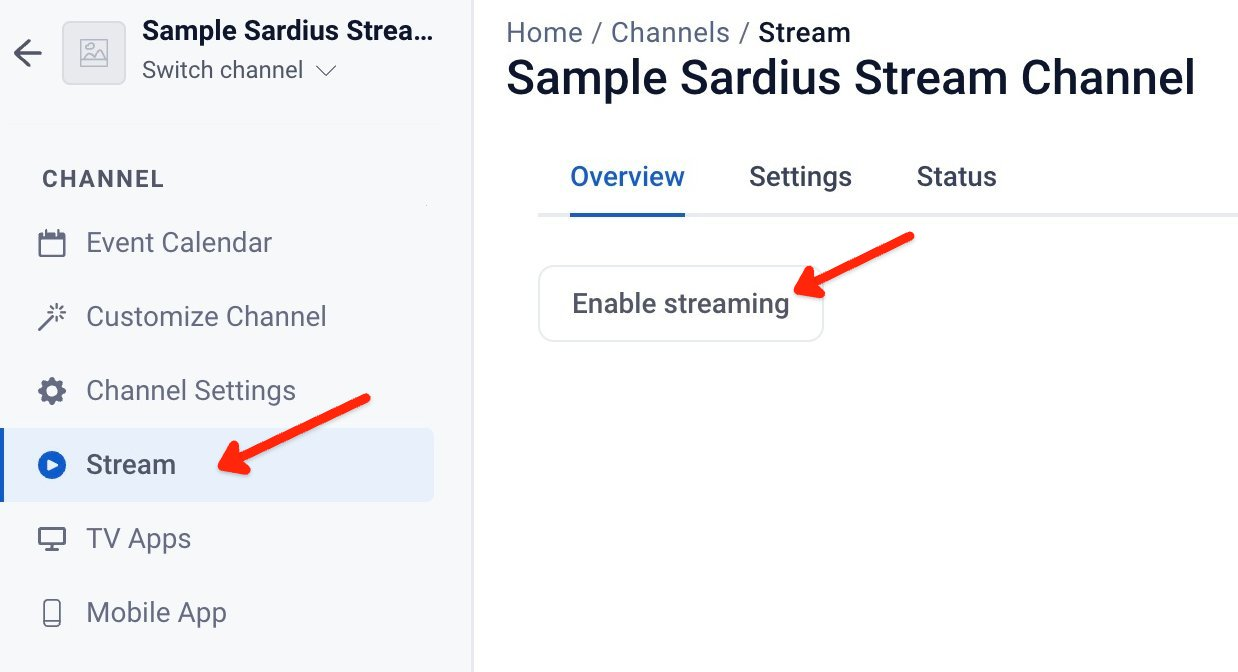
To create default streaming settings, you must first enable streaming on your Sardius channel. To do this, select the Channel you wish to enable streaming for and select “Stream” from the Channel Sidebar navigation.


Disclaimer: Creating and setting your stream channel defaults will be applied only to any newly created events. Previously created events will not be changed. Should you wish to change settings for previously created events, you will have to manually update those events.

Click the “Enable streaming” button. Your Sardius Channel will be updated in the background and prepare it to for streaming. Once it is ready, you will be prompted to define your default settings. Begin by clicking the “Set defaults” button. 


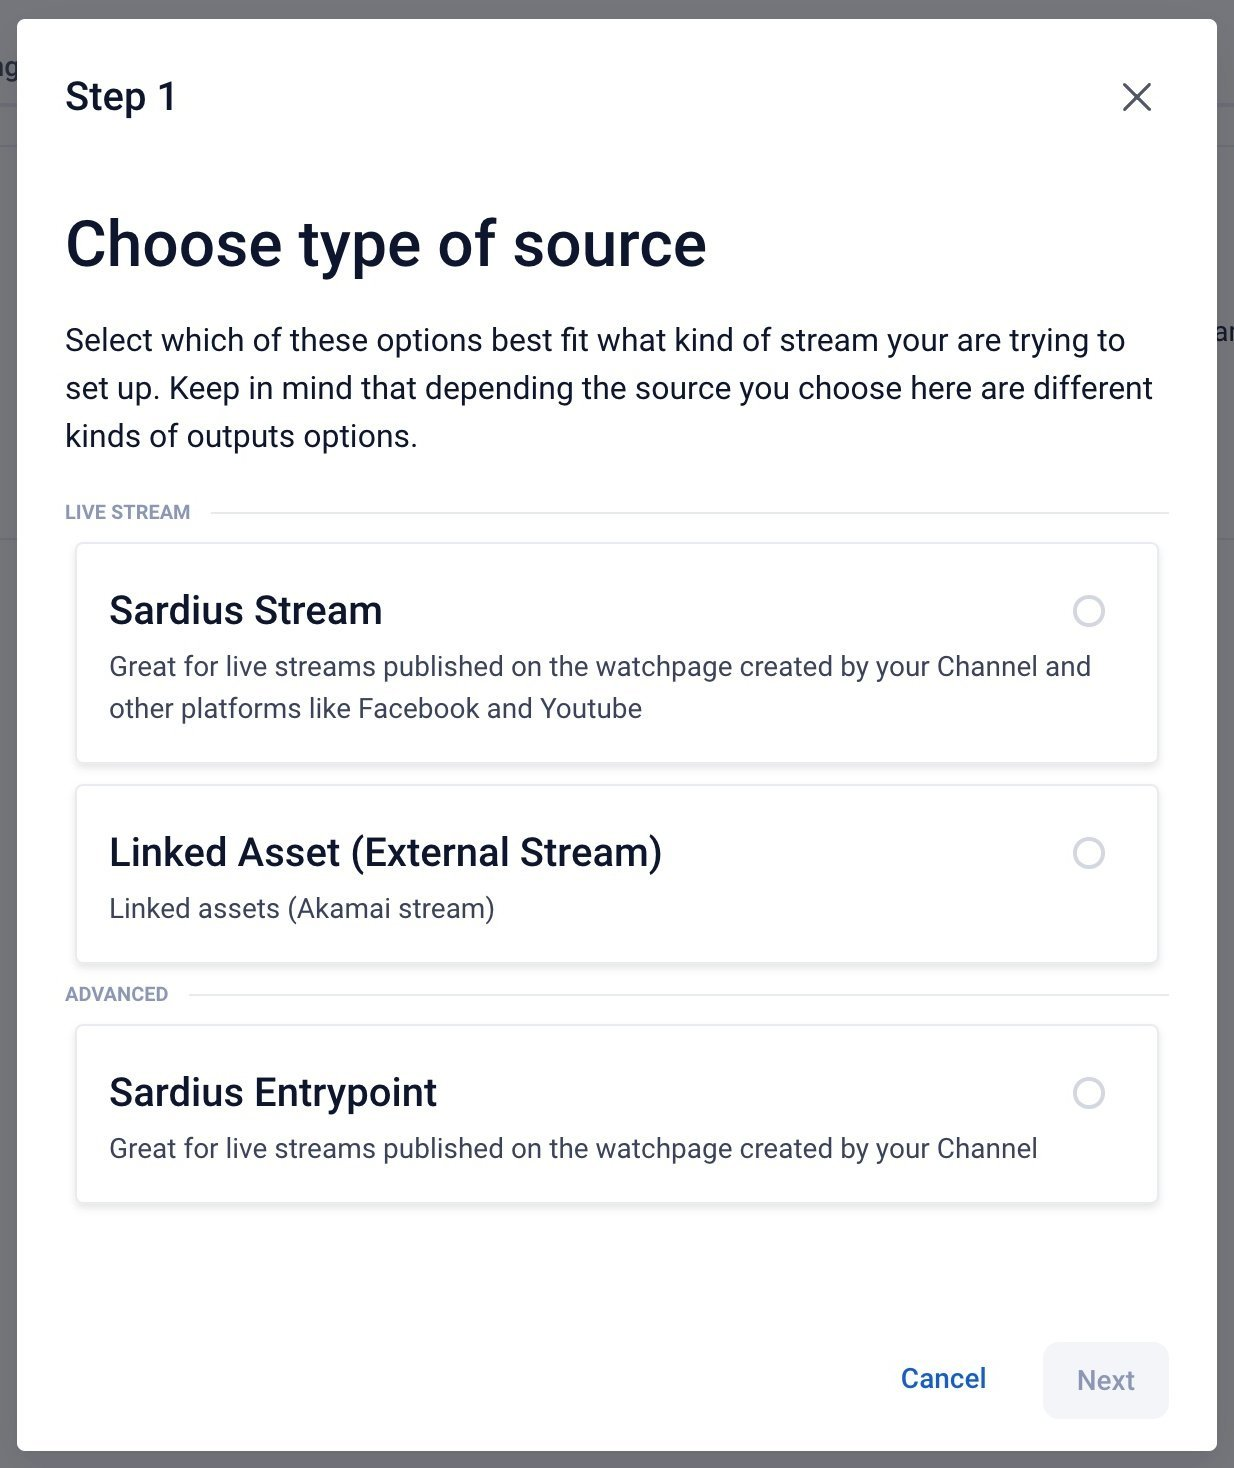
A modal will appear in the center of the screen. Step 1 of this setup will prompt you to select the source of the live stream. For this walkthrough, we are assuming that you will be using Sardius Stream. Click on it to continue.


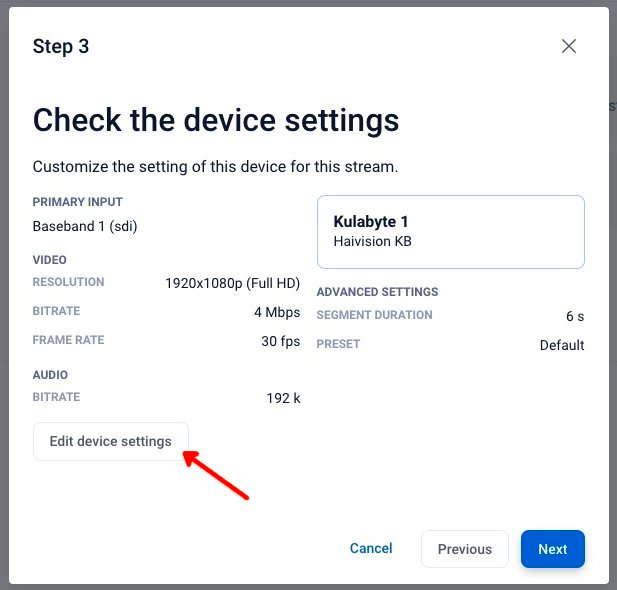
Setup for Linked Asset (External Stream): If you wish to set up your defaults using a Linked Asset, you will automatically be advanced to Step 3. Here, you can select a previously created Live Stream Asset that is pulling from a source such as Akamai or Resi.

Setup for Sardius Entrypoint: In Step 2, you have the option of selecting a previously paired device. If you select a paired device, you will advance to Step 3 where you can see that encoder’s default settings and will allow you to edit those settings.

If you select a Manual device, the modal will give you Stream URLs to insert into your encoder. 


Step 2 will prompt you to add a device which you will be using to receive your source stream from. Here, you can choose an existing paired device in your account (if you previously paired your encoder with Sardius Devices), or you can select Manual if you are using an unpaired encoder. 


Selecting a paired device will advance you to Step 3 where you can see that encoder’s default settings and will allow you to edit those settings.  Click here to review our recommended settings.
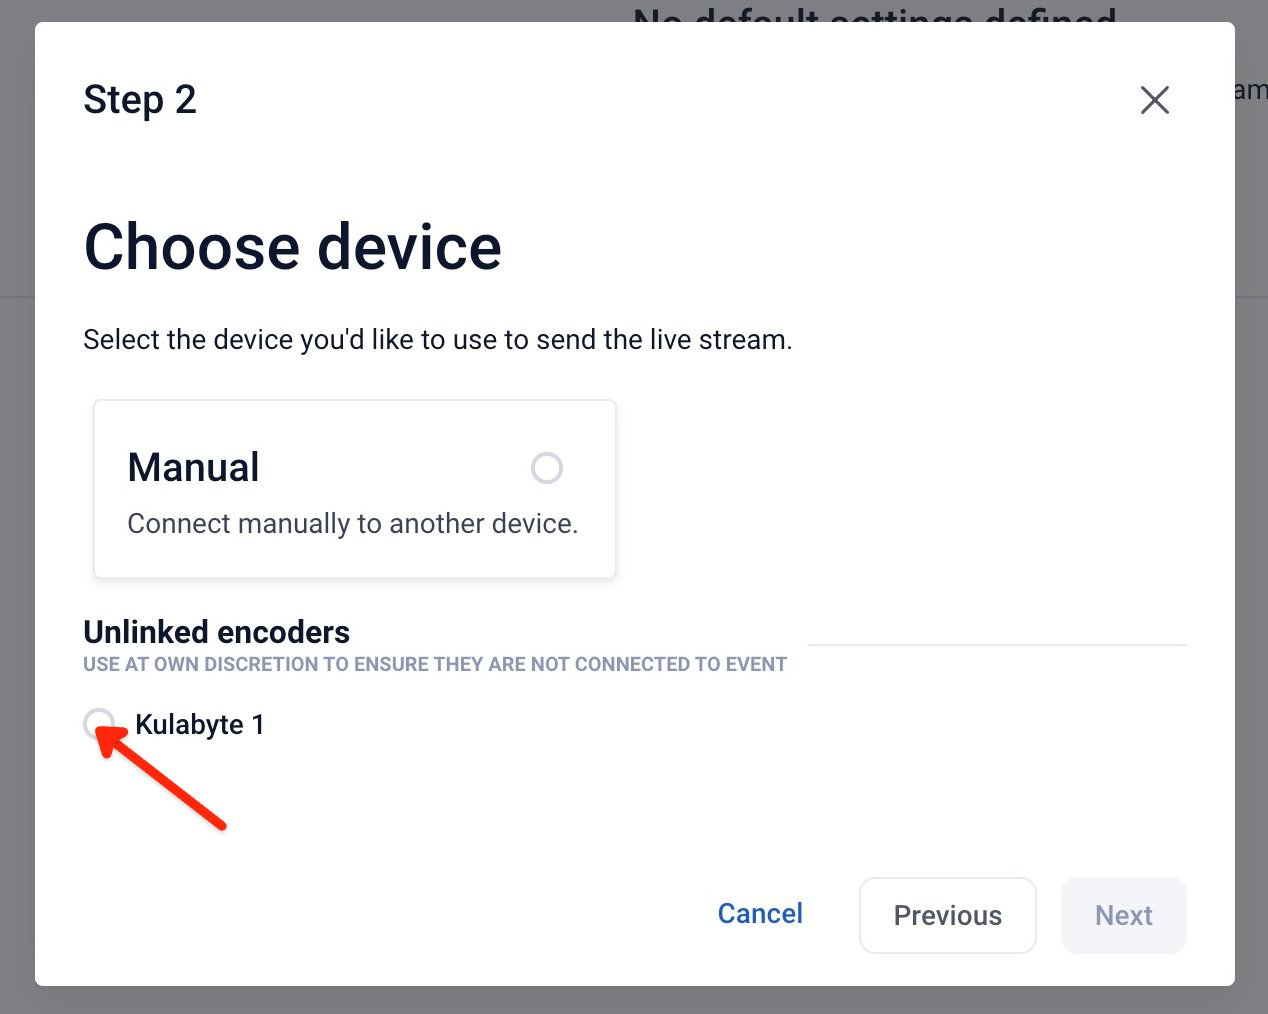
 

image.png


When checking your device’s settings, it is recommended that you take a close look at the following:
  • Frame rate: Be sure that this matches your camera and switcher settings
  • Bitrate: We recommend that the bitrate be set between 4 Mbps - 6 Mbps. 
  • Segment Duration: We recommend 4s - 6s. 


Note: If you will be streaming to social sites such as Facebook or YouTube, please check their recommended settings. If your device settings are greater than their recommendations, you could experience issues when streaming to those locations.
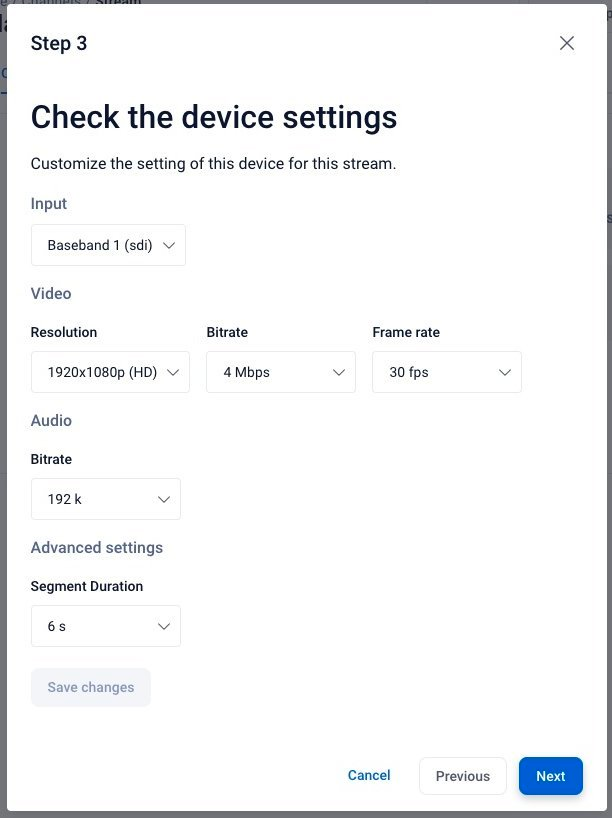
 

image.png


Manual setup: If you select manual setup, the modal will display both RTMP and SRT stream links and keys that you can manually plug into your unpaired device. 
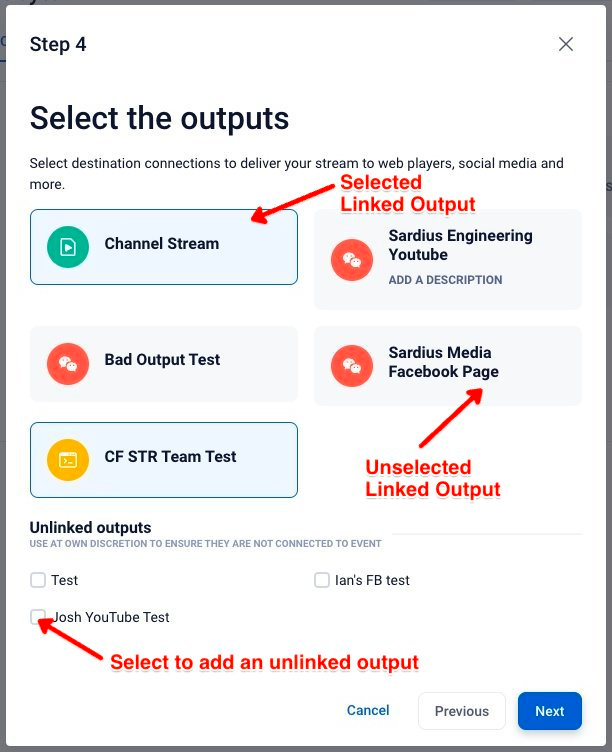
With your input device set up, Step 4 will prompt you to select your desired Output(s). By default, Channel Stream is selected. This is the Sardius Channel’s default asset that will play out on the channel’s website or any external site the Sardius player is embedded in. 
 
In addition, you can choose other preconfigured outputs you would like to publish your stream to, such as an RTMP output that is setup to point to YouTube, that you created previously in the Sardius Outputs page.


image.png


Note:  If there is an alternate output that you wish to stream to, but have not created an Output for, you will need to create that output using the Sardius Outputs page. Then you can return here to change your default settings.
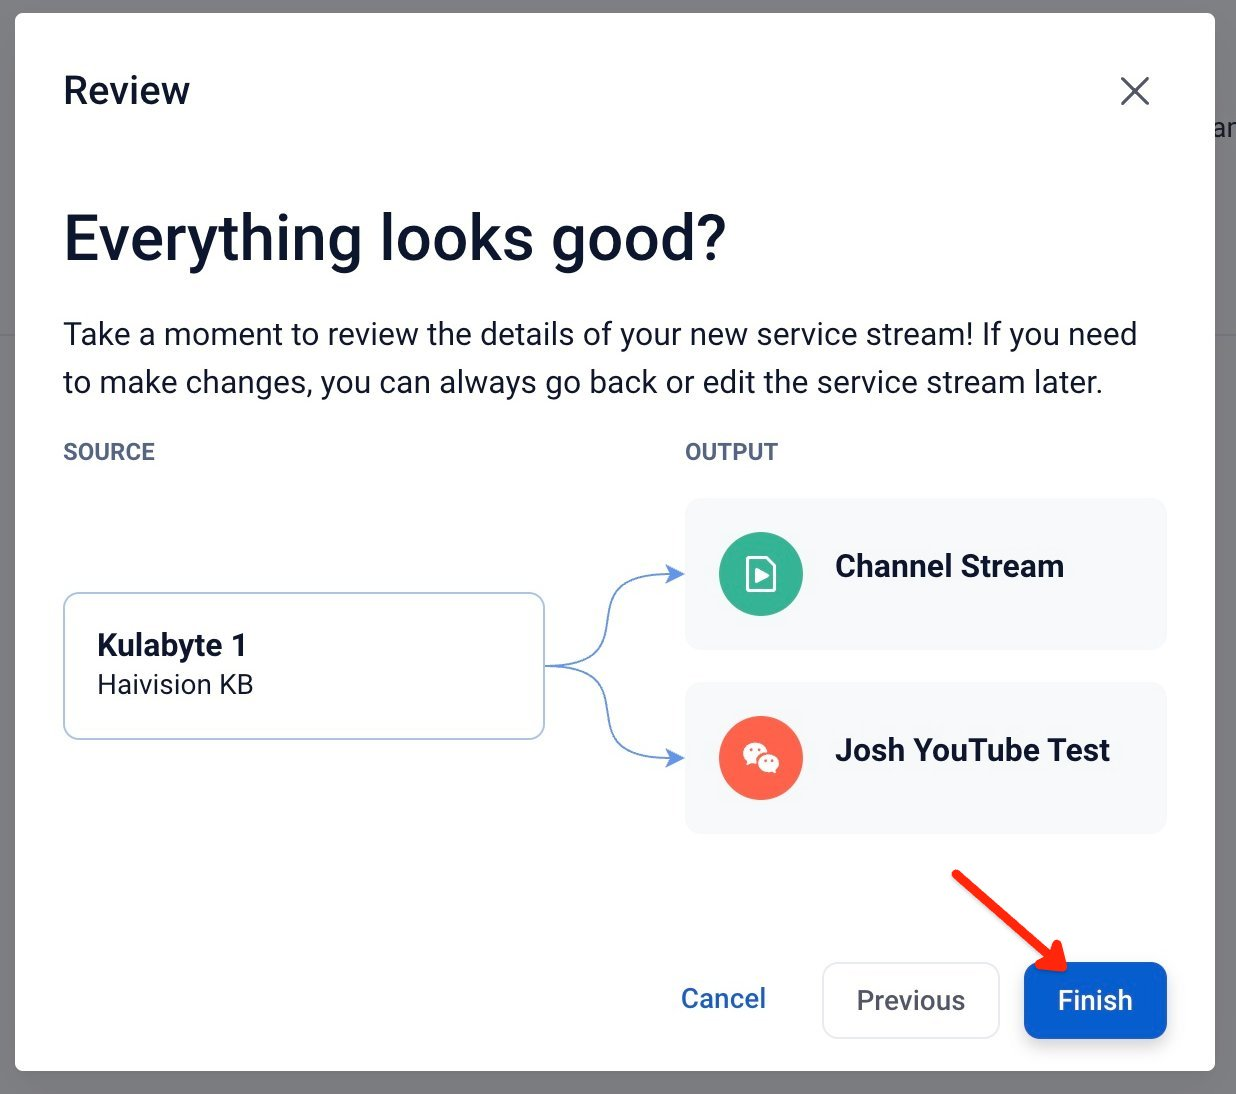
The modal’s final step will allow you to review your settings to make sure everything looks good. Make sure that you have the correct source selected as well as the correct output(s). If everything looks correct, click “Finish.”


That’s it! By following these steps, you have successfully set up your Channel’s default stream settings.


Changing Your Default Settings
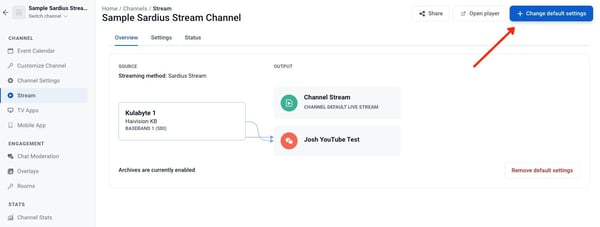
If you need to update or change your default stream settings, you can click on the “Change default settings” button in the upper right corner. You can adjust any of your settings by repeating Steps 1-4 in the modal that pops up. 


Note:  It is possible to override a Channel's default settings for a particular event. To view instructions on how to override, click here.


Removing Your Default Settings

If you ever need to remove your default settings, access the Stream Overview page in the Channel settings. Under your device, there will be a gray button that says “Remove default settings.”


The Control Panel will ask you if you wish to remove your default settings. If you do, click “Ok” to proceed. Your default settings will be removed immediately. 


Note: Updating or removing your default settings will not affect any previously created event that is still scheduled. If you need to adjust settings for those events, you will have to manually update each event.