
Build a Multi-Campus Report in Pulse360
Updated
See every campus at the same moment. A Report puts the services you care about on one picture so you can review, coach, and understand: what every campus did the same, what was different, what happened at a different time, and whether the spots you care about played.
Start a report
Click Report on the navigation bar. (You must be signed in: Sign In to Your Pulse360 Site.)
Choose the services to compare
Start by picking exactly which services you want to compare.
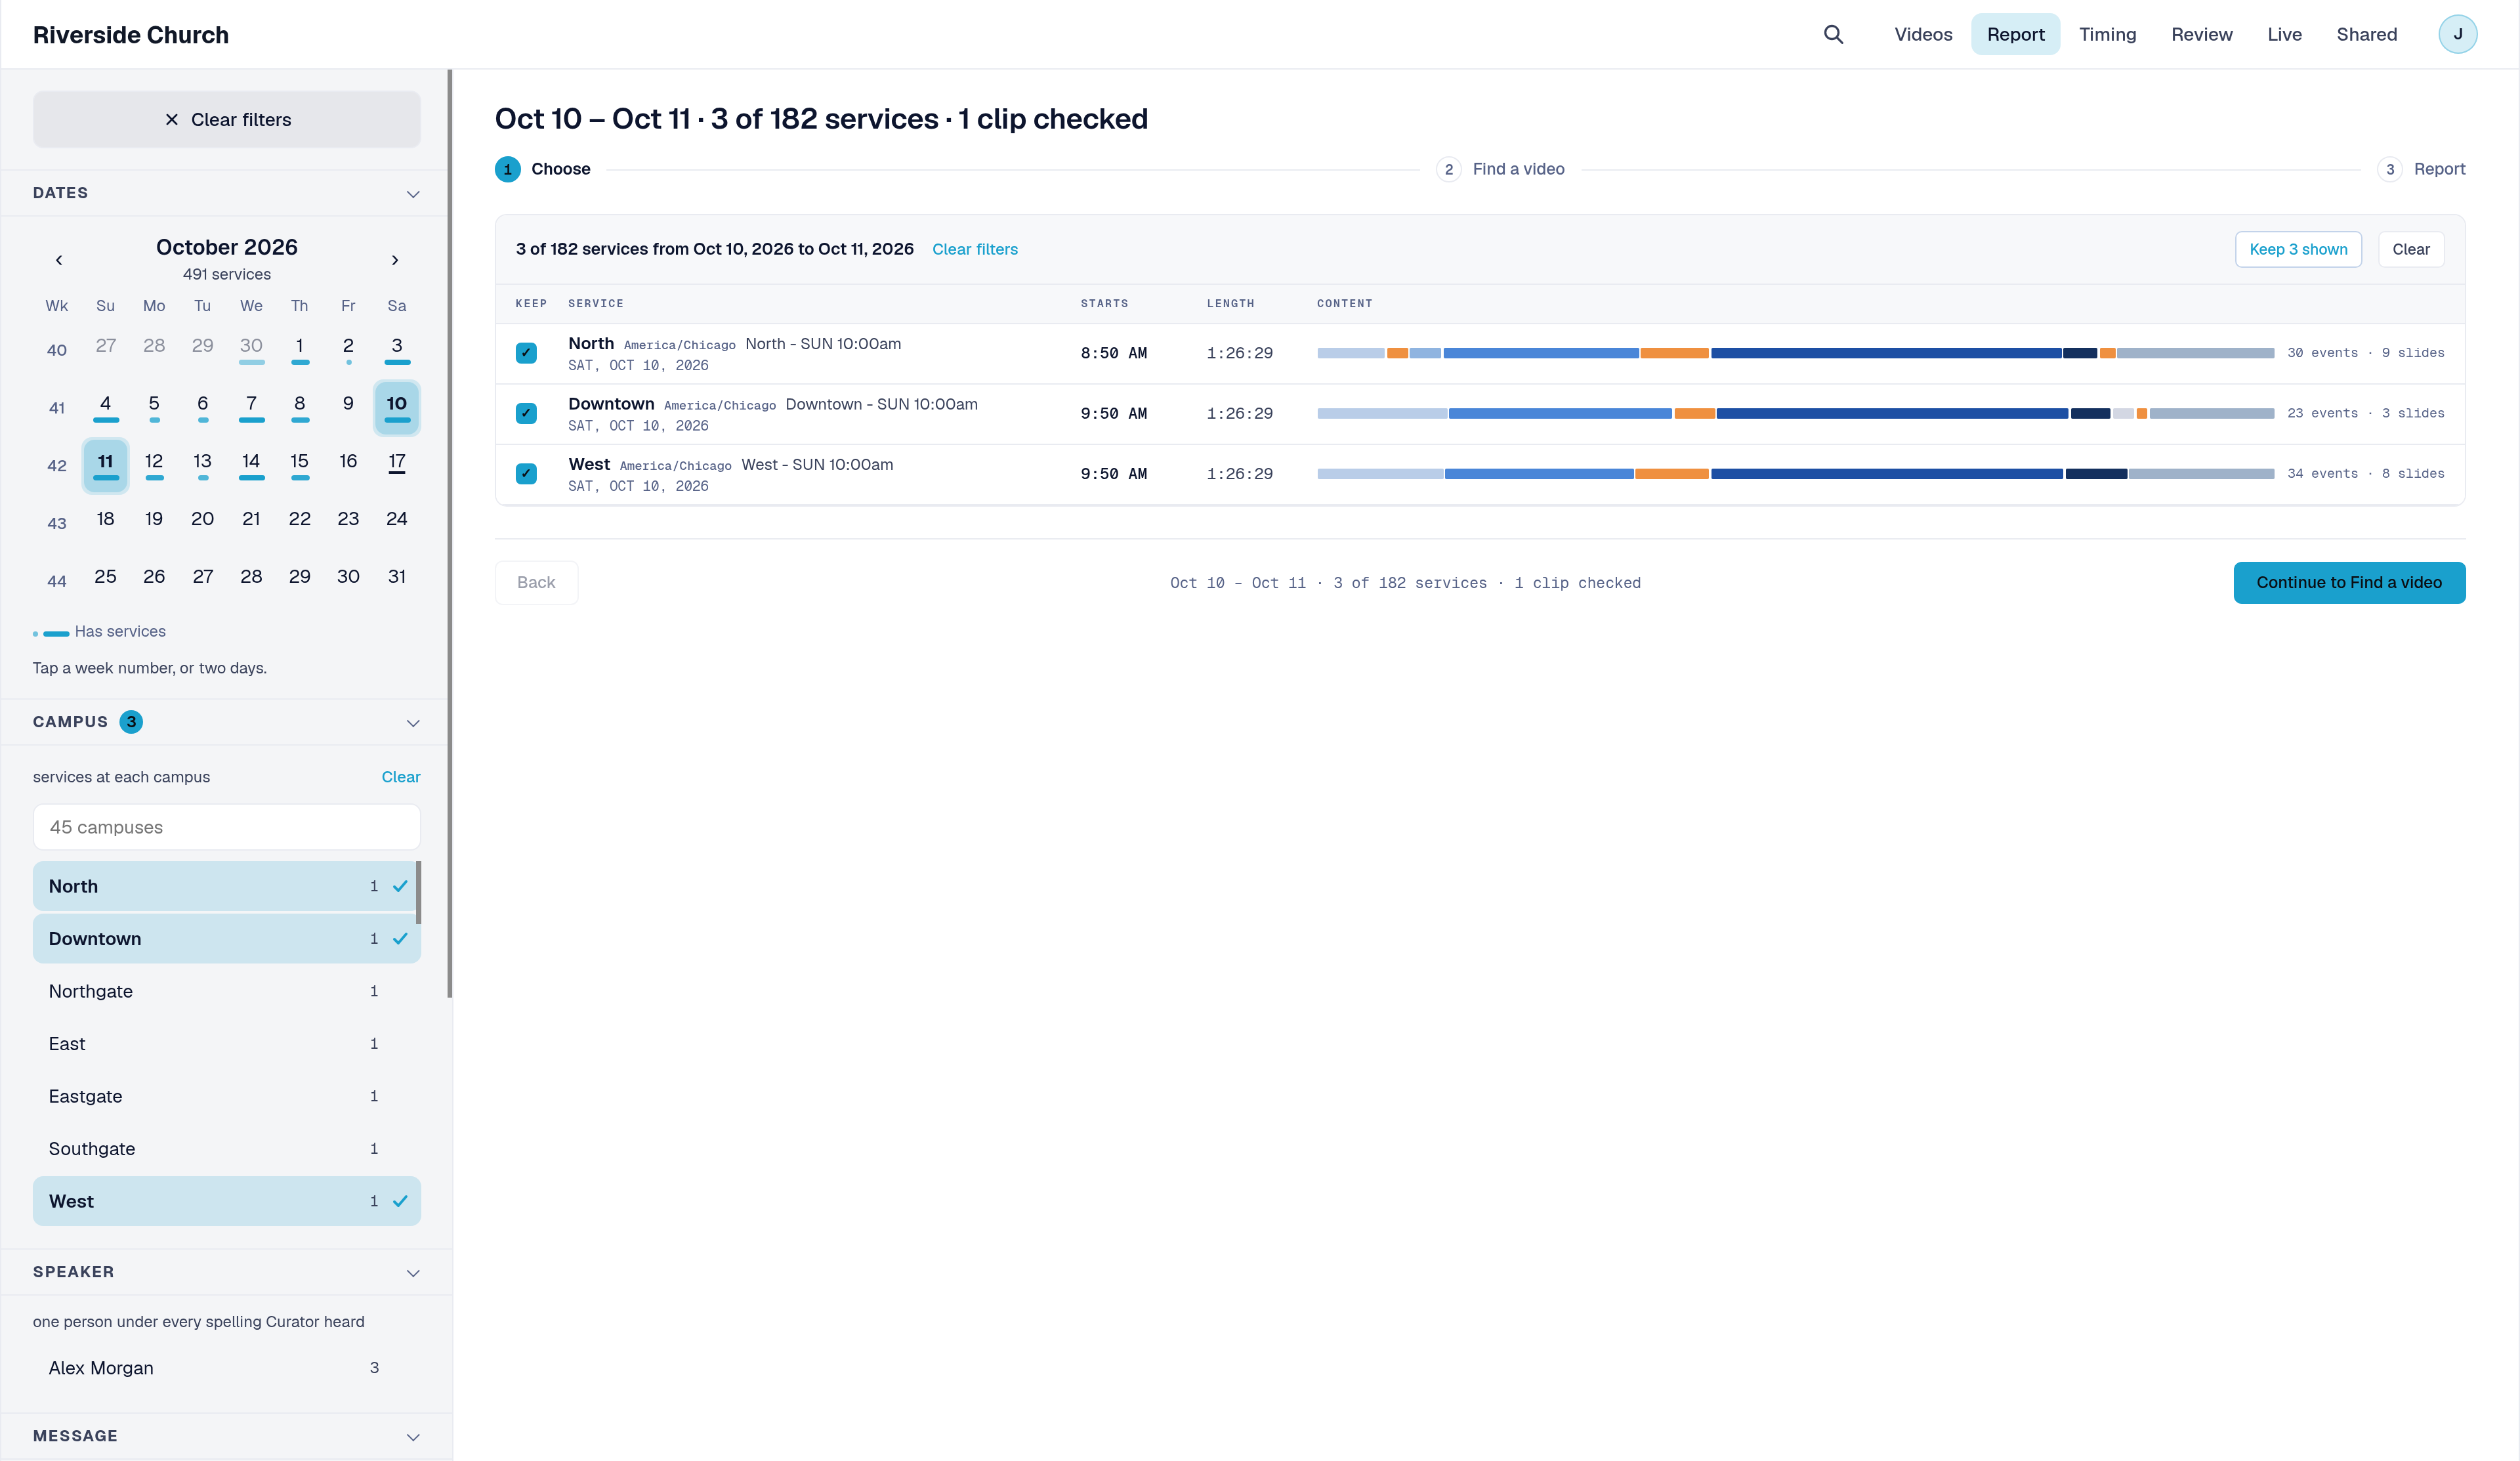
On the left side of the page, the Filters panel narrows which services appear in the list. On a phone, tap Filters to open the same panel.
By default, no Campus, Speaker, Message, or Service time filters are chosen, so you see every service in the dates you pick. Choose one or more options in any group. A service stays in the list only when it matches your choices in every group that has a selection.
| Filter | What it does | When you'd use it |
|---|---|---|
| Dates | Calendar for a day, a week number, or a range between two days | Start here so the list shows the weekend (or day) you care about |
| Campus | Narrows to services at the campuses you choose | Compare just a few campuses side by side |
| Speaker | Narrows to services with the speaker you choose | Focus on one speaker's services across campuses |
| Message | Narrows by message series (however each service labeled it) | Line up the same series weekend across the network |
| Service time | Narrows by the time slot in the service title (for example SUN 8:30am) | Compare only the 9am, or only the evening, across campuses |
Above those groups, Clear filters appears when something is chosen. It clears Campus, Speaker, Message, and Service time so you can start the narrowing over (your dates stay).
On the right, the service list is what the report will include:
- Pick your dates in Dates on the left.
- Optionally narrow with Campus, Speaker, Message, or Service time.
- In the list, use the KEEP column on each row, or Keep all / Keep N shown (when filters are on) and Clear, so only the services that matter stay selected. When you change filters, Pulse360 keeps only the services that still match.
- Click Continue to Find a video.
Example: You want Sunday morning at Riverside North and Downtown only. Under Campus, choose North and Downtown. Under Service time, choose the Sunday morning slot. Click Keep all (or Keep N shown), then Continue to Find a video.
Find a video to check (optional)
Confirm the spots that matter actually played, without asking every campus to self-report.
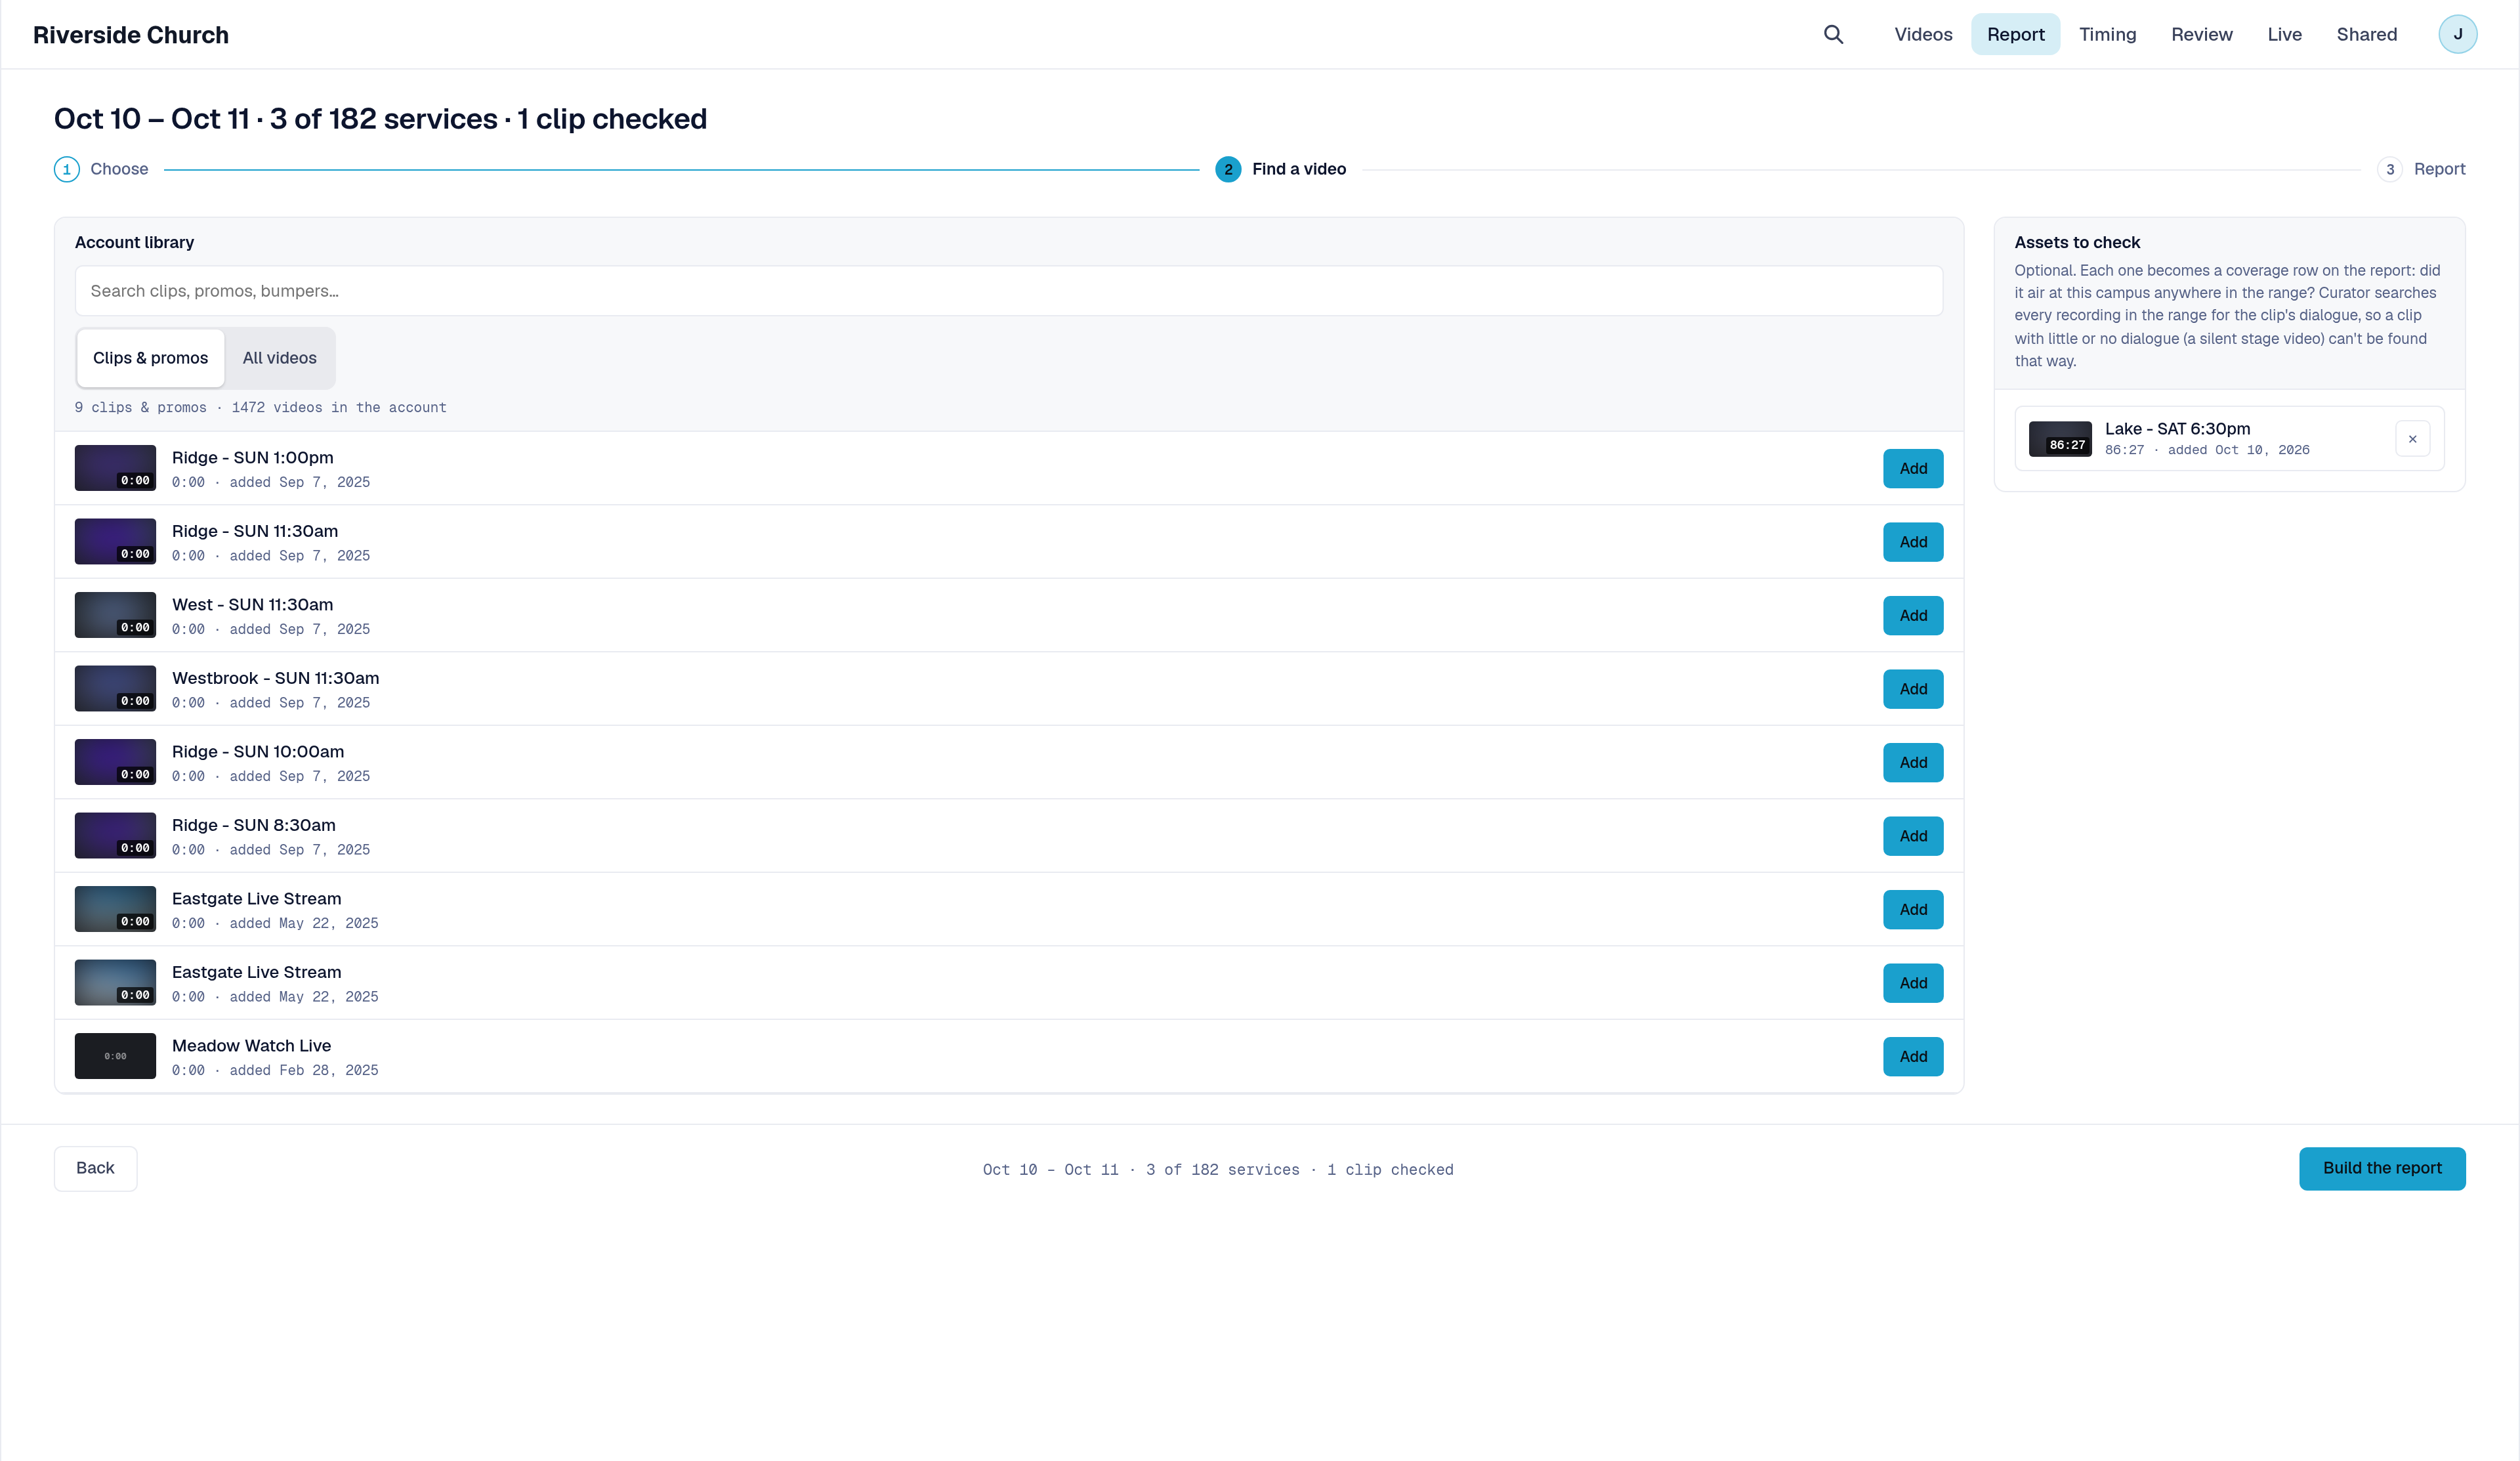
On Find a video, you can pick clips from your account library (a promo, bumper, announcement video, or sermon series open). Each one you add becomes a coverage check on the report: did that clip air at this campus in the range? That is how you catch a campus that skipped it, swapped it, or never ran it, while everyone else did.
- Search the Account library for the clip you want. Switch between Clips & promos and All videos to see a wider set.
- Click Add on each video you want to check. It moves to Assets to check. To remove one, click Added.
- Click Build the report. Use Back if you need to change which services you kept. You can leave Assets to check empty if you only want the service comparison (the report still works and just skips the coverage column).
Open the report
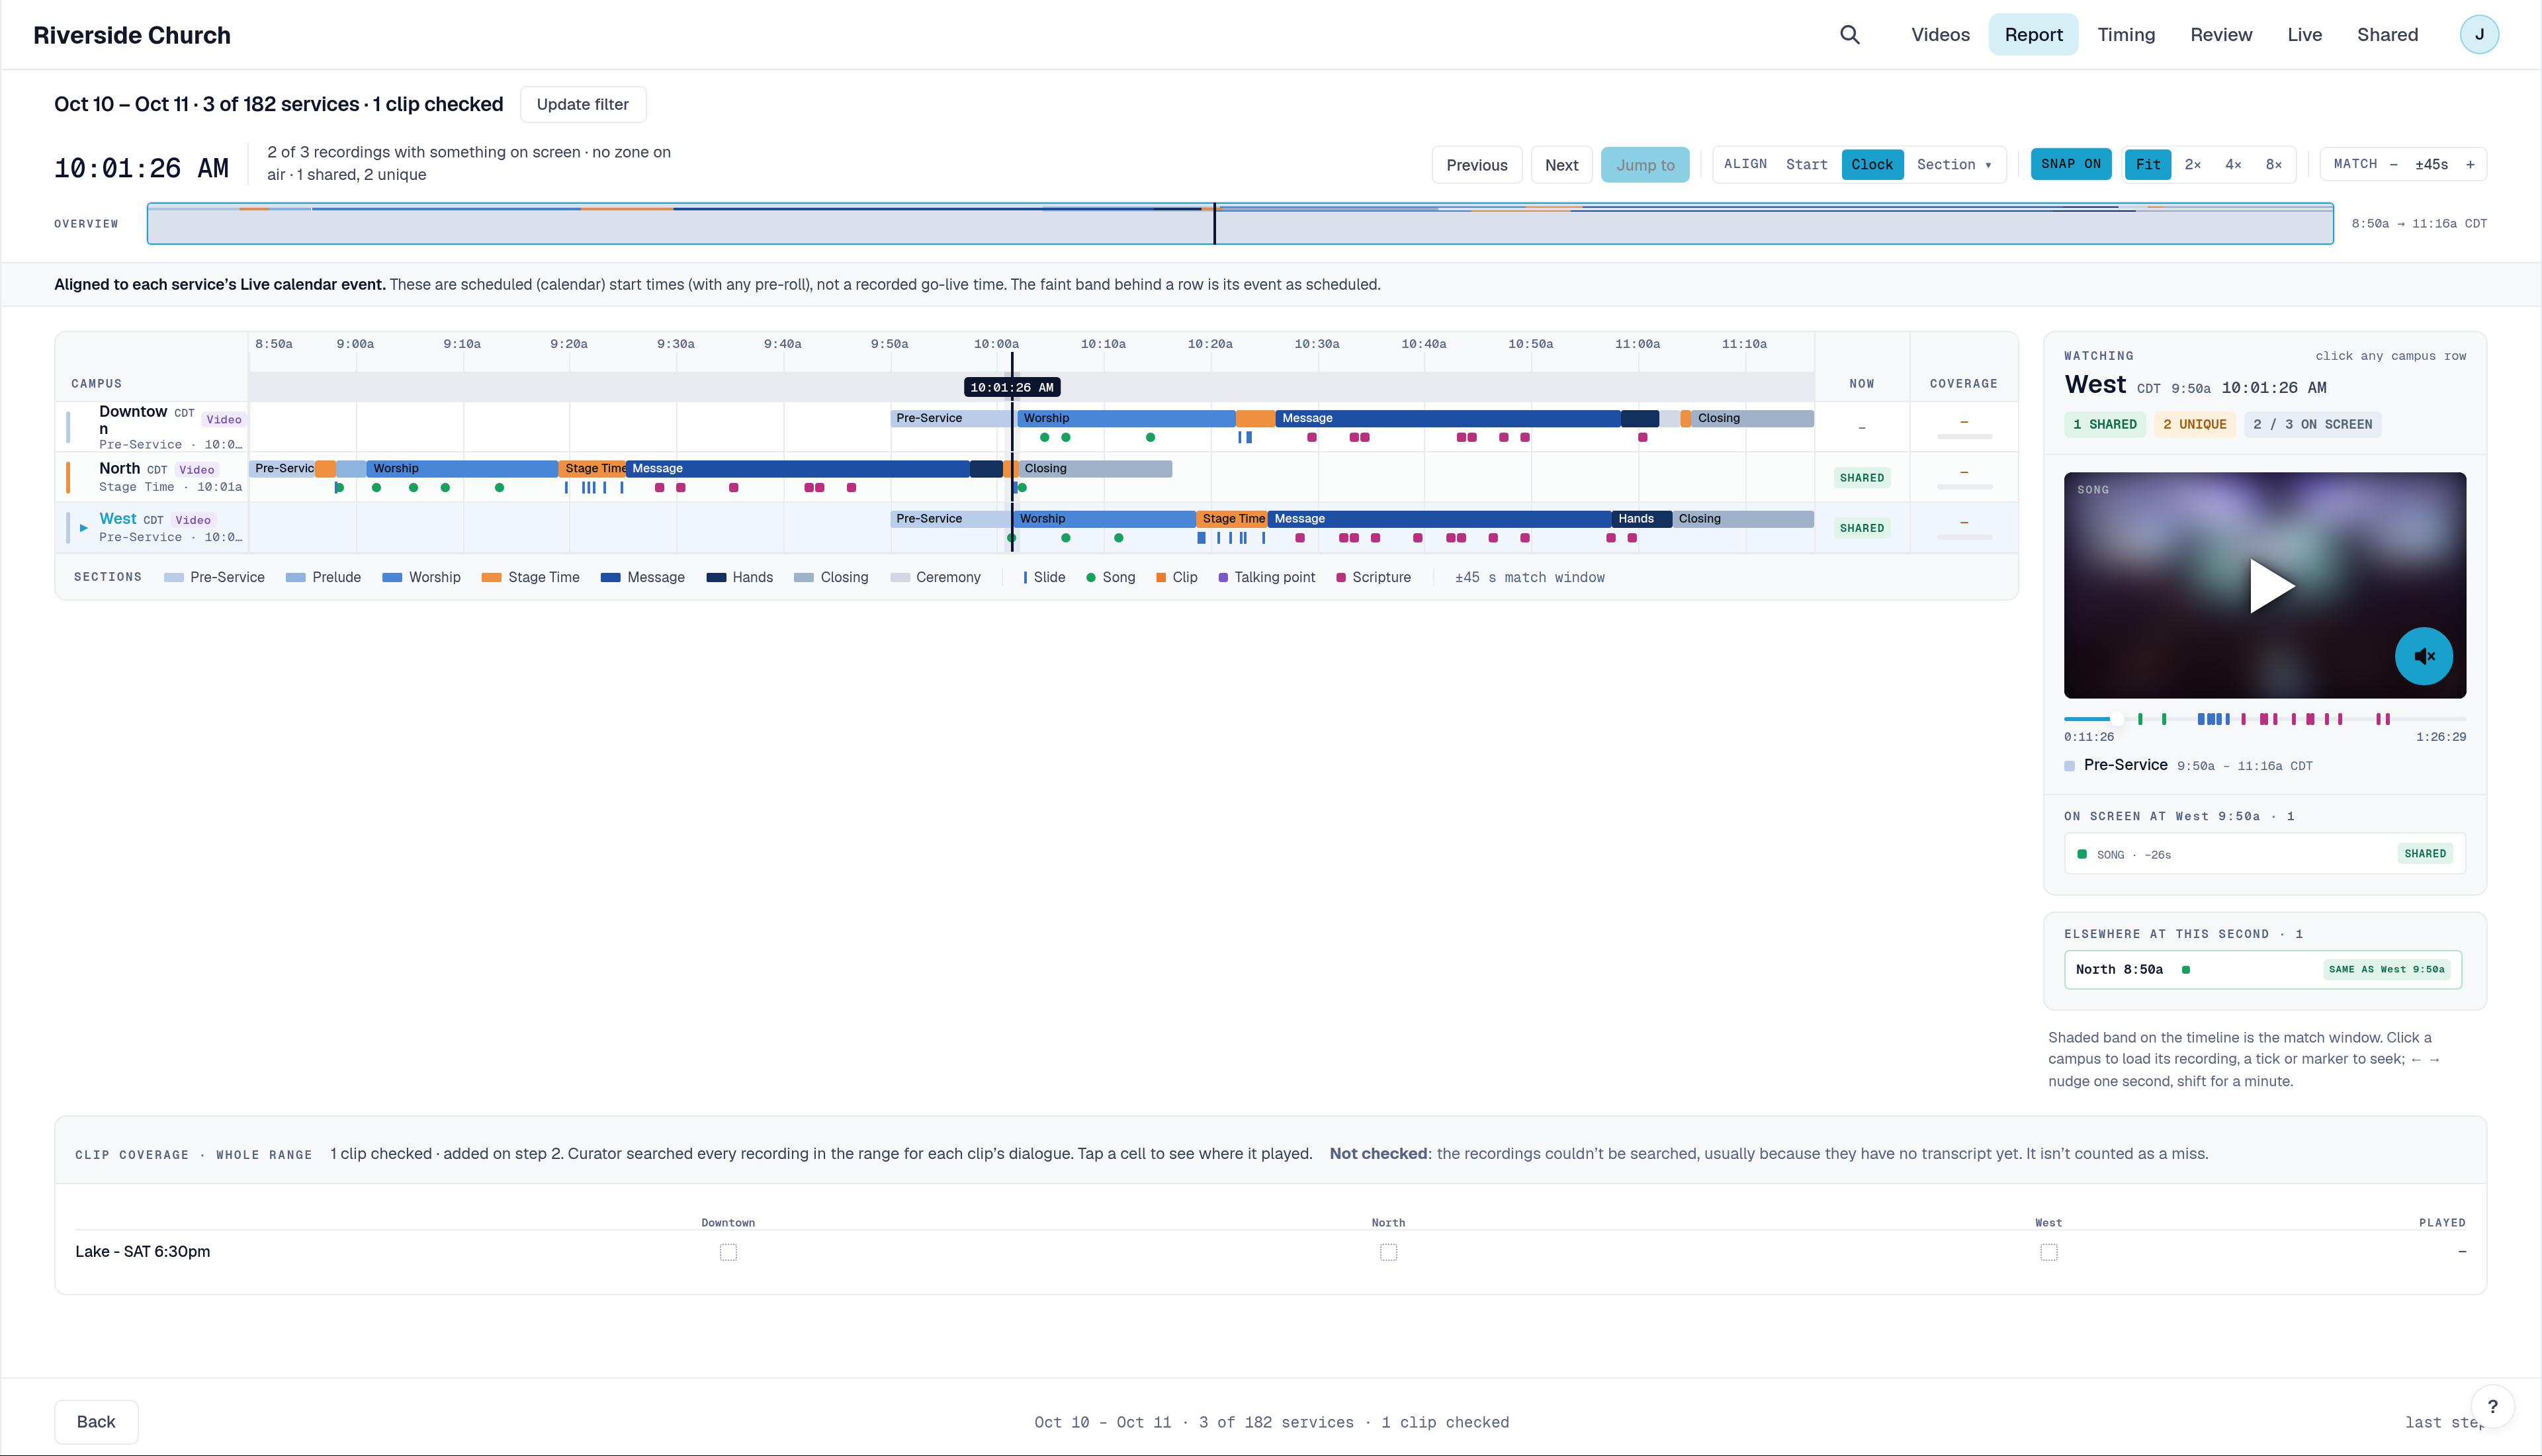
After Build the report, Pulse360 opens the report view: playhead, campus timeline, WATCHING panel, and optional CLIP COVERAGE.
- Use Update filter if you need to change the day, campuses, or services.
- For how to read every panel, chip, Align mode, Match window, and coverage result, see Read Your Multi-Campus Report in Pulse360.
Congratulations! You have a multi-campus picture you can coach from, without opening every recording alone.
Related articles
- Read Your Multi-Campus Report in Pulse360
- Pulse360 Overview
- Sign In to Your Pulse360 Site
- Compare Service Timing Across Campuses
- Browse Campus Videos in Pulse360
Questions about any of these features? Reach out to your Sardius Account Manager, or you can request a demo by clicking here.