
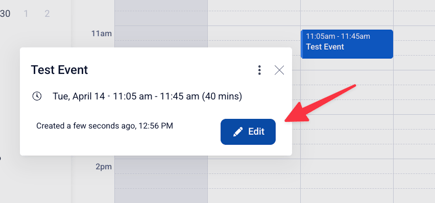
On an event, clicking Edit gives you access to the full set of event configuration options.
Event settings are organized across the following tabs: Event Details, Customization, Archive Settings, Stream, and Live Subtitles. Below we will walk through each of these setting
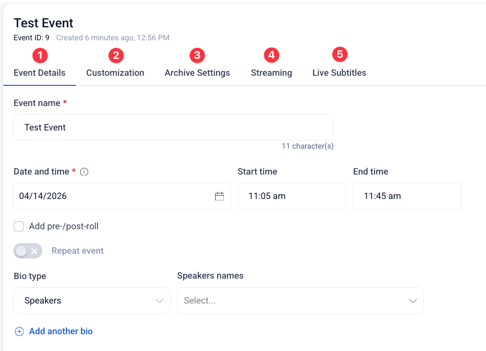
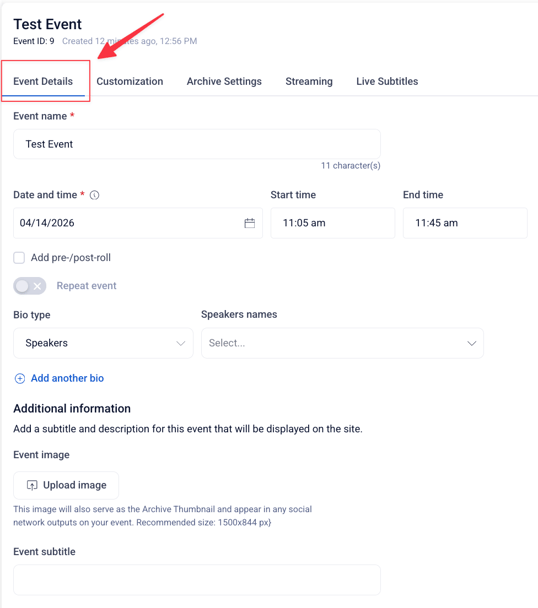
TAB 1: Updating Your Event Details
Event Pre-Roll and Post-Roll
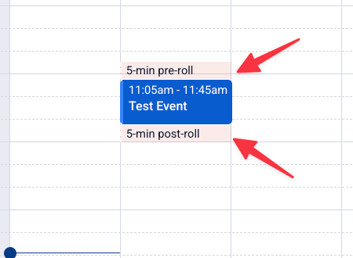
Pre-roll is a buffer of time added before your scheduled event start time — think of it like doors opening early before a concert.
Post-roll similarly keeps viewers engaged after the official end of the event, allowing chat conversations to wrap up and accommodating viewers who may be behind on the stream due to connection speeds.
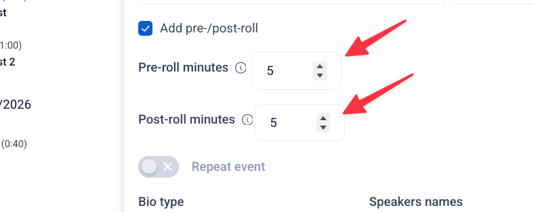
Use the arrows to adjust the amount of time — in minutes — for pre-roll and post-roll. Or you can also enter in a number of your choosing.
When added, you'll see the extra time reflected on the calendar surrounding your event.
Note: Once your event has gone past its end time and entered post roll, the event has officially ended and no additional edits can be made to the event.
For full documentation on Pre-roll and Post-roll see:
Bio Type
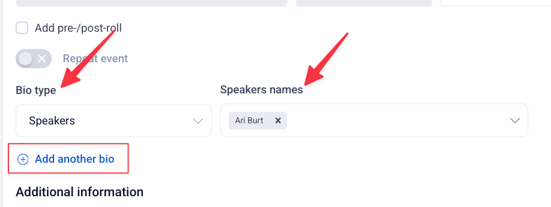
Helpful Tip: Bios must be created in the Bios section under Metadata before they can be selected here. Click here for a walkthrough on BIos
Additional Information:
-
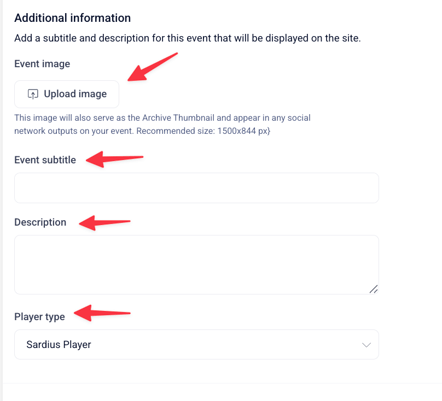
Event Image — Click Upload Image to add an event image
-
This shows up in three places:
- On the site/watch page as the event image
- As the archive thumbnail after the event ends
- On social media outputs tied to that event (Facebook, YouTube, etc.)
-
-
Event Subtitle — A short tagline or secondary title for the event (think one line, like "Special Guest: John Smith")
-
Event Description — A longer block of text describing the event in more detail, displayed on the event page
-
Player Type - You can override the channel's default player for this specific event.
Scroll to the bottom of the Event Details tab and select your preferred player from the Player Type dropdown.
TAB 2: Customization
The Customization tab allows you to assign a video asset to your event and configure how it's delivered to viewers. From here you can select or replace the asset, toggle between basic and advanced asset settings, and export or import your event configuration.
The Viewer Segment field at the top indicates which audience experience is applied to this event.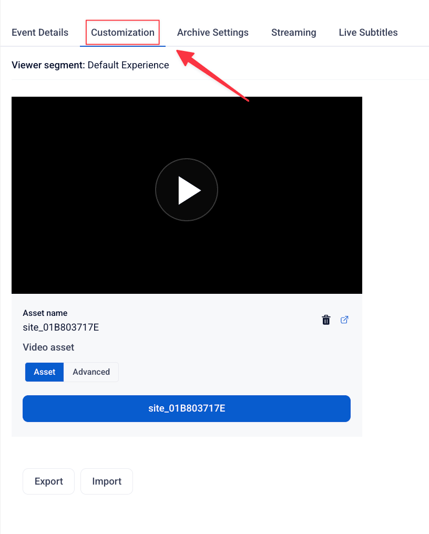
Other settings available in this tab vary depending on your channel layout and account configuration. Contact Sardius Support if you have questions about which options are available for your account.
TAB 3: Archive Settings
The Archive Settings tab controls how your live event is saved and organized after it ends. Settings here apply to this event only and will override any channel-level archive defaults.
Helpful Tip: Your channel's Archive Settings tab contains default values that pre-fill many of these fields automatically.
See Creating a Channel's Autoarchive Settings to set those defaults.
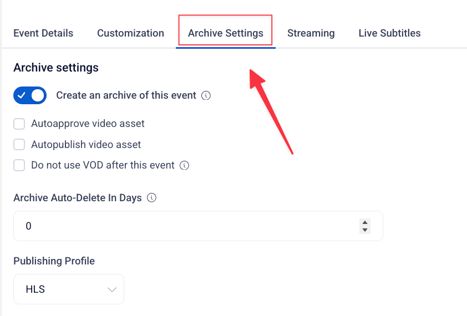
For full documentation on each setting in this tab, see:
- Create an Asset Using Autoarchive — how archive settings work at the event level
TAB 4: Streaming
The Streaming tab displays your event's current streaming configuration as a visual flow — from your source device, through your chosen streaming method, to your outputs. It shows you exactly how your stream is routed for this specific event.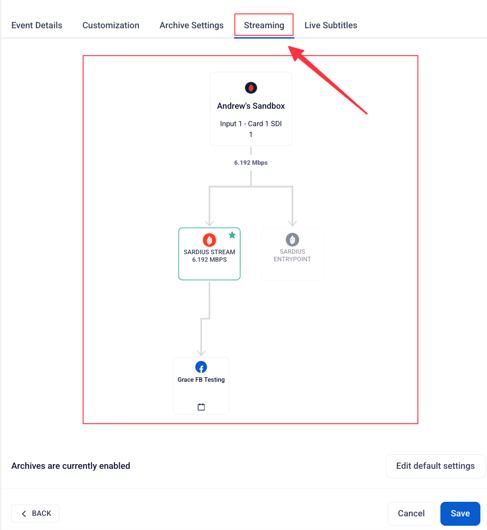
At the bottom left you'll also see your current archive status and a shortcut on the right to edit your channel's default archive settings.
By default, a new event inherits the streaming configuration set as your channel's defaults.
Most events won't require any changes here.
Note: Changes made here apply to this event only and will not affect your channel's default settings.
For full documentation on each setting in this tab, see:
- Set and Change Default Stream Settings
- This article will walk you through channel defaults AND event level stream settings
- This article will walk you through channel defaults AND event level stream settings
TAB 5: Live Subtitles
The Live Subtitles tab allows you to enable and configure subtitles and translations for your event

For full documentation on subtitles see:
Once you've configured your settings across all tabs and are satisfied,
click Save to apply your changes and your event will be ready to go!