
Stream Deck Companion Module
Updated
Control Sardius Live events directly from a Stream Deck — create broadcasts, extend event time, end streams, and switch channels without ever touching your computer.
What You'll Need
Before getting started, make sure you have:
- A Stream Deck device (any model)
- Bitfocus Companion — free software that bridges your Stream Deck and Sardius. Download and install it first.
- Your Sardius API Key — found in your Sardius account settings
- Your Sardius Account ID — found in your Sardius account settings
Part 1 — Getting Your Sardius Credentials
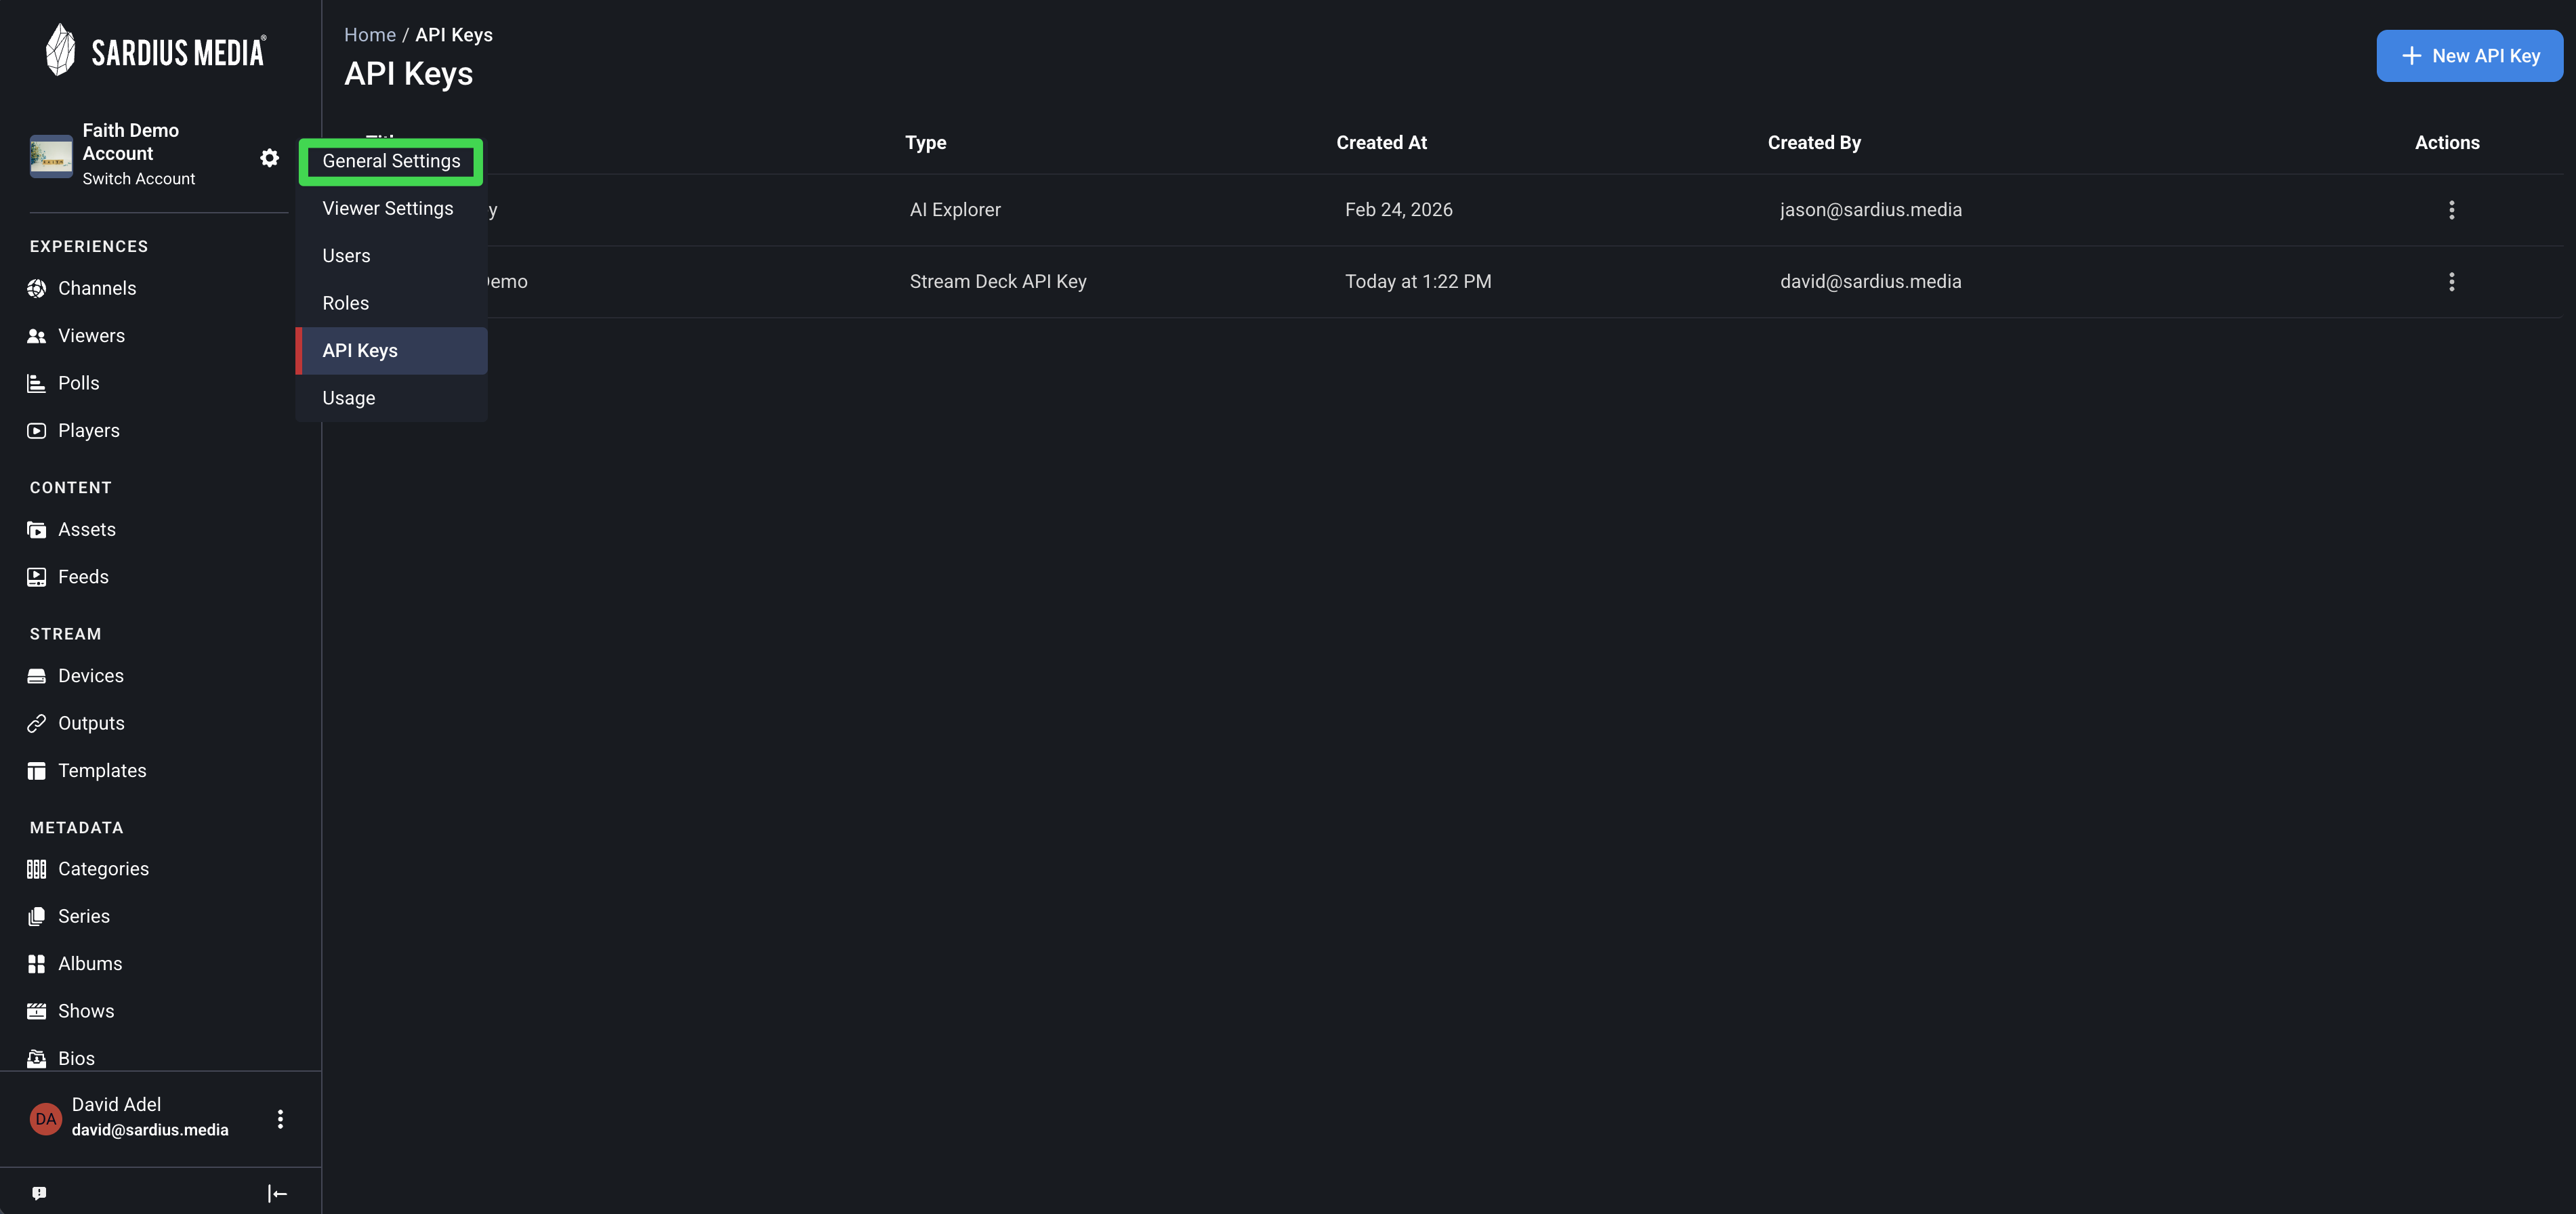
Before installing anything, you'll need two pieces of information from your Sardius account: an API Key and your Account ID. These are what the Stream Deck module uses to connect to your channels.
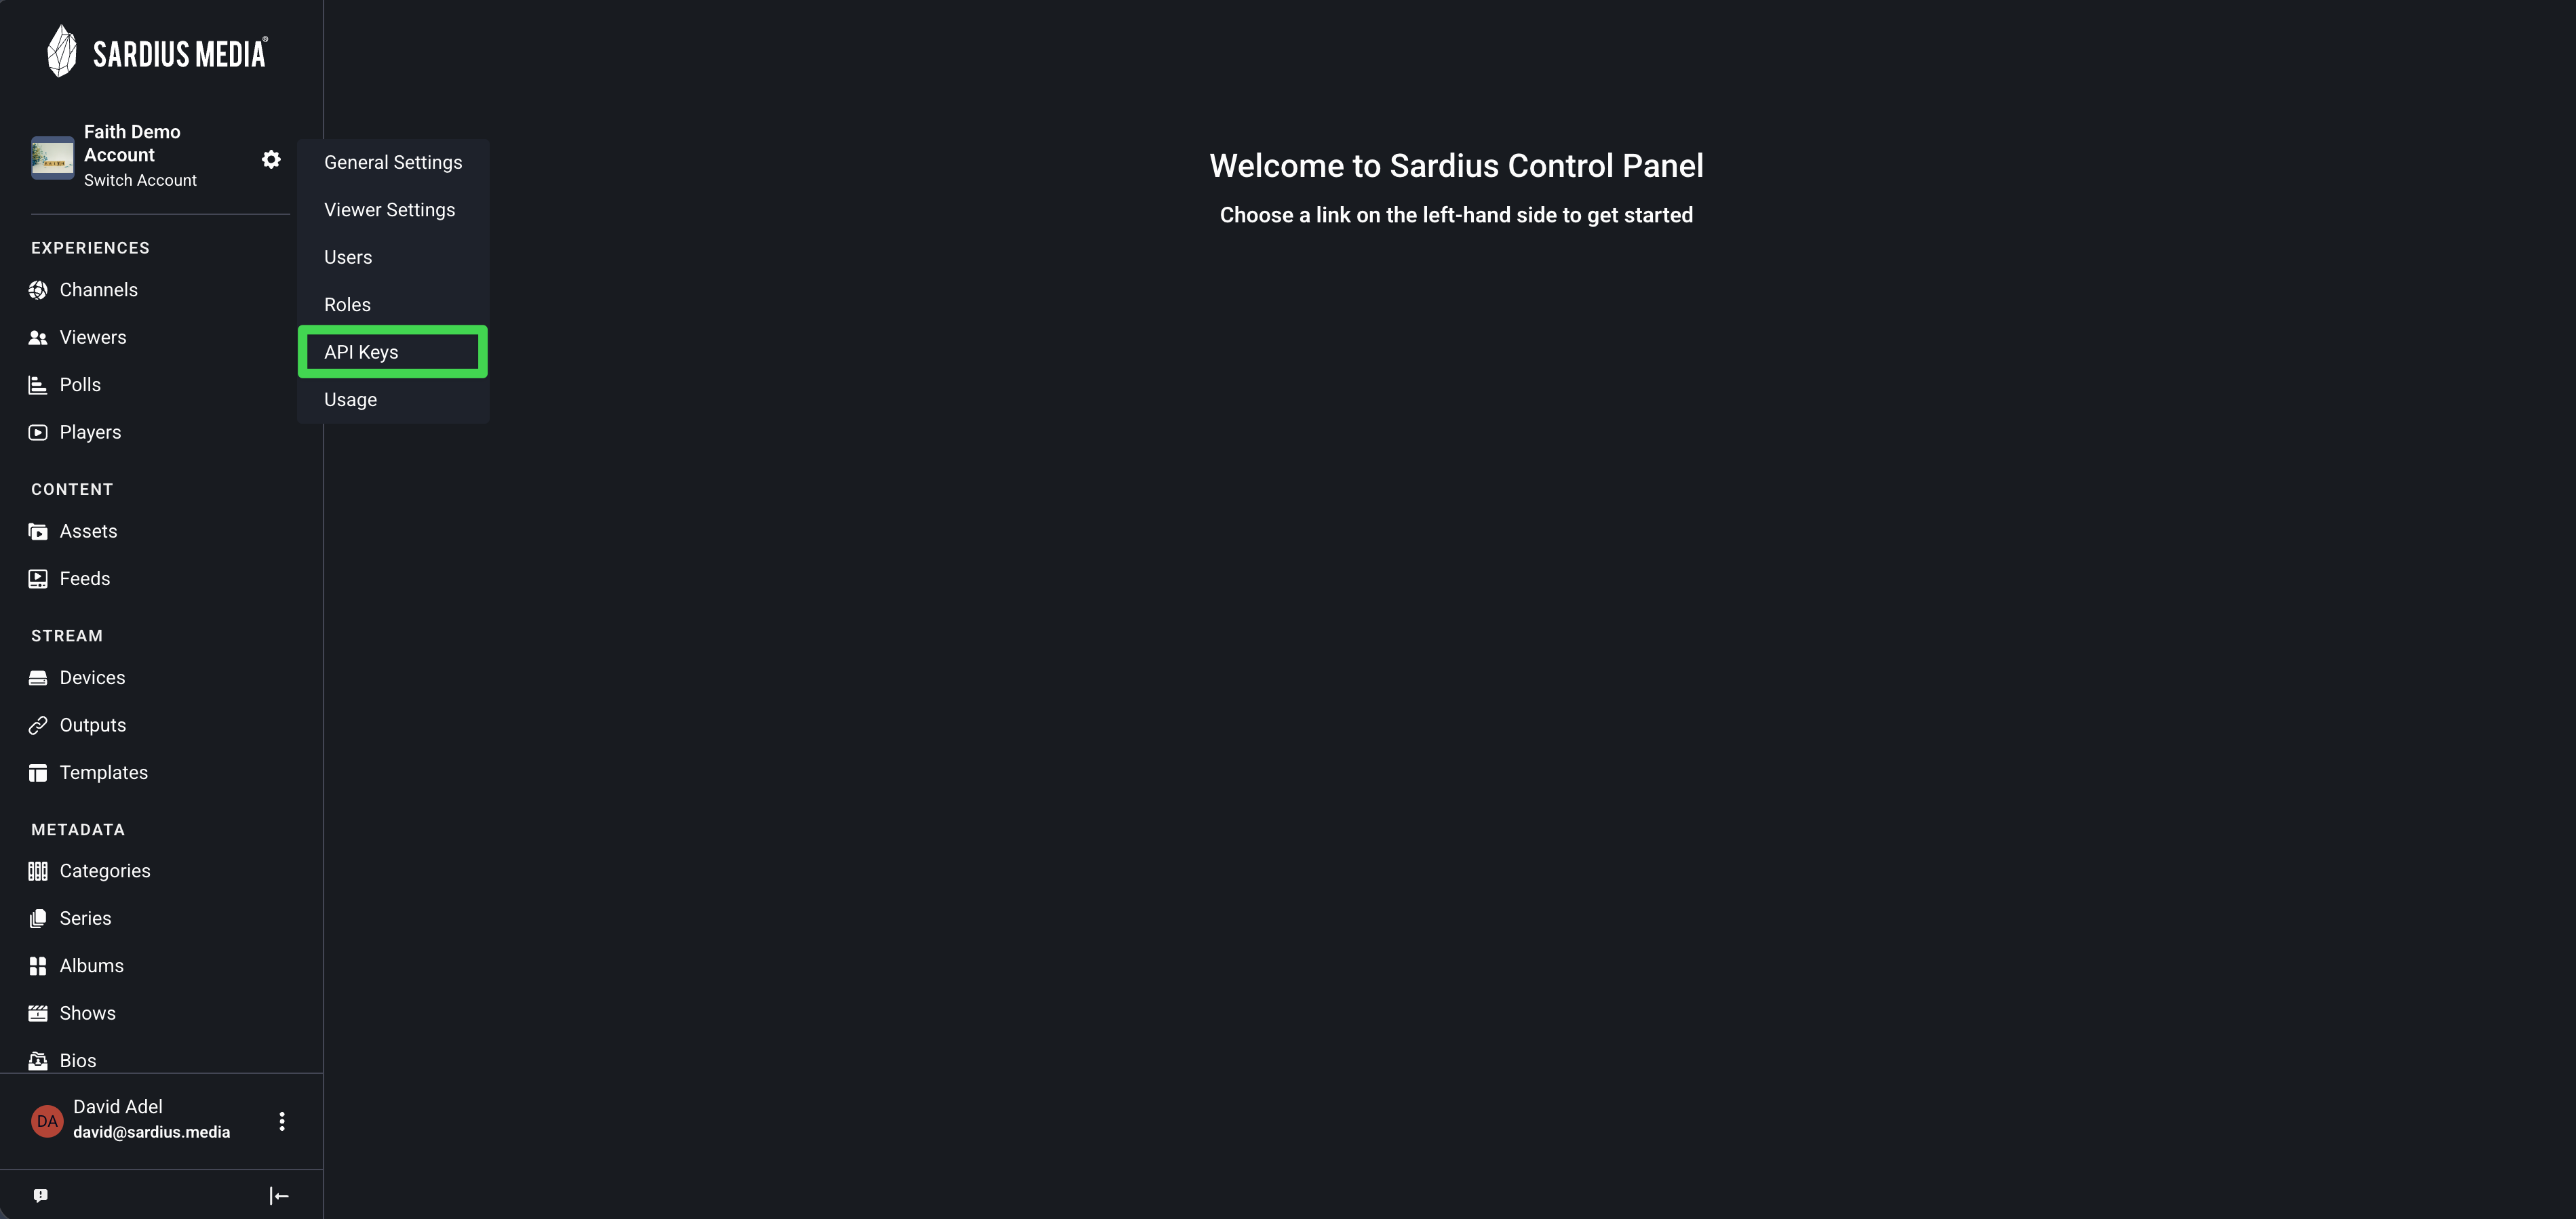
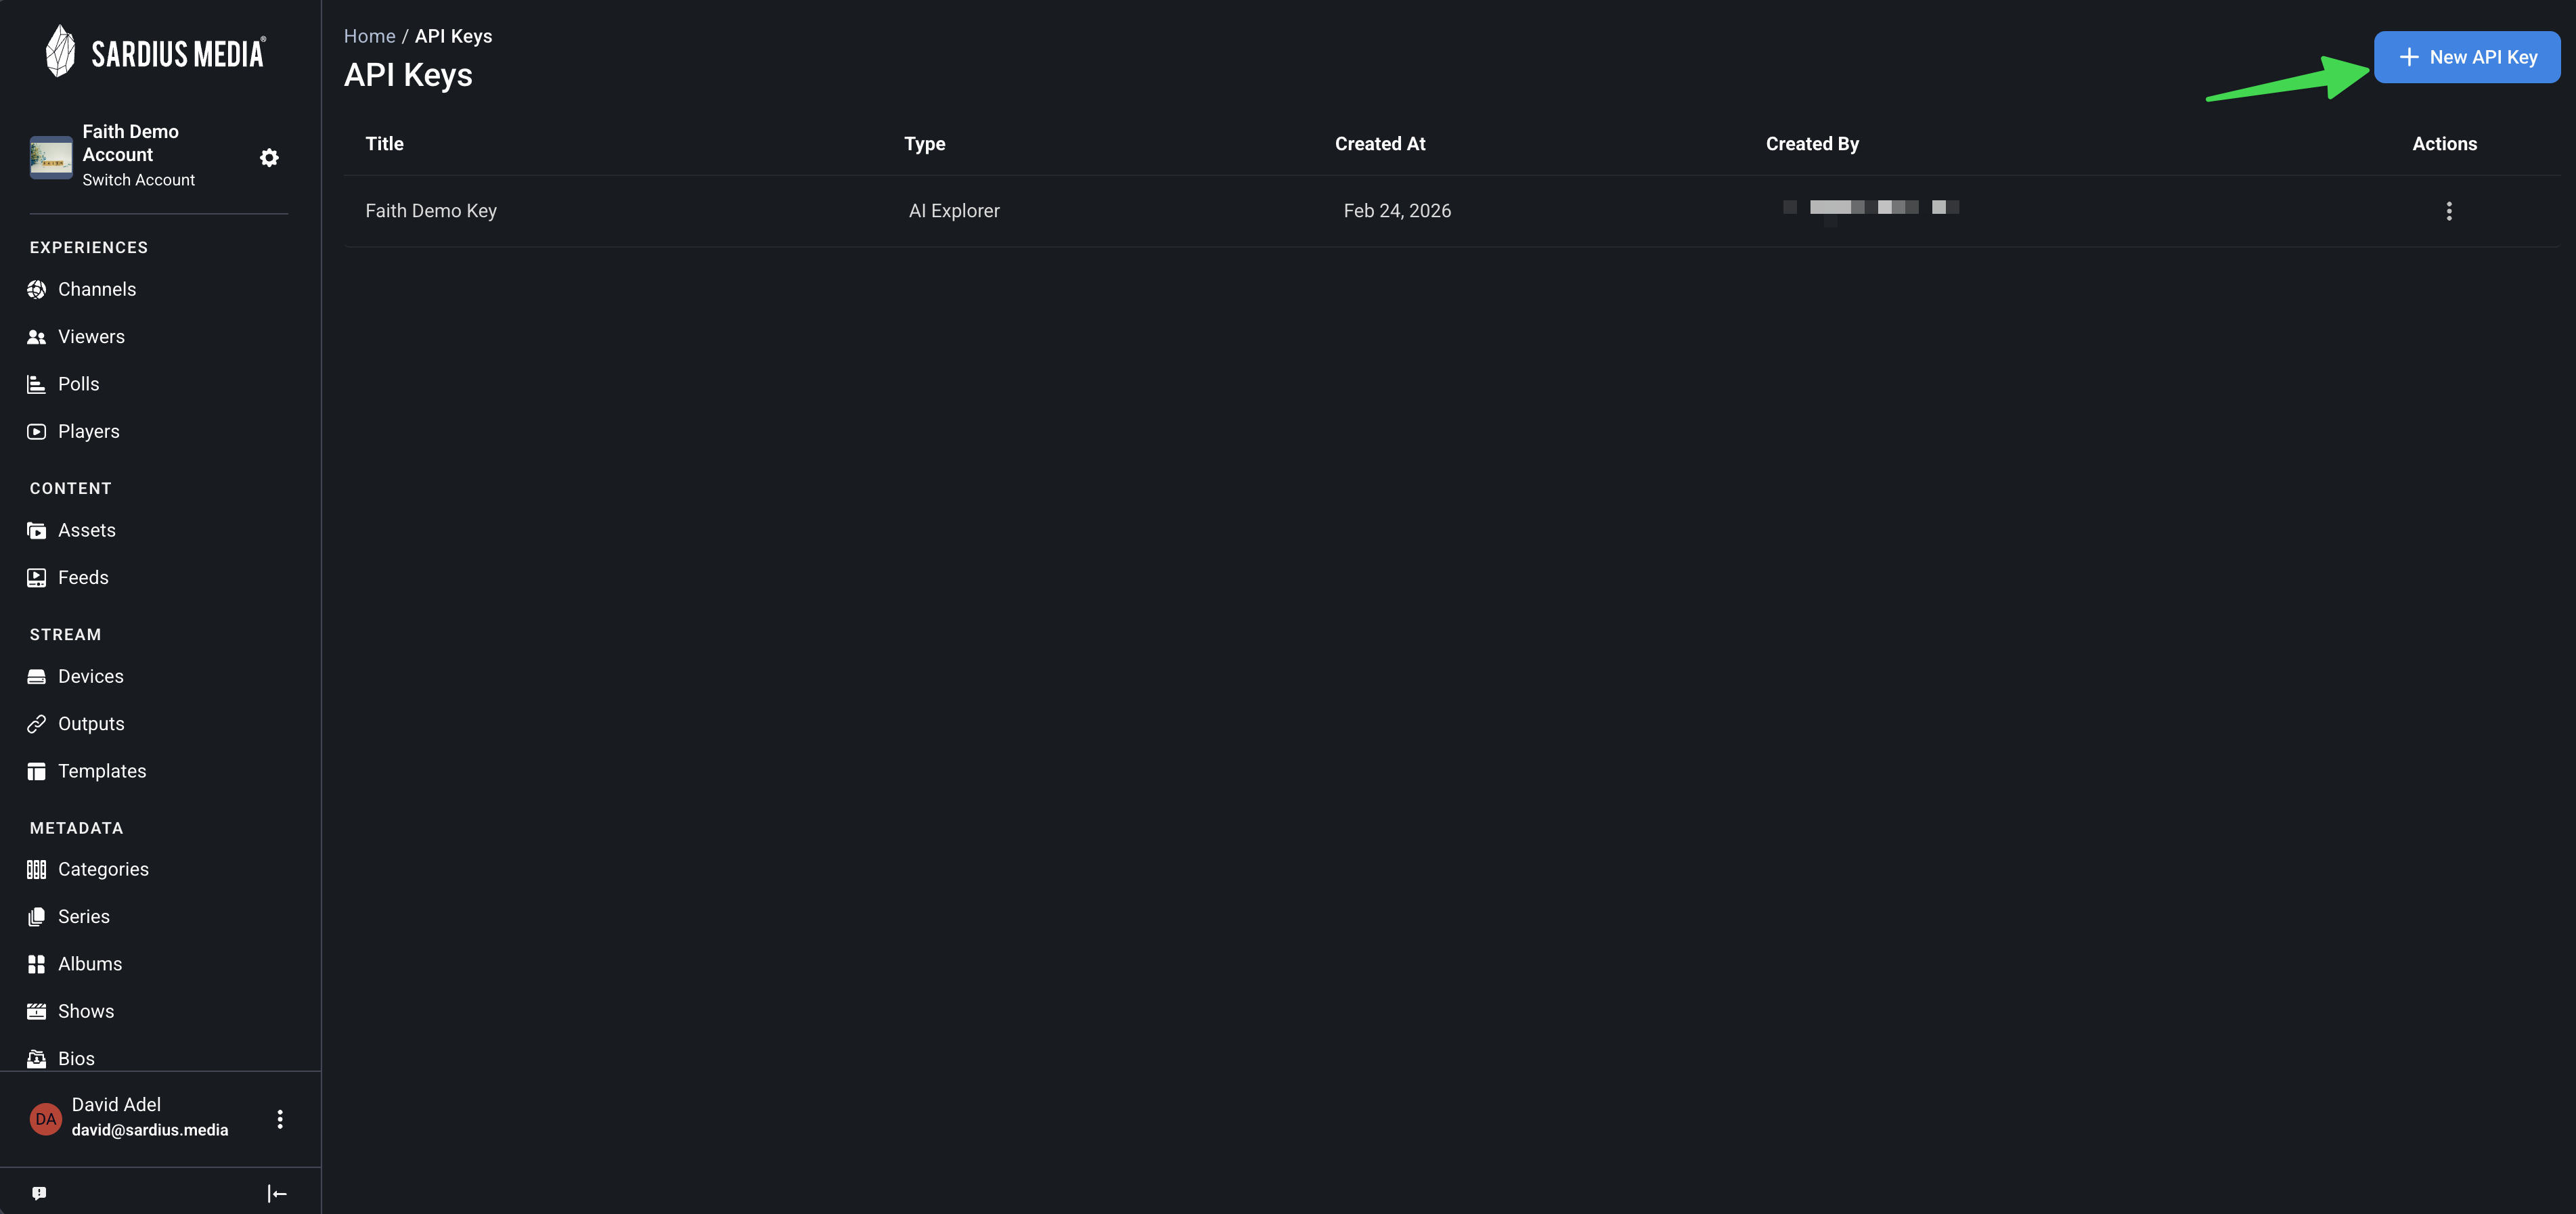
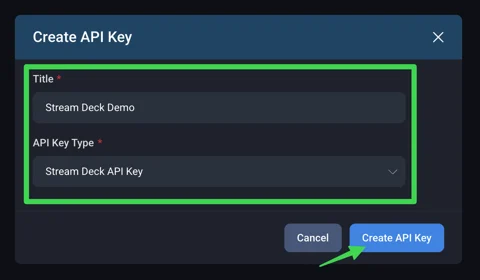
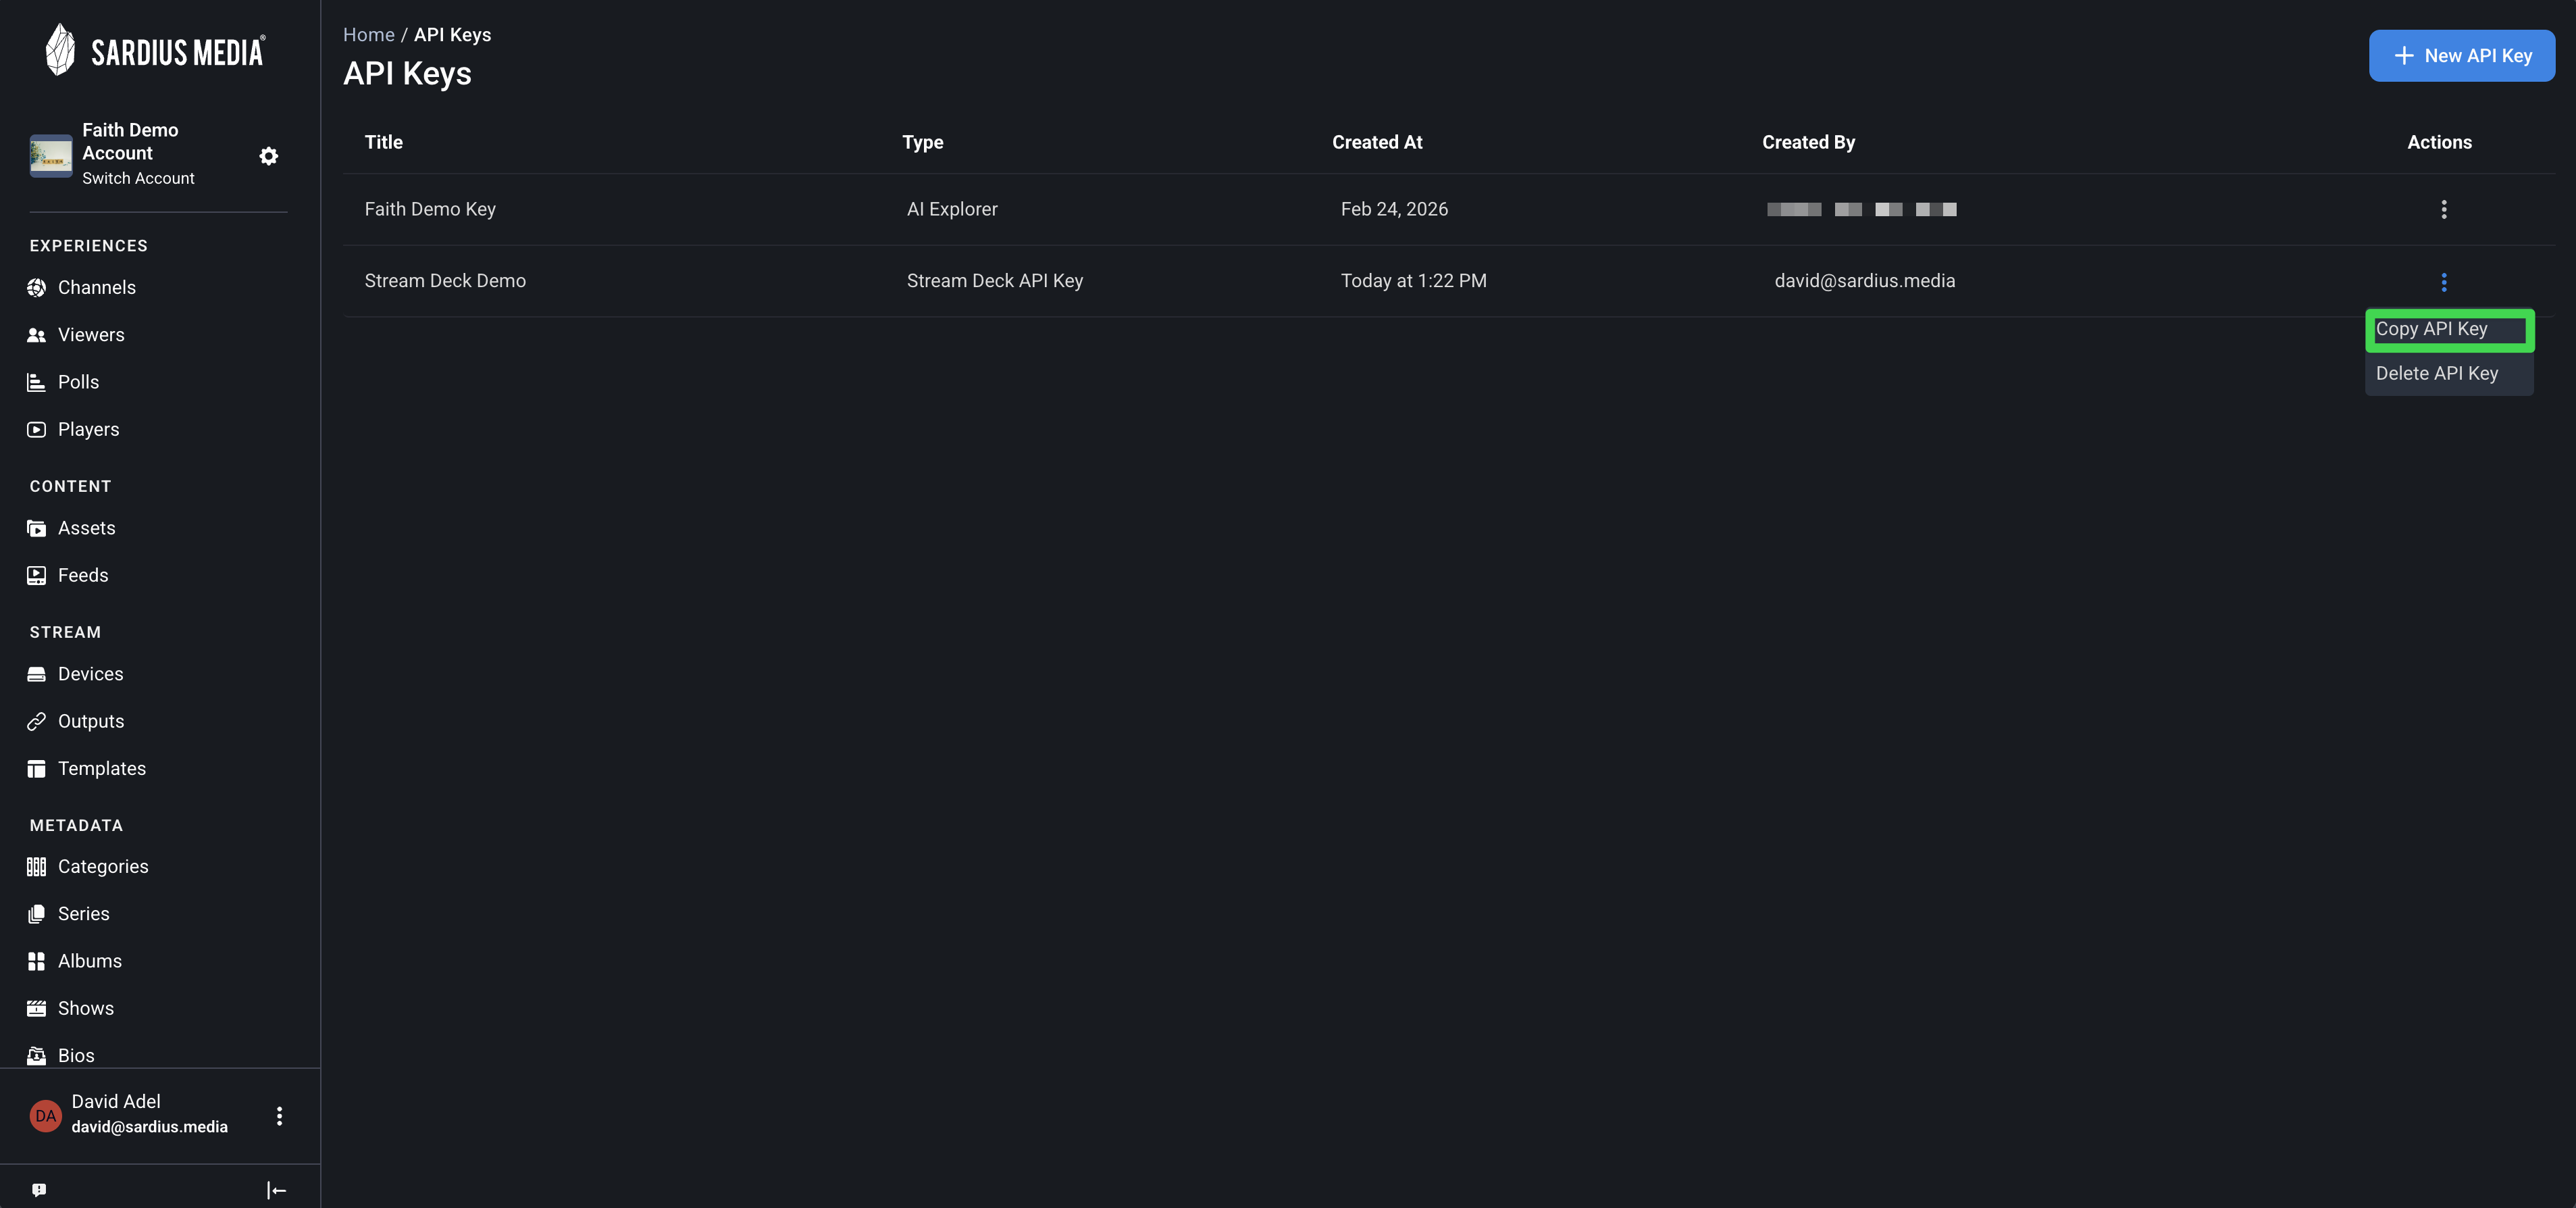
Copy your API Key — you'll need it in the next step.
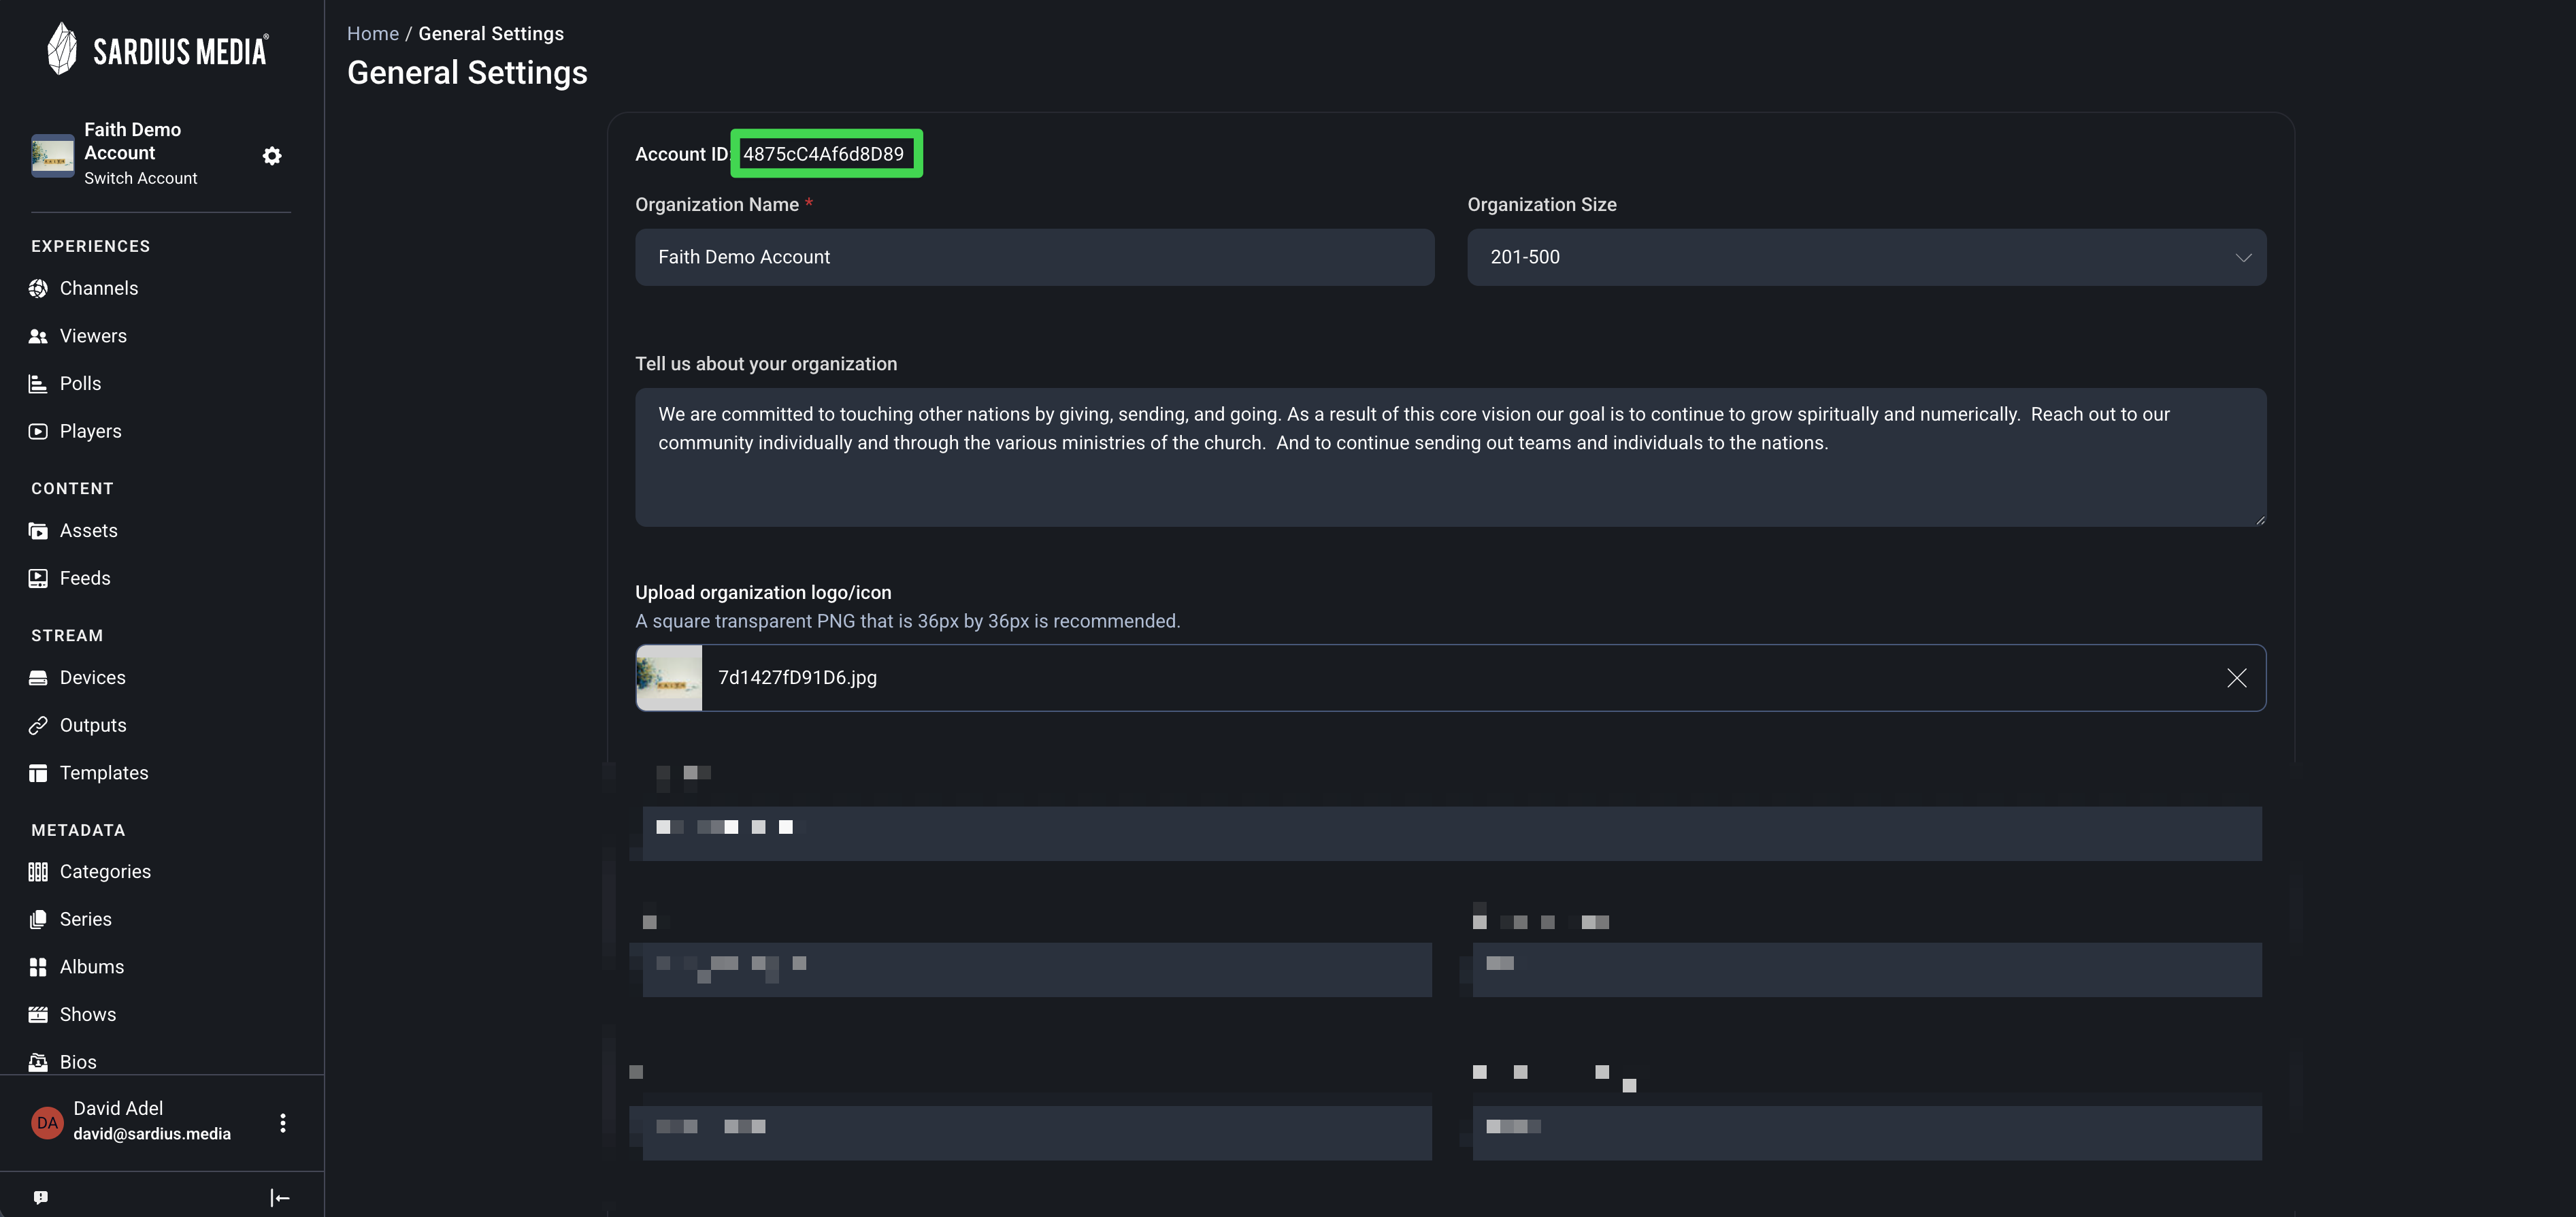
Copy your Account ID as well. You'll need both values when setting up the module in Companion.
Part 2 — Installation & Setup
Step 1: Install Bitfocus Companion
Bitfocus Companion is the free software that connects your Stream Deck to external tools like Sardius. Download and install it from bitfocus.io/companion. It runs on both Mac and Windows.
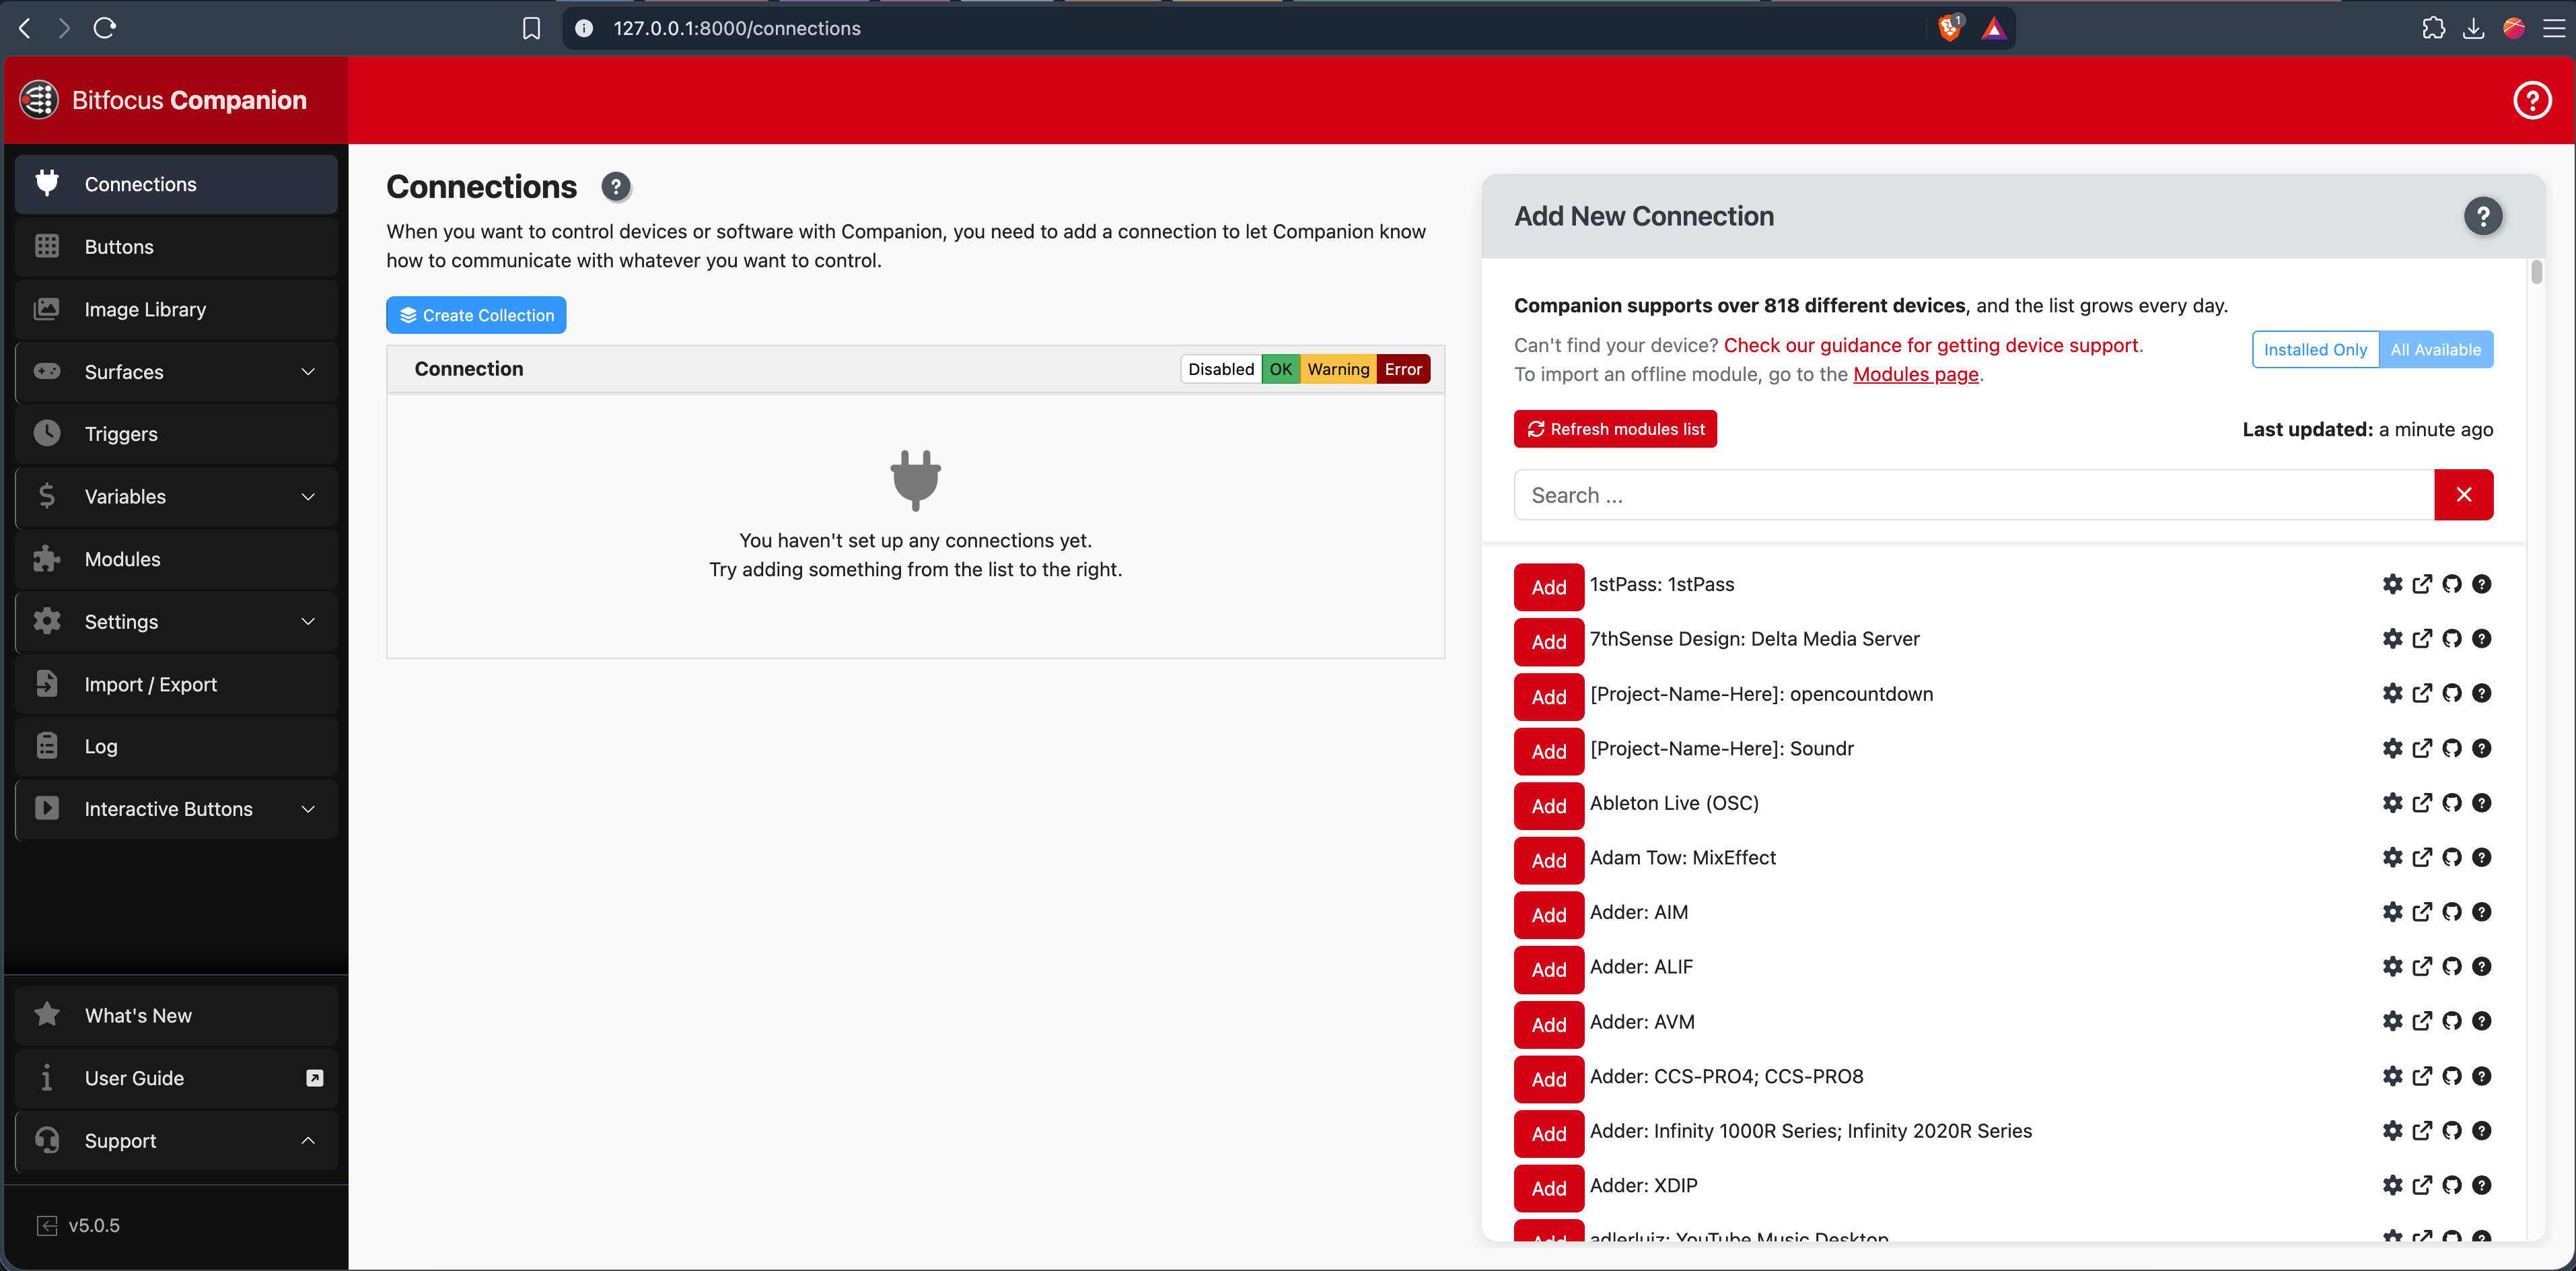
Once installed, open Companion — it runs as a background app and opens its interface in your browser at http://localhost:8000.
Step 2: Add the Sardius Module
- In Companion, click Connections in the left sidebar
- Click + Add connection
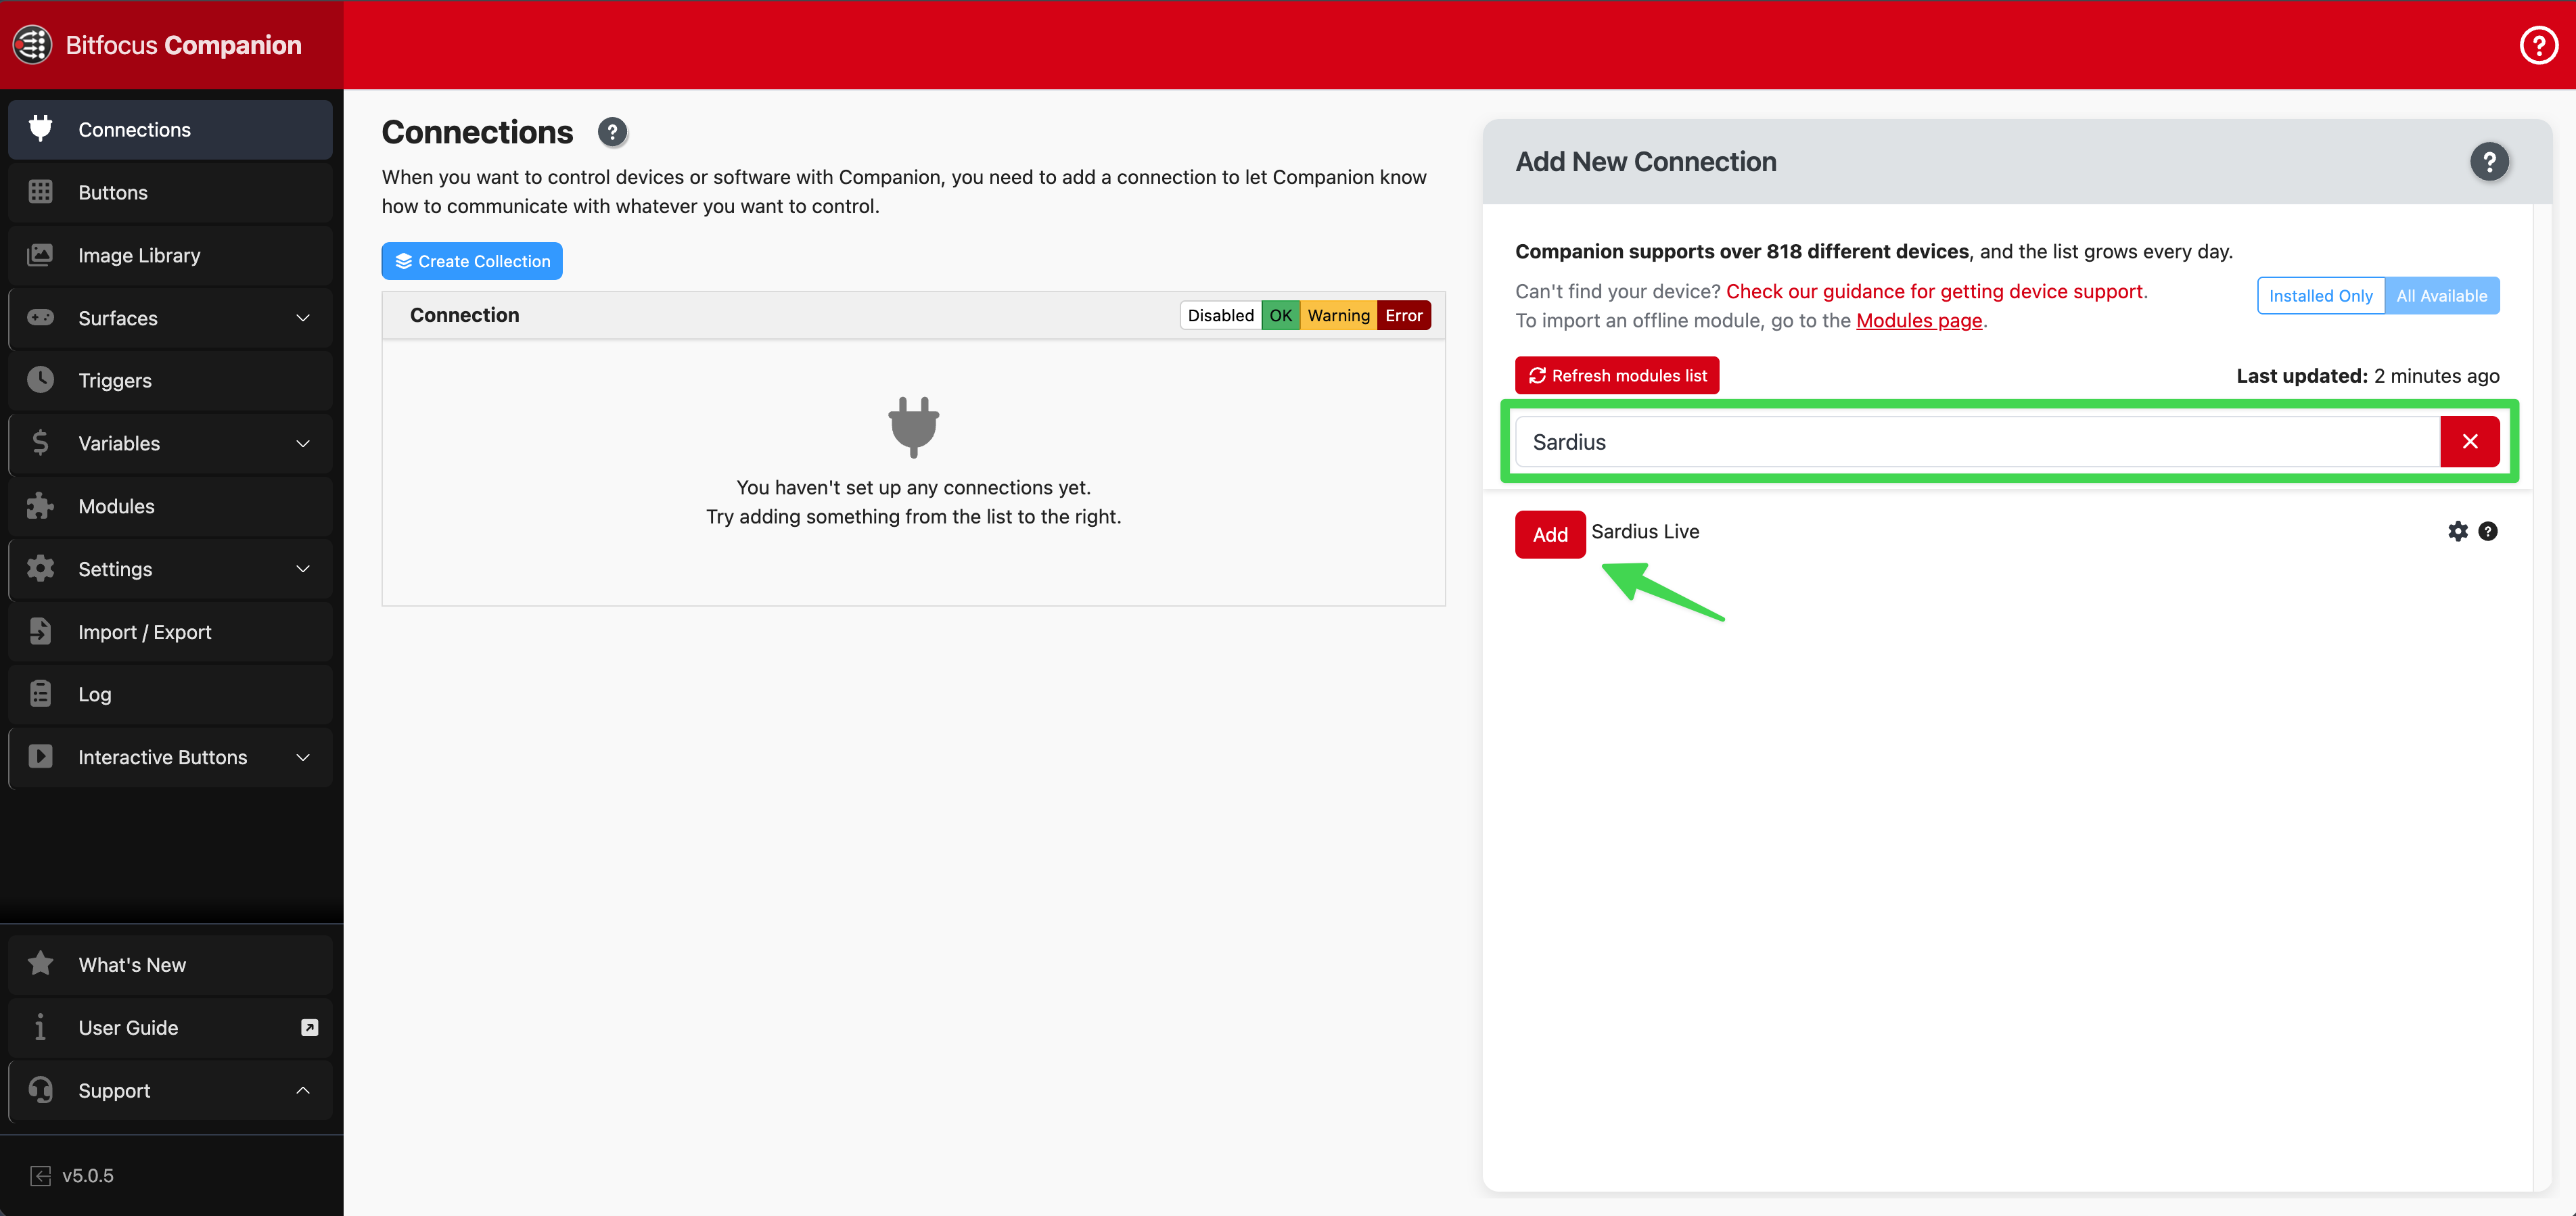
- In the search box, type Sardius
- Click Add next to Sardius Live
Step 3: Enter Your Credentials
After adding the module, a settings panel opens. Fill in:
- API Key — Paste your Sardius Stream Deck API key
- Account ID — Paste your Sardius account identifier
Then click Save.
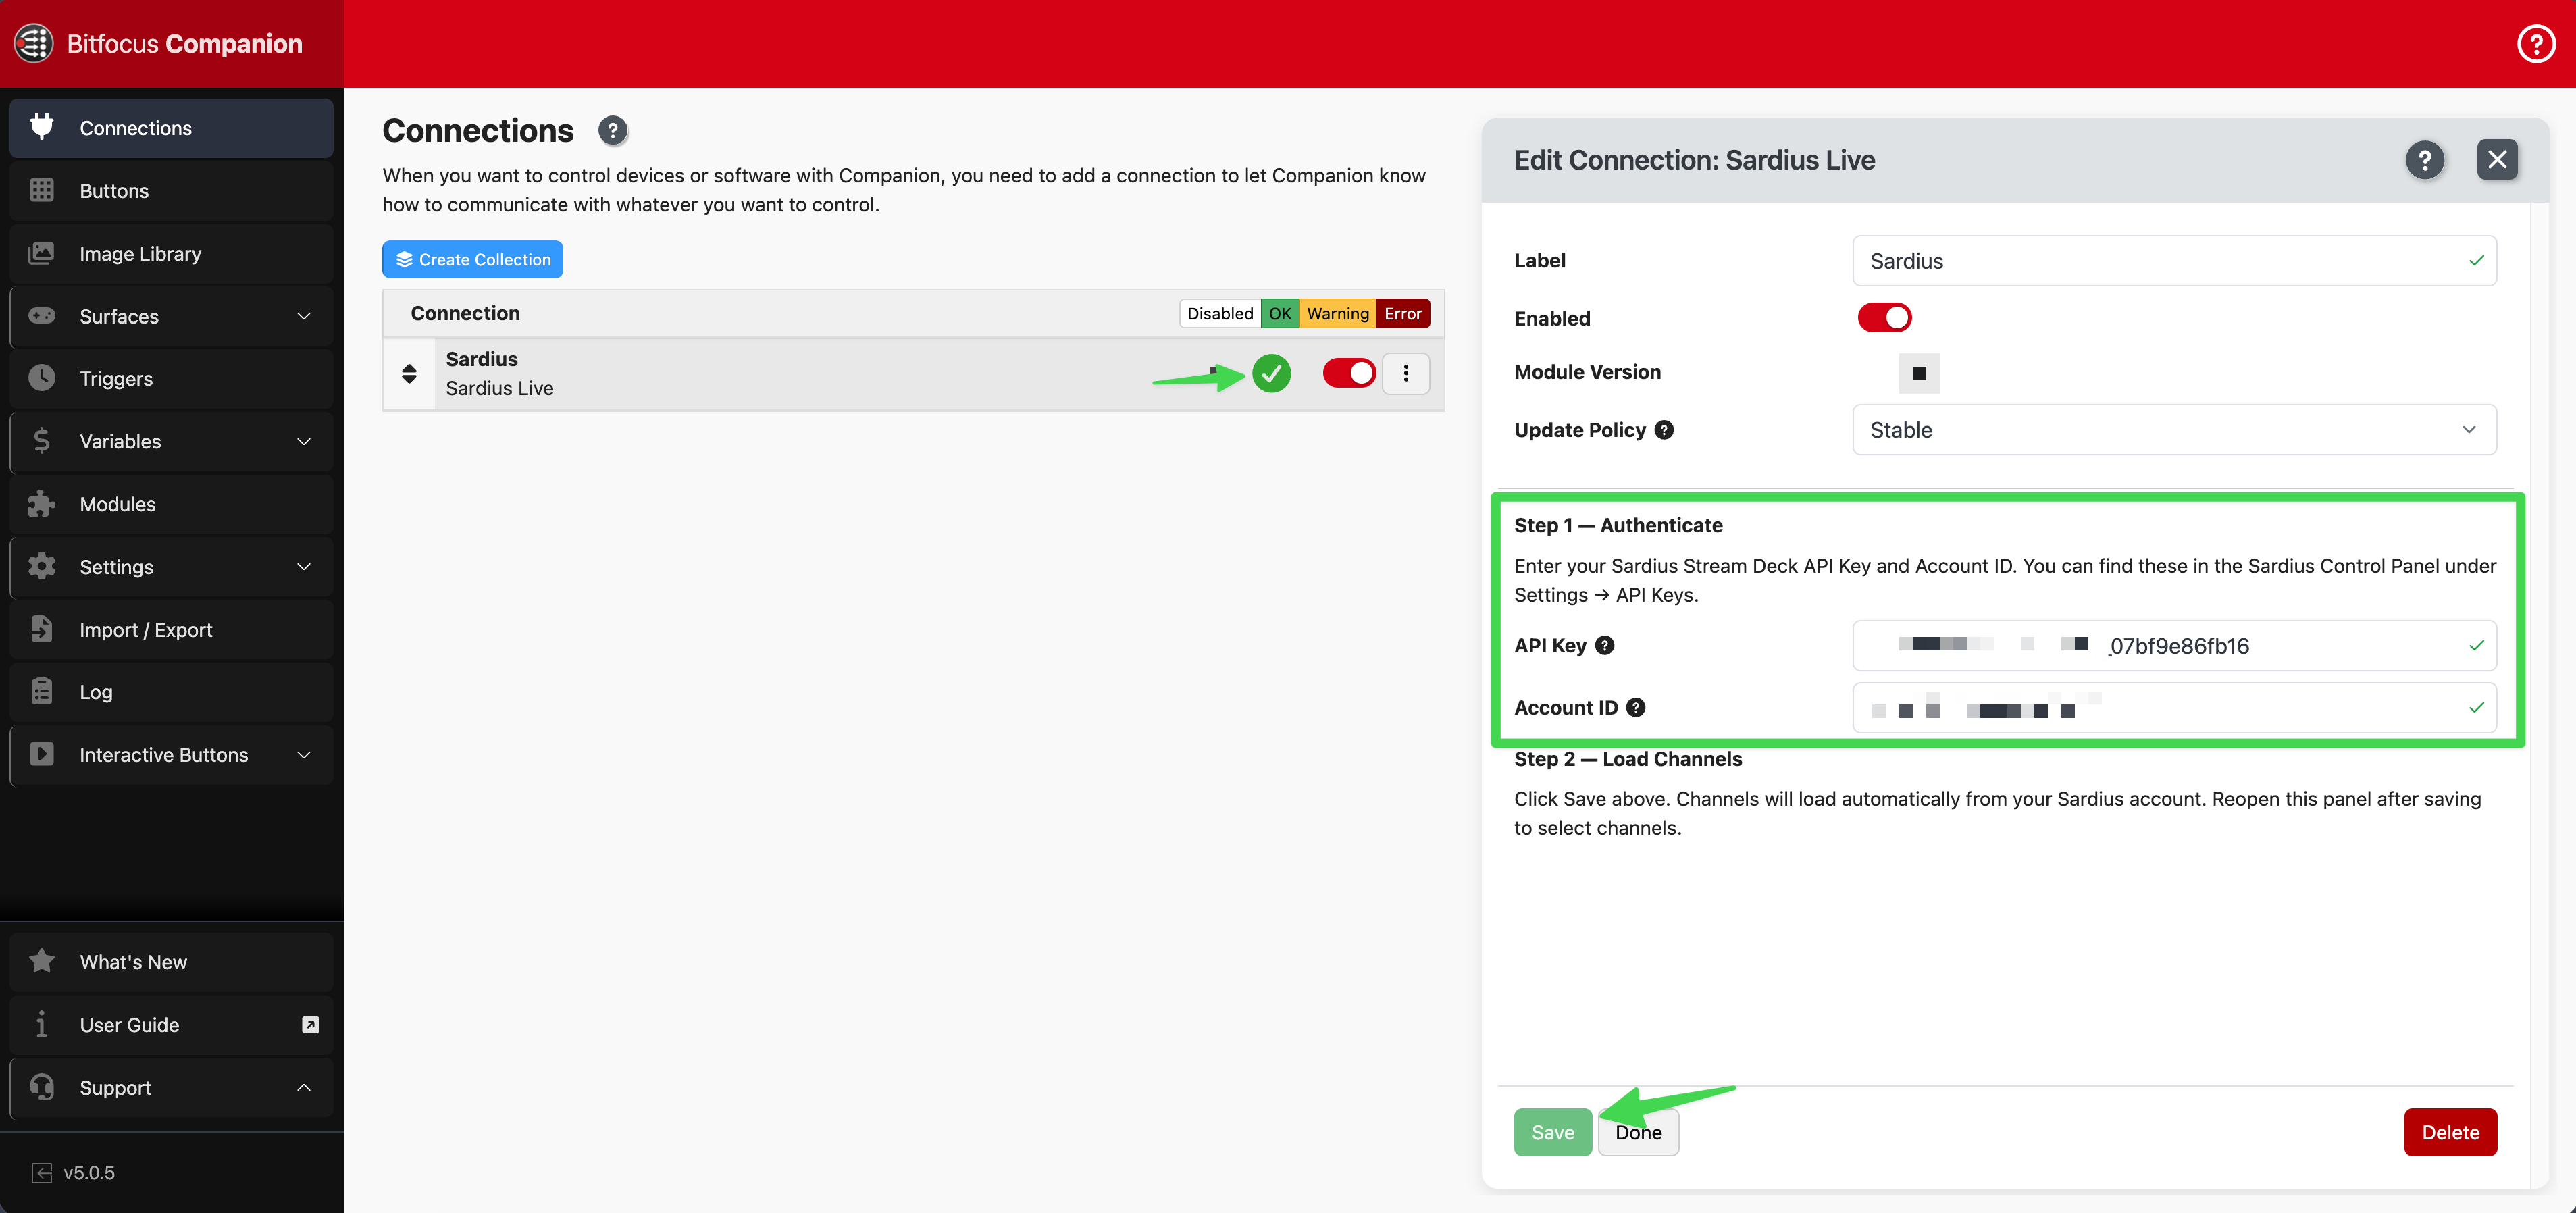
Step 4: Confirm the Connection
In your Connections list, the Sardius Live module should show a green dot and OK status within a few seconds of saving.
If it shows an error instead:
- AuthenticationFailure — One or both credentials are incorrect. Re-enter them and save again.
- No channels found (warning) — Credentials are valid but no channels were returned. Verify your Account ID is correct.
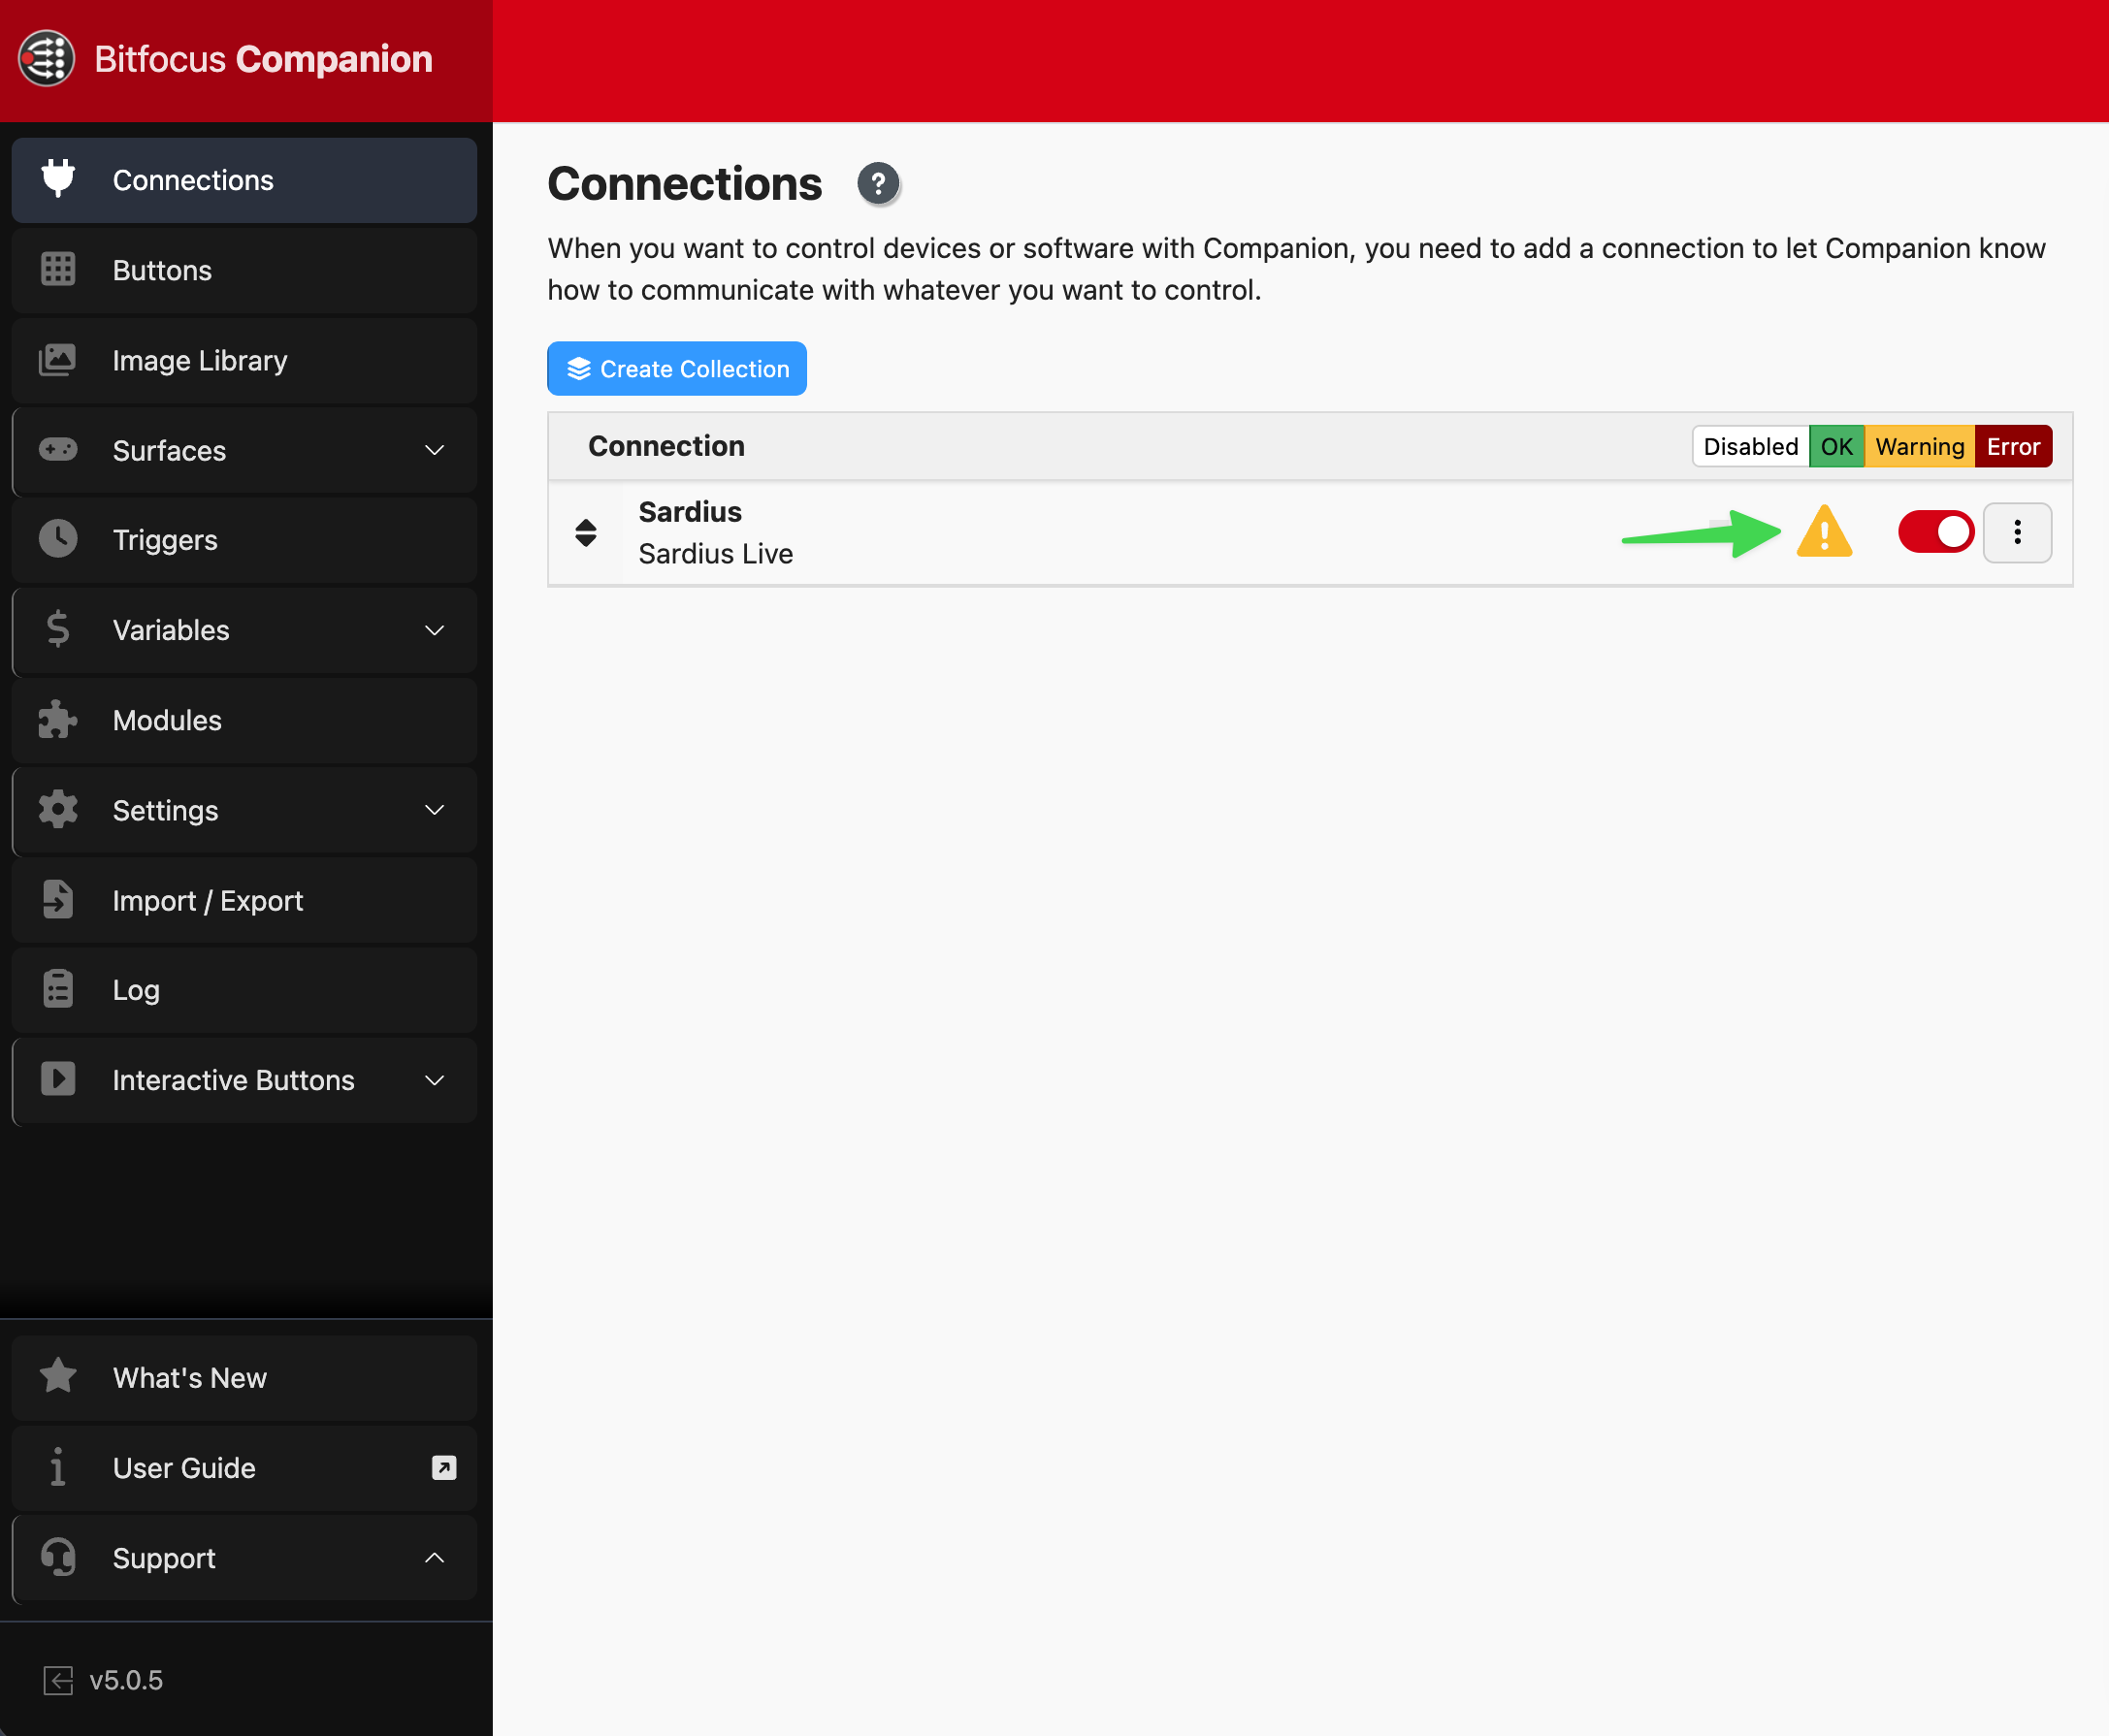
Step 5: Load Your Channels
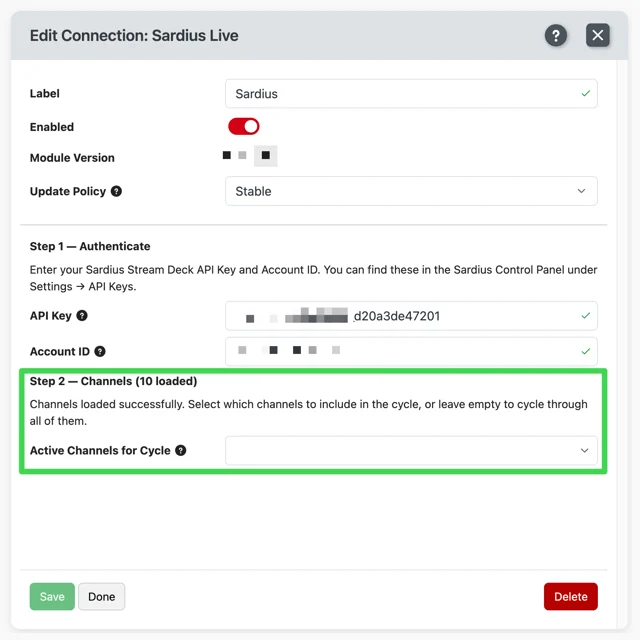
Channels load automatically in the background after you save your credentials. Click the module again to reopen its settings — you'll now see an "Active Channels for Cycle" field listing all your Sardius channels.
If you manage multiple channels, check only the ones you want included in the cycle buttons. Leave the field empty to include all channels.
Part 3 — Setting Up Your Buttons (Presets)
The fastest way to get started is with presets — ready-made buttons that come pre-configured with the right action, color scheme, and visual feedback already wired up.
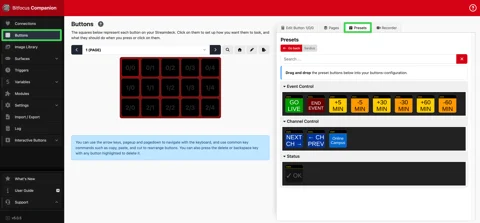
How to Add a Preset
- Click the Buttons in Companion
- Click any empty button slot on the grid
- In the right panel, open the Presets tab
- Find the preset you want and drag it onto a button slot
Available Presets
The module ships with 12 ready-to-use presets organized into three groups.
Event Control
| Preset | Button Style | What It Does |
|---|---|---|
| Go Live | Green | Creates a live event on the selected channel. Turns bright green with a live countdown when a broadcast is running. |
| End Event | Red | Ends the active broadcast immediately. Requires a 2-second hold — prevents accidental activation. |
| +5 Min | Yellow | Adds 5 minutes to the active event's scheduled end time. |
| -5 Min | Orange | Subtracts 5 minutes from the active event's scheduled end time. |
| +30 Min | Yellow | Adds 30 minutes to the active event's scheduled end time. |
| -30 Min | Orange | Subtracts 30 minutes from the active event's scheduled end time. |
| +60 Min | Yellow | Adds 60 minutes to the active event's scheduled end time. |
| -60 Min | Orange | Subtracts 60 minutes from the active event's scheduled end time. |
Channel Control
| Preset | Button Style | What It Does |
|---|---|---|
| Next Channel | Blue | Steps forward through your channel cycle. |
| Previous Channel | Blue | Steps backward through your channel cycle. |
| Channel Display | Dark / Blue highlight when selected | Shows the active channel name. Highlights blue when a channel is selected. |
Status
| Preset | Button Style | What It Does |
|---|---|---|
| Error Display | Dark gray / Bright red on error | Shows ✓ OK normally. Turns bright red and displays the error message whenever any action fails. |
Recommended Starter Layout
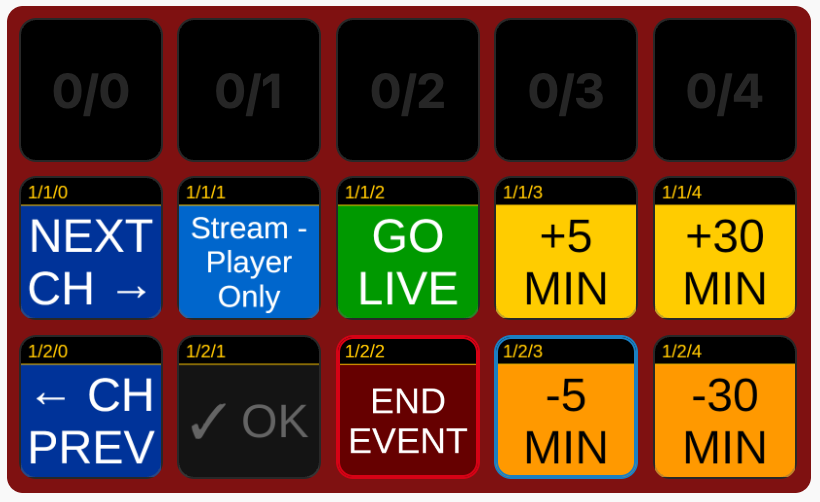
For most setups, this 3-column, 2-row layout covers everything you need:
| Next Channel | Selected Channel | Go Live | +5 | +30 |
|---|---|---|---|---|
| Previous Channel | Error Display | End Event | -5 | -30 |
Part 4 — Basic Usage
Going Live
- Use Next Channel or Previous Channel to select the channel you want to broadcast on. The Channel Display button always shows the currently selected channel name.
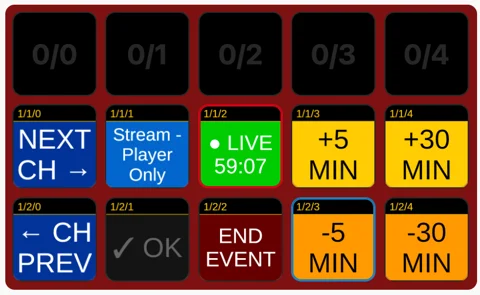
- Press Go Live. A 1-hour live event is created on that channel automatically.
- The Go Live button turns bright green and displays
● LIVEwith a real-time countdown.
Extending or Shortening Event Time
While a broadcast is live, press any time button to adjust the scheduled end:
- +5, +30, or +60 — adds that many minutes to the end time
- -5, -30, or -60 — subtracts that many minutes from the end time
The countdown on the Go Live button updates instantly.
Ending the Broadcast
Press and hold the End Event button for 2 seconds. The broadcast ends immediately — the event's end time is set to right now.
The 2-second hold is intentional. A quick accidental tap will never cut your stream.
Switching Channels
If you manage multiple channels:
- Press Next Channel or Previous Channel
- The Channel Display button immediately updates to show the new selection
- All event actions (Go Live, time buttons, End Event) now target the newly selected channel
Part 5 — Error Display Button
The Error Display button gives you a real-time status indicator for every action you take.
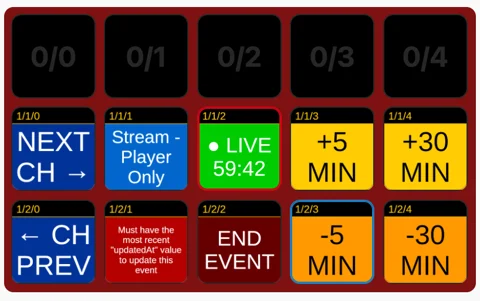
Normal state: Shows ✓ OK in gray text on a dark background — everything is working as expected.
Error state: Turns bright red and displays the specific error message. Examples:
- "Request timed out — check your network connection"
- "400 — Resource conflict / Encoder busy / Try in 5 Min"
- "Request failed with status 520"
The error clears automatically as soon as you successfully run another action. You don't need to dismiss it manually.
Part 6 — Working with Multiple Channels
How the Channel Cycle Works
The Next and Previous Channel buttons step through a circular list. After the last channel, the next press wraps back to the first. All feedbacks and event actions automatically follow whichever channel is selected.
By default, all channels in your account are included in the cycle. To limit it:
- Open the module settings in Companion
- Under Active Channels for Cycle, check only the channels you want
Locking a Button to a Specific Channel
Every action has a "Use selected channel" option that is checked by default. You can uncheck it to lock that button to a fixed channel, regardless of what the cycle is showing.
This is useful for:
- Multi-operator setups where each person has their own Stream Deck targeting their own channel
- Permanent status displays for a specific channel that shouldn't follow the cycle
To configure this, edit any button in Companion, uncheck Use selected channel, and choose the channel from the dropdown.
Part 7 — Reference: All Actions
| Action | What It Does | Options |
|---|---|---|
| Go Live | Creates a 1-hour live event and starts the broadcast on the selected channel | Event Name, Channel |
| Add Time | Extends the active event's scheduled end time | Minutes (default: 5), Channel |
| Subtract Time | Shortens the active event's scheduled end time | Minutes (default: 5), Channel |
| End Event | Ends the broadcast by setting the event end time to right now | Channel |
| Cycle Channel (Next) | Steps forward through the channel list | — |
| Cycle Channel (Previous) | Steps backward through the channel list | — |
| Open Control Panel | Opens cp.sardius.media in your default browser | — |
Part 8 — Reference: Feedbacks
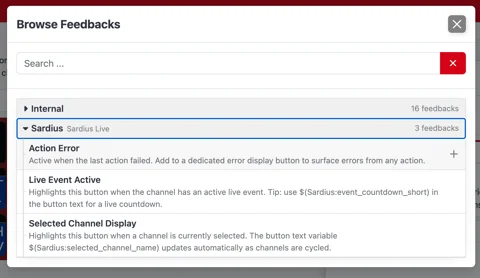
Feedbacks change a button's appearance based on live state. The presets already have the right feedbacks applied — you can also add any feedback to a custom button you build yourself.
| Feedback | Triggers When | Default Button Appearance |
|---|---|---|
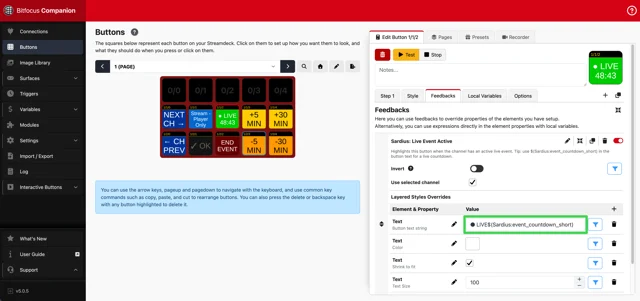
| Live Event Active | The selected channel has an active live event | Bright green background, ● LIVE with countdown timer |
| Selected Channel Display | A channel is the active selection in the cycle | Blue highlight on the button |
| Action Error | The last action resulted in an error | Bright red background, error message text on the button |
To add a feedback to any custom button:
- Edit the button in Companion
- Click the Feedbacks tab in the right panel
- Click + Add feedback
- Choose the feedback, configure any options, and save
Part 9 — Reference: Variables
Variables are live data values you can embed directly in any button's text. They update automatically as things change.
How to use: Type the variable name into a button's text field in Companion. Replace connection with your module's actual name as shown in the Connections tab (for example, if your module is named Sardius-Live, use $(Sardius-Live:event_title) instead).
| Variable | What It Shows | Example Output |
|---|---|---|
$(connection:selected_channel_id) | ID of the currently selected channel | ch_abc123 |
$(connection:selected_channel_name) | Name of the currently selected channel | Main Auditorium |
$(connection:event_title) | Title of the active live event | Sunday Service |
$(connection:event_end_time) | Scheduled end time of the active event | 3:00 PM |
$(connection:event_countdown) | Full countdown to event end (always HH:MM:SS[]) | 01:23:45 |
$(connection:event_countdown_short) | Compact countdown — shows MM:SS[] when under 60 minutes, H:MM:SS[] when over | 23:45 |
$(connection:last_error) | Error message from the last failed action. Empty when no error. | Request timed out |
Part 10 — Advanced Usage
Displaying Live Data on Custom Buttons
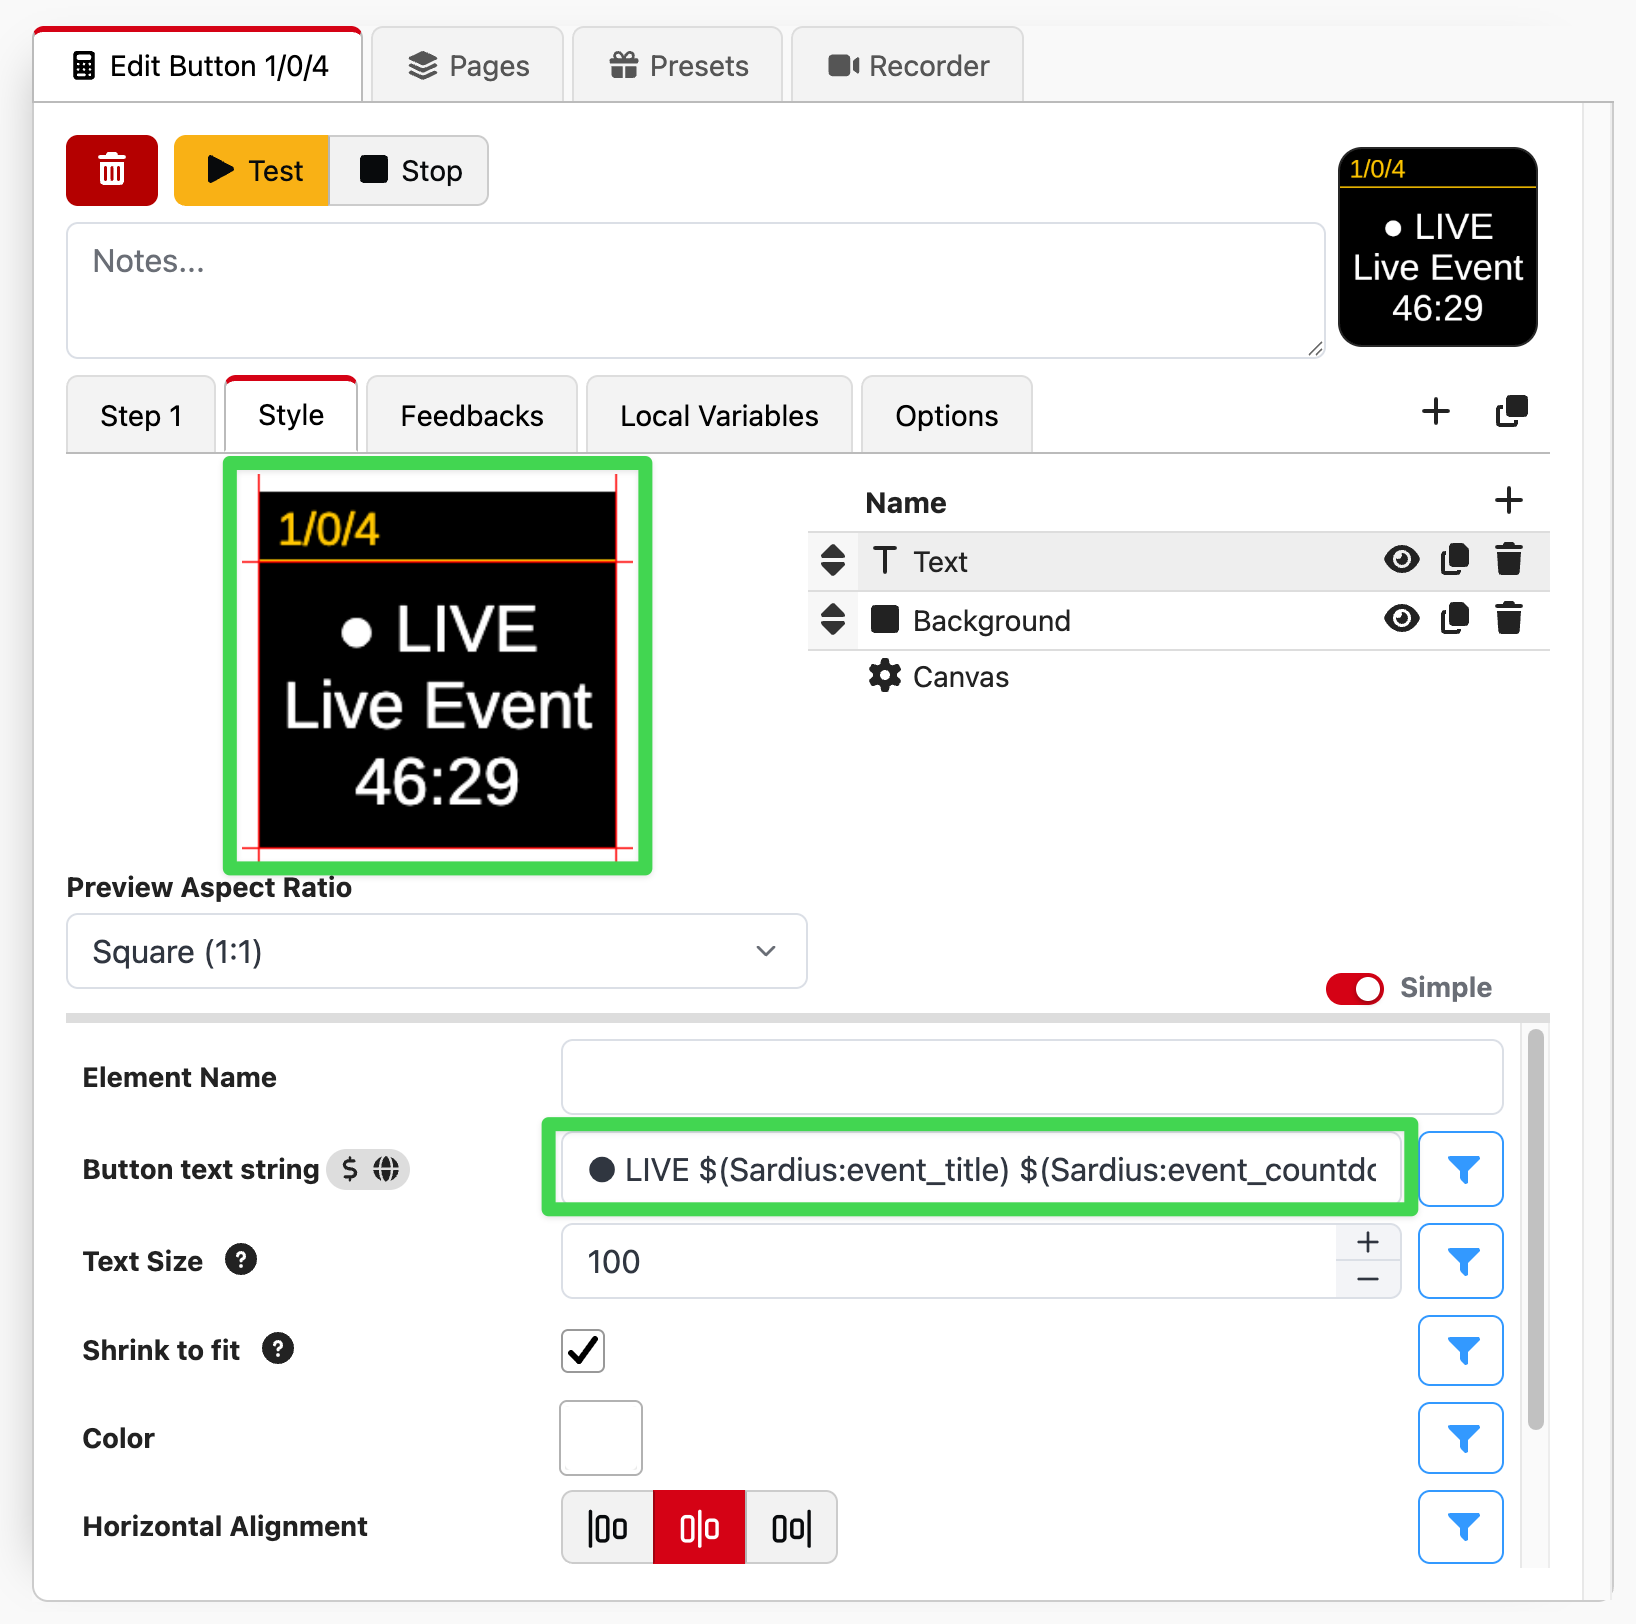
Any button in Companion can show live data — just type a variable into its text field. For example, to show the event name and a countdown on a single button:
● LIVE
$(connection:event_title)
$(connection:event_countdown_short)
Or to show just the channel name: $(connection:selected_channel_name)
Adding Action Error Feedback to Other Buttons
The Action Error feedback isn't limited to the Error Display preset. You can add it to any button — for example, add it to your Go Live button so that button itself turns red if the go-live action fails. This is useful if you want fewer total buttons on your deck.
Custom Time Increments
The Add Time and Subtract Time actions accept any value from 1 to 60 minutes. To create a time button not available as a preset (like +15 min or -10 min):
- Add an empty button to your layout
- Assign the Add Time or Subtract Time action
- Set Minutes to the value you want
Hold-to-Confirm on Any Action
The End Event preset uses a 2-second hold requirement to prevent accidents. You can apply the same protection to any action:
- Edit the button in Companion
- In the Button tab, change the press type to Hold and set your preferred duration
Multi-Operator Setups
For organizations with multiple Stream Deck operators each controlling a dedicated channel:
- Assign each operator their own Stream Deck profile in Companion
- On each profile, uncheck Use selected channel on all action buttons and hard-code them to that operator's channel
- This way, no one needs to worry about which channel is currently "selected" — every button always targets the right one
Troubleshooting
-
Connection shows AuthenticationFailure
Your API Key or Account ID is incorrect. Open the module settings in Companion, carefully re-enter both values, and click Save.
-
Connection shows "No channels found"
Your credentials are valid but no channels were returned. Verify that your Account ID is correct and that your Sardius account has at least one channel configured. Contact Sardius support if you're unsure what your Account ID should be.
-
Channel dropdown is empty in button settings
Channels load in the background the first time you save your credentials. Reopen the module settings by clicking the module in the Connections tab — the dropdown fills in automatically once channels have loaded. This usually takes just a few seconds after saving.
-
Go Live does nothing when I press it
A live event is probably already active on the selected channel. Look at your Go Live button — if it's bright green, a broadcast is already running. End it first before starting a new one.
-
Add/Subtract Time or End Event does nothing
These actions only work when a live event is currently active. Make sure your Go Live button is in its bright green live state on the selected channel before using these buttons.
-
Error Display shows "Encoder busy" or "Resource conflict"
The encoder is already assigned to another event or session. Wait 5 minutes and try again. If the problem persists, check the Sardius Control Panel at cp.sardius.media for any conflicting events and end or remove them there.
-
Error Display shows "Request timed out"
The module couldn't reach the Sardius API within 15 seconds. Check your internet connection and try again. If the timeouts continue, contact Sardius support.
-
Presets tab is empty or shows no Sardius presets
Disconnect and reconnect the module: in the Connections tab, click the enable toggle to turn the module off, then back on. Wait a moment, then check the Presets tab again.
Support
For technical issues with the module: github.com/bitfocus/companion-module-sardiusmedia-sardiuslive/issues
For Sardius account or broadcasting questions, reach out at Support@Sardius.media