
This article will introduce you to the first tab in the Asset management pane. Introductions to the other tabs can be found here:
- Managing an Asset's Metadata
- Managing an Asset's Media
- Managing an Asset's Images
- Managing an Asset's Files
Select an Asset
This will open the management pane for that asset and present you the Asset Overview tab.
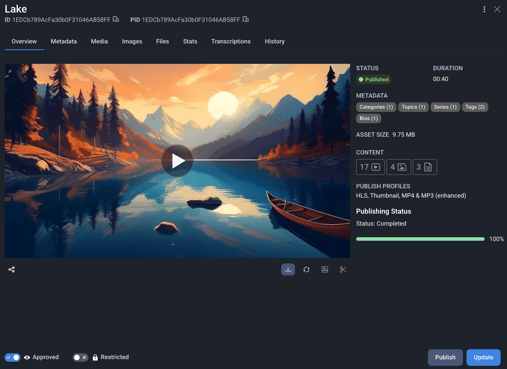
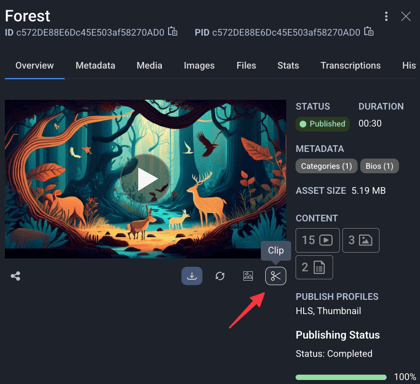
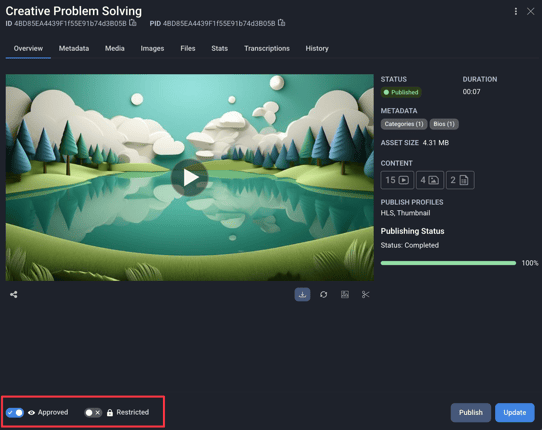
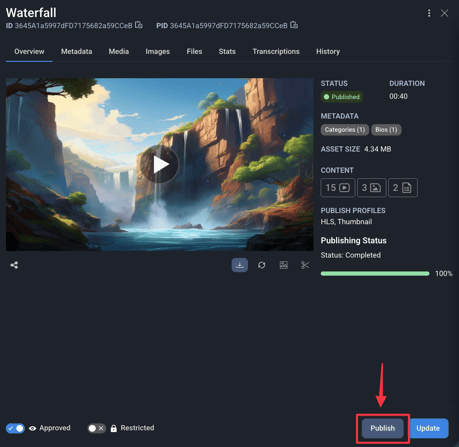
Basic Information
- Created: date the asset was initially created
- Edited: date the file was last updated
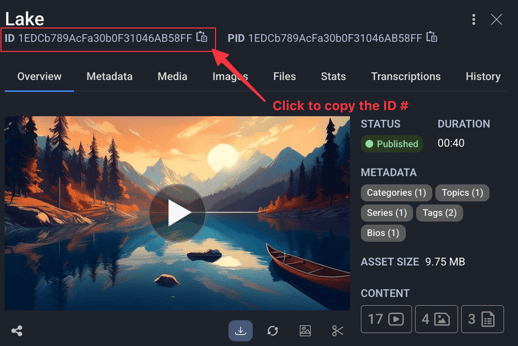
- ID: the identification # assigned to the asset upon creation
Helpful Tip: You can search in the Assets area to find this specific asset using this ID #. If you need to copy the ID #, simply click on the icon to the right of the number to copy it to your clipboard.
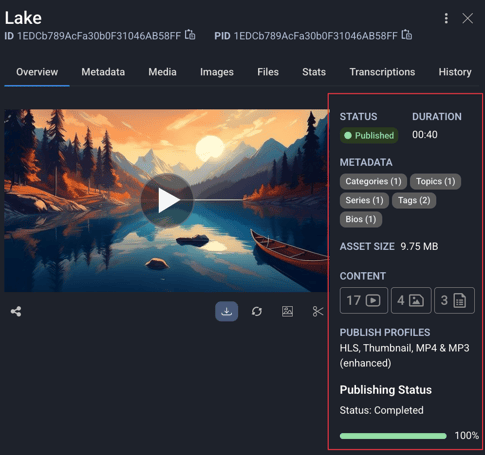
Asset Details
- Status: shows whether an asset is Published or Unpublished.
- Duration: this field will automatically populate with the length of the video content
- Metadata: quick view of what metadata fields currently exist on the asset
- Content: visual representation showing the amount of existing content in the Media, Images or Files tabs of the asset
- Publish Profile: displays the format of the asset (HLS, MP4, MP3, Thumbnails Only)
- Publishing Status: shows publishing status (Completed or will show a progress bar when an asset is currently publishing)
Quick Actions

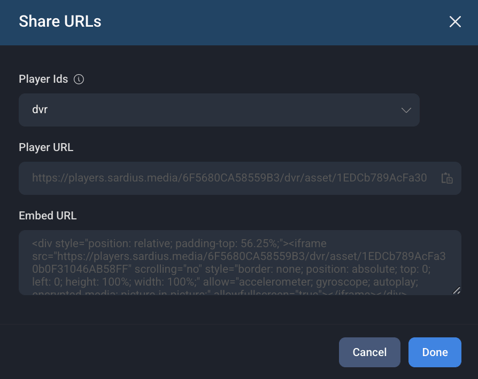
- Player URL: If the Asset is a livestream feed, production teams are often given access to a Player URL so they can see the feed as Viewers would from an existing Channel or Event Watch Page. Note: This unauthenticated link has no access restrictions, so should be shared appropriately.
- To copy the Player URL, click on the clipboard icon next to the URL link to copy onto your clipboard.
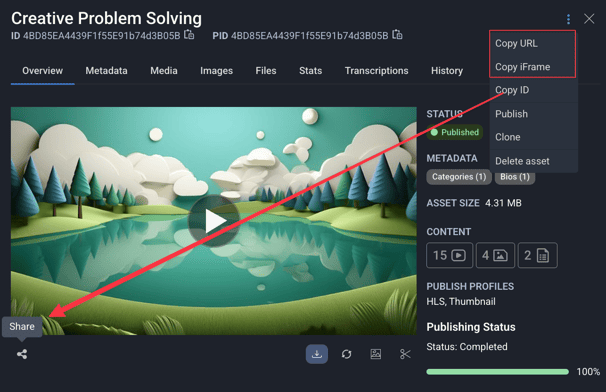
- Embed URL: If embedding the asset as an iFrame on another site, this Embed URL should be used.
- To copy the iFrame, click anywhere on the Embed URL code.You will then see a confirmation message that it has been copied to your clipboard.
Download: Clicking this will Immediately download a copy of media file to your computer. You can rename as needed once the download is complete.
Refresh Player: For videos - when you have pressed play, the refresh player button will reload the asset and play it from the beginning.
Create Thumbnail: Use this action if you want to create a thumbnail from a frame in the video file. This is a quick and easy way to ensure an appropriate “visual hook” to encourage Viewers to play your asset. As an alternative, you can also upload a thumbnail to the Images tab and set it as the default thumbnail.
To get started click on Create Thumbnail. 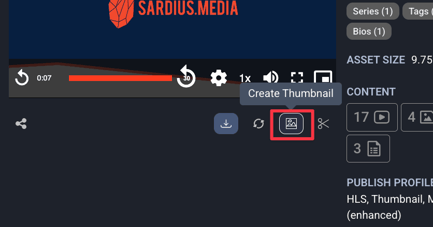
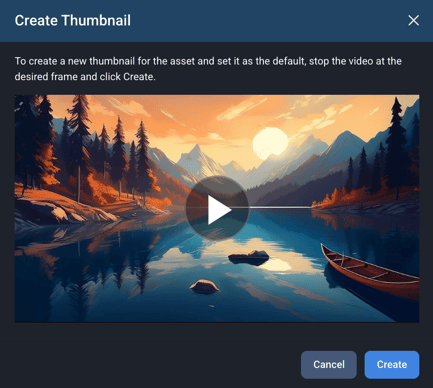
An instructional window will appear explaining how to create a thumbnail by pausing the video on the frame you want your default thumbnail to be set to. The default thumbnail is the frame Viewers will see before initiating the video to play, so it is helpful to capture a frame that best reflects the asset content.
Once you’ve found the desired frame, click the Create button to set it as your default thumbnail.
Clip: There may be times when you want to clip out a portion of a longer asset for the purpose of posting it on social media, create a VOD asset from a livestream asset, etc.
Helpful Tip: To learn more about our clipping tool, please review this article: How to Clip an Asset
Permissions Actions
-
ON: indicated by the blue toggle with checkmark
-
OFF: indicated by the gray toggle and ‘X”
Helpful Tip: These permissions have to do with how the asset will behave when added to feeds.
Approval Actions
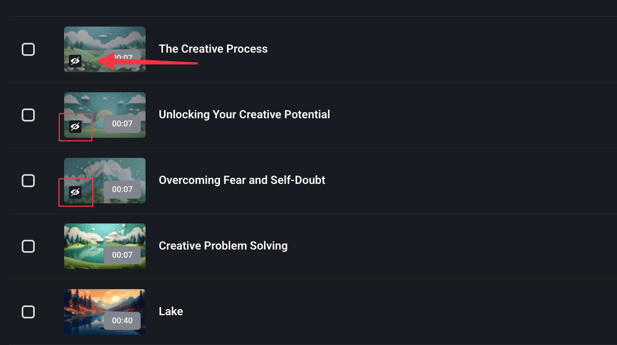
When toggled ON, the asset is Approved to appear in any feeds it has been added to. If the asset is not approved, it will not show up in any private or public feeds.
- When an Asset is approved, the thumbnail is no longer grayed out from the list view, and the icon in the bottom left corner is removed, indicating that its visibility in feeds has been approved.
NOTE: Assets are always available in the API of a feed, but when approved it will display on any channels the feed has been added to.
Toggle OFF to unapprove an asset. Unapproved assets will not appear in any public or private feeds until approved.
- Unapproved assets are quickly identifiable in the list view because they are grayed out and show the “no visibility” icon on the thumbnail.
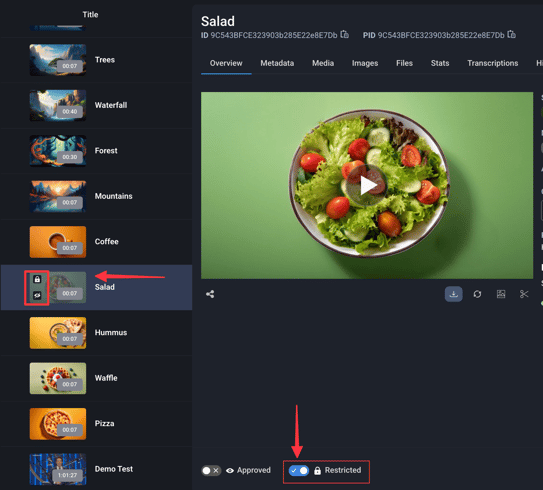
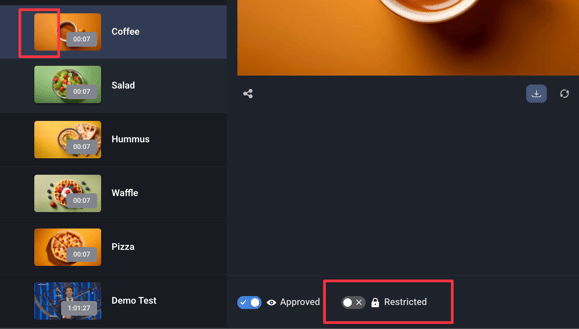
Restriction Actions
Toggle ON to hide asset in a Public Feed but make visible in Private Feeds.
- This setting only works when "Enable Private Feed" toggle is also ON in Feed Restrictions.
NOTE: Assets must still be approved to be displayed, even if restricted.
Toggle OFF to ensure this asset is available to all viewers, in any feeds it is added to.
- Unrestricted assets do not show the lock icon on the thumbnail when viewing from the list, indicating they will not be hidden from any viewers.
Publish Asset
Helpful Tip: HLS is the preferred profile for streaming, as it will give you all of the bit rates that are needed in order to adjust to viewer internet speeds.
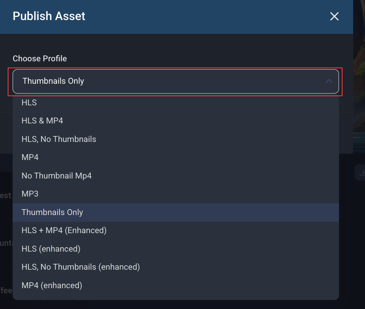
When the modal appears, select the appropriate publishing profile from the list of dropdown options and click the Publish button when finished.
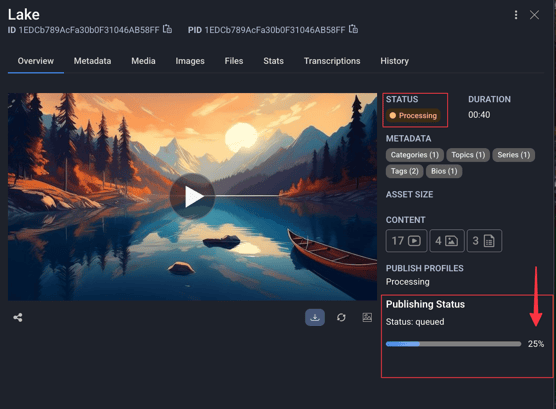
Once the Publishing process is complete, you will see the status updated and all existing Publish Profiles listed in the Overview tab, to the right of the player.

Helpful Tip: The larger the file size or longer the duration, the longer it will take to publish, so plan accordingly.
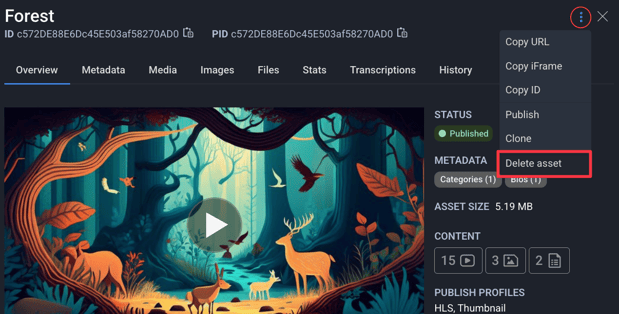
Additional Actions
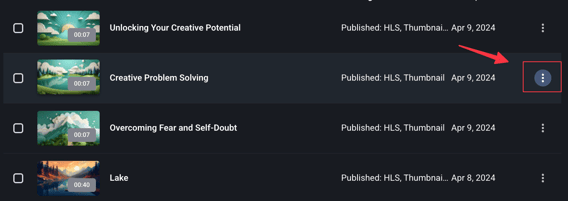
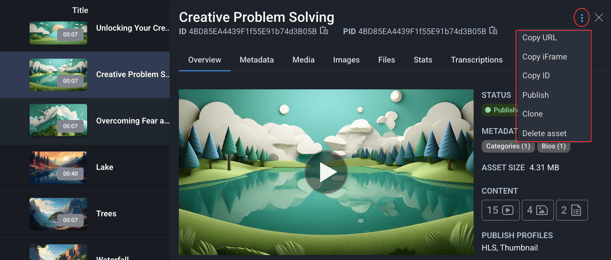
Copy URL & Copy iFrame
Copy ID
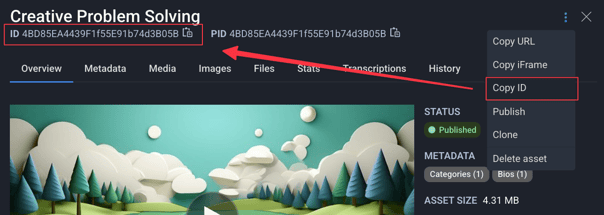
The PID is also listed here
- The PID is generated upon creation to match the asset ID.
While the asset ID is not changeable, you are able to update the PID to use a unique identifier here before implementing the asset for use
Helpful Tip: Never change the PID after the asset has been implemented for use, in order to avoid any possible disconnections from websites, etc.
Publish
Clone

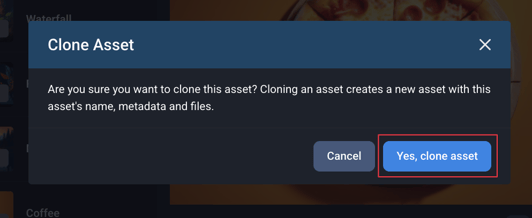
Helpful Tip: This will create a new copy of the original asset (with the same title and “copy” at the end of it). This new asset has a different ID but contains all of the content and metadata from the original asset as well as the same permissions (approval/restrictions) set on the asset. This may be helpful when using parent/child assets.
Delete
For more information on deleting assets, click here
For more information on restoring assets, click here