Managing an Asset
Updated
Managing your assets is straightforward, no matter the size of your library. Each asset can use the full metadata system, include multiple images and files, and be transcoded into different formats—such as SimLive, MP4 downloads, or audio for podcasts.
This article will introduce you to the first tab in the Asset management pane. Introductions to the other tabs can be found here:
- Managing an Asset's Metadata
- Managing an Asset's Media
- Managing an Asset's Images
- Managing an Asset's Files
Select an Asset
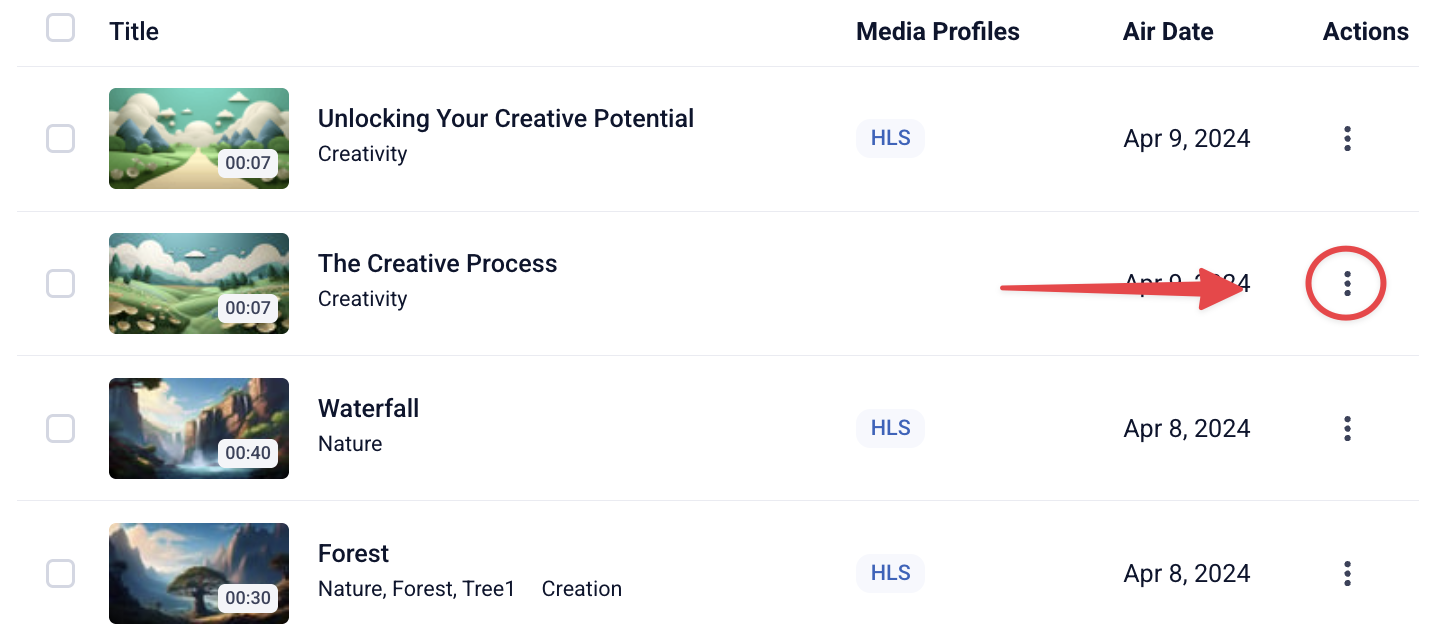
To access a specific asset, click on the asset you want to review or update from the Asset list.
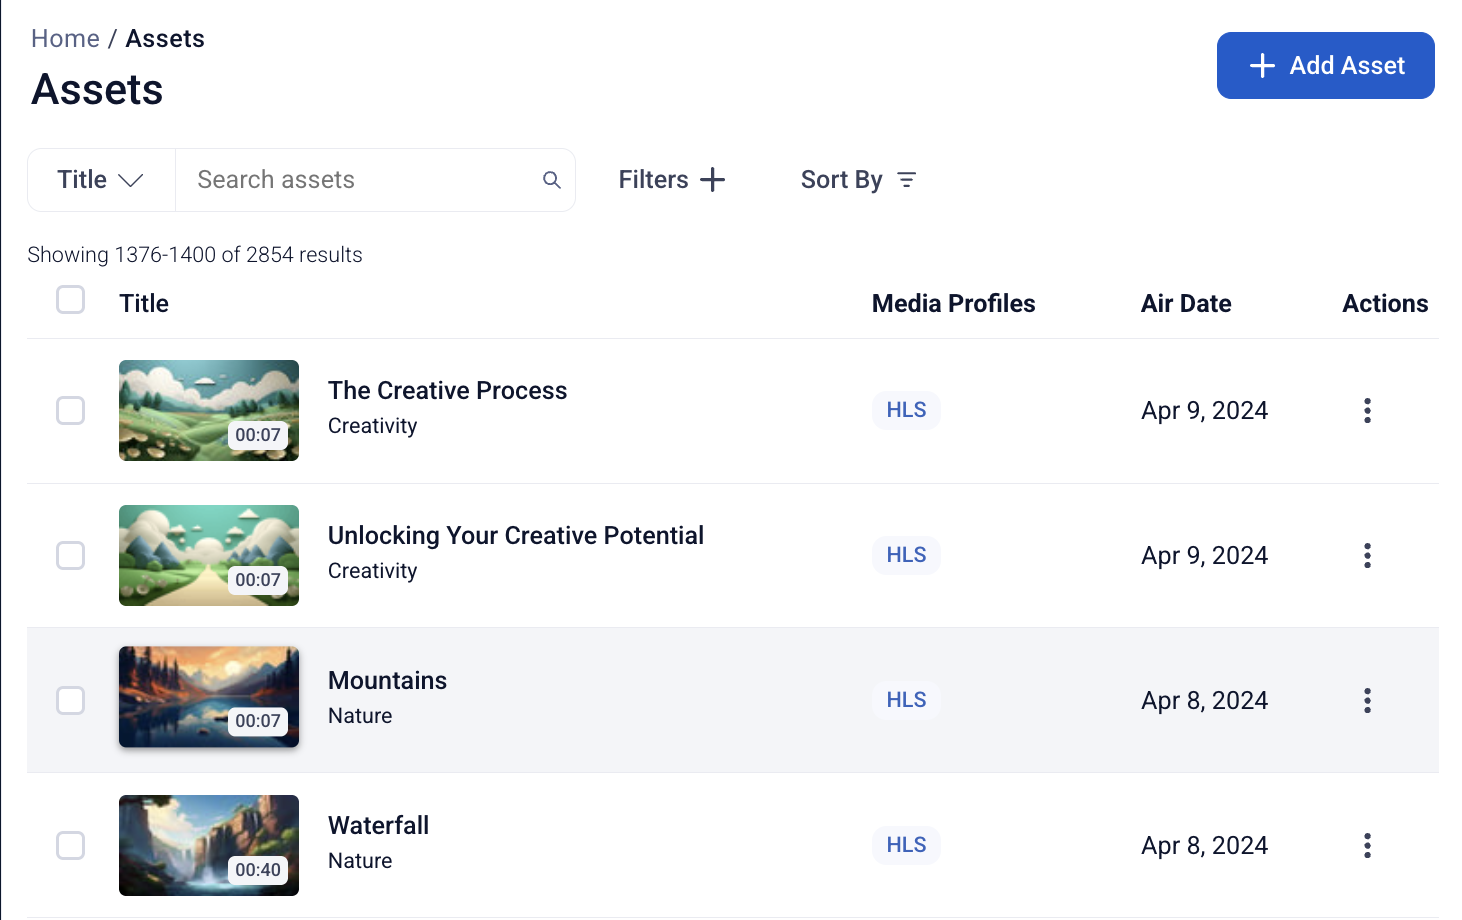
This will open the management pane for that asset and present you the Asset Overview tab.
Basic Information
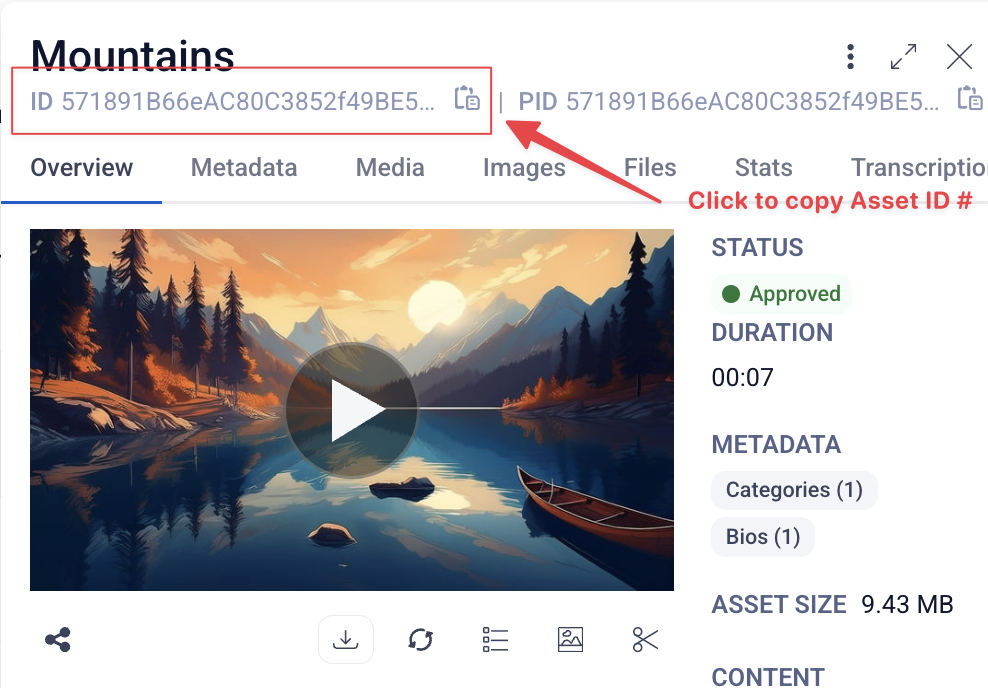
Basic information is found at the top of the asset, under the Asset name, and is visible from all tabs within the Asset.
- Created: date the asset was initially created
- Edited: date the file was last updated
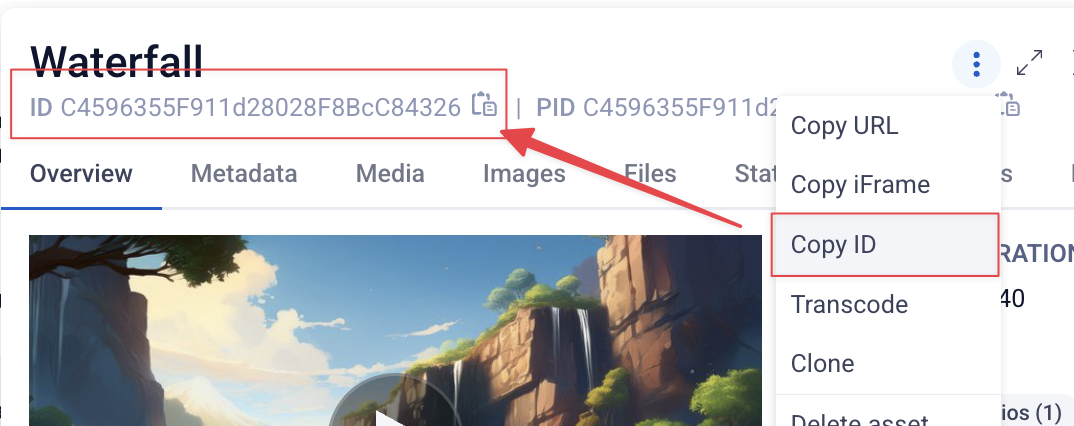
- ID: the identification # assigned to the asset upon creation
Asset Details
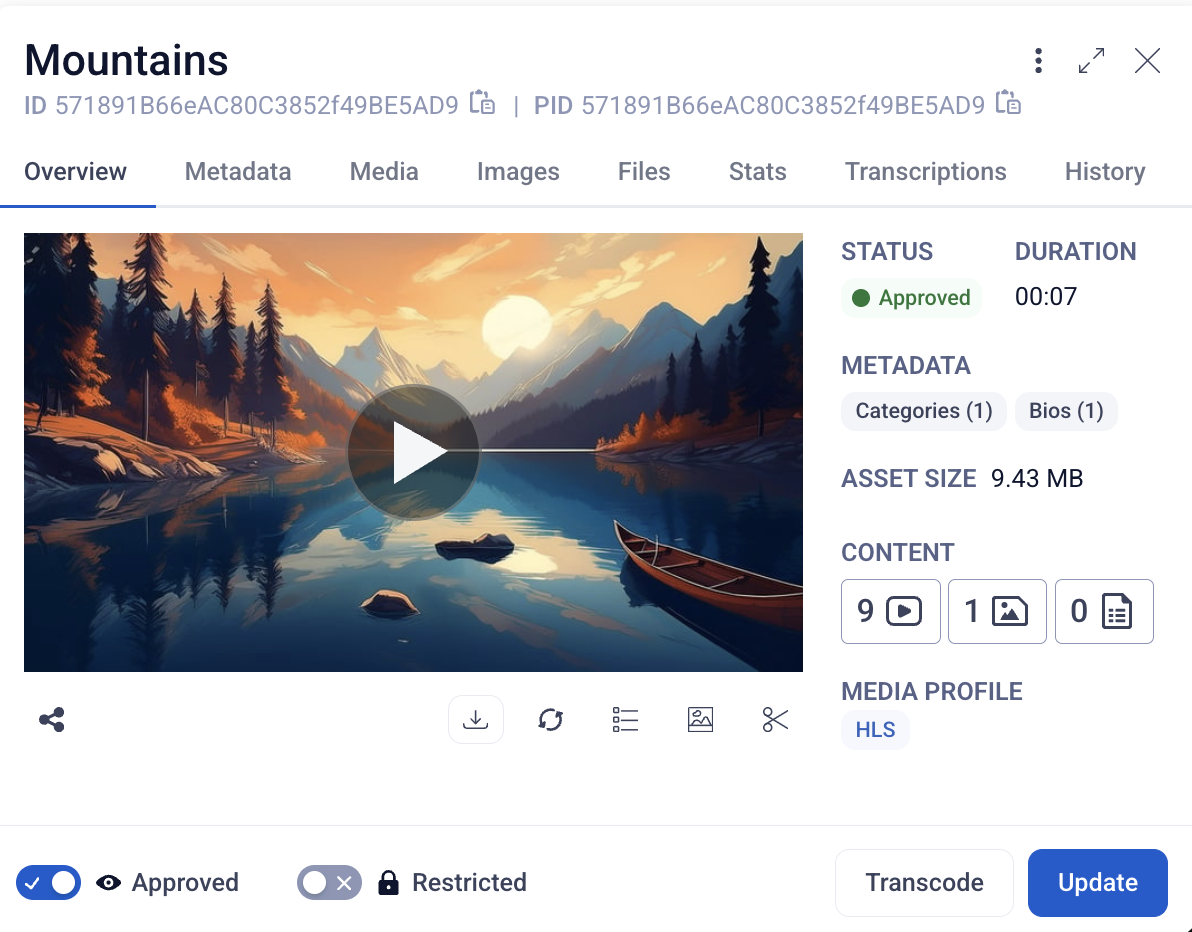
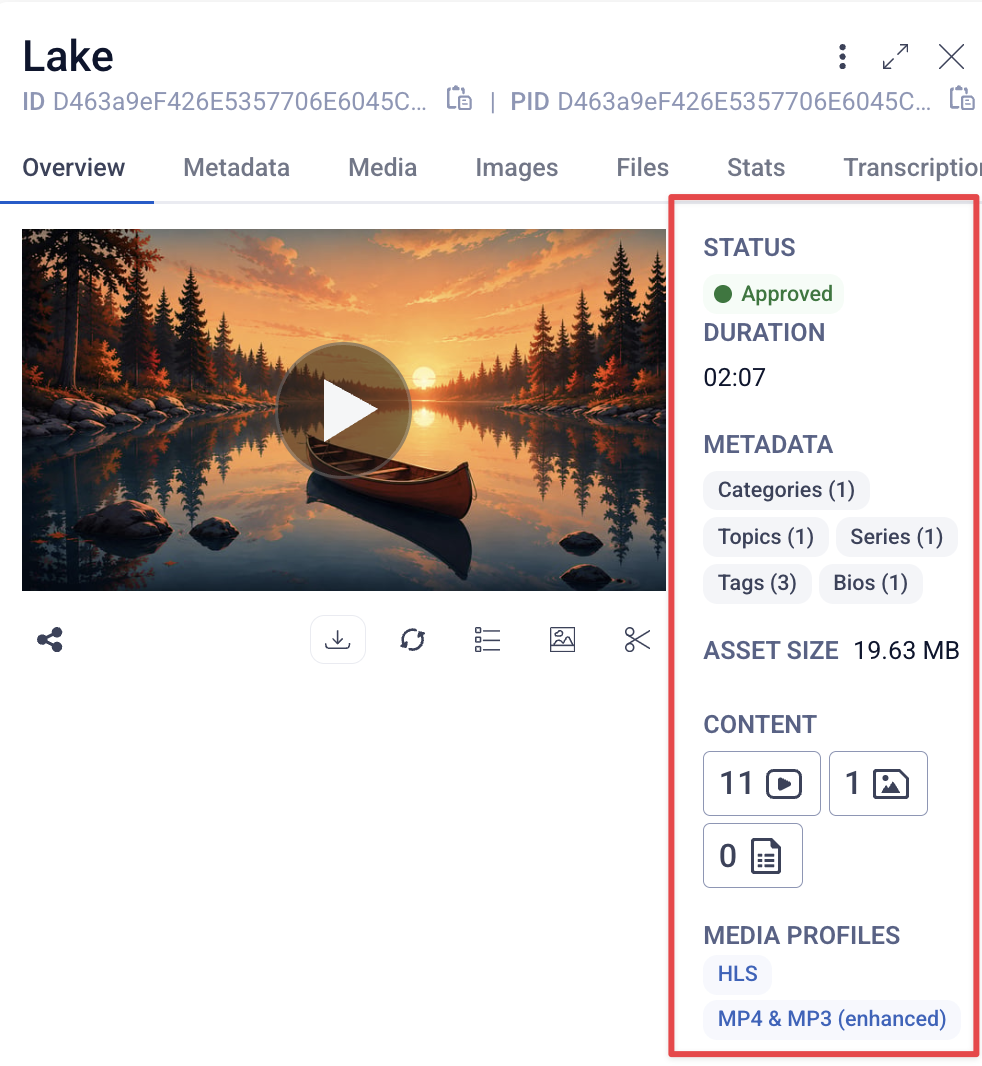
An overview of Asset Details can be seen to the right of the asset thumbnail.
- Status: shows whether an asset has been Transcoded or not.
- Duration: this field will automatically populate with the length of the video content
- Metadata: quick view of what metadata fields currently exist on the asset
- Content: visual representation showing the amount of existing content in the Media, Images or Files tabs of the asset
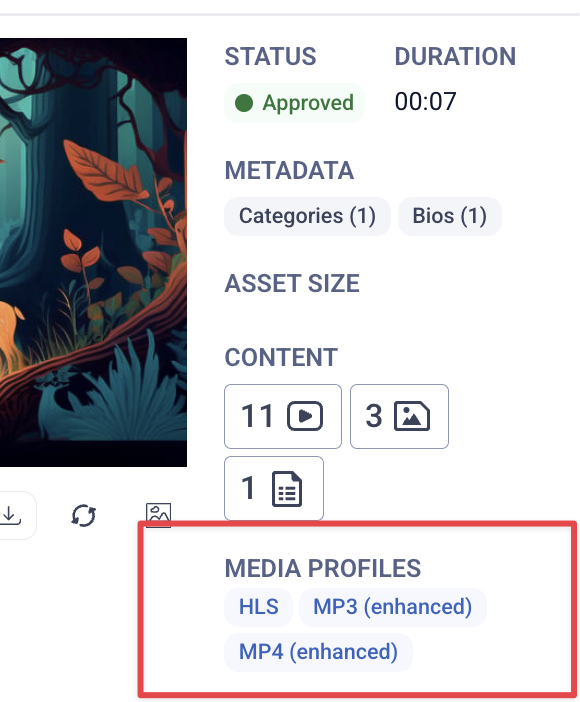
- Media Profile: displays the format of the asset (HLS, MP4, MP3, Thumbnails Only)
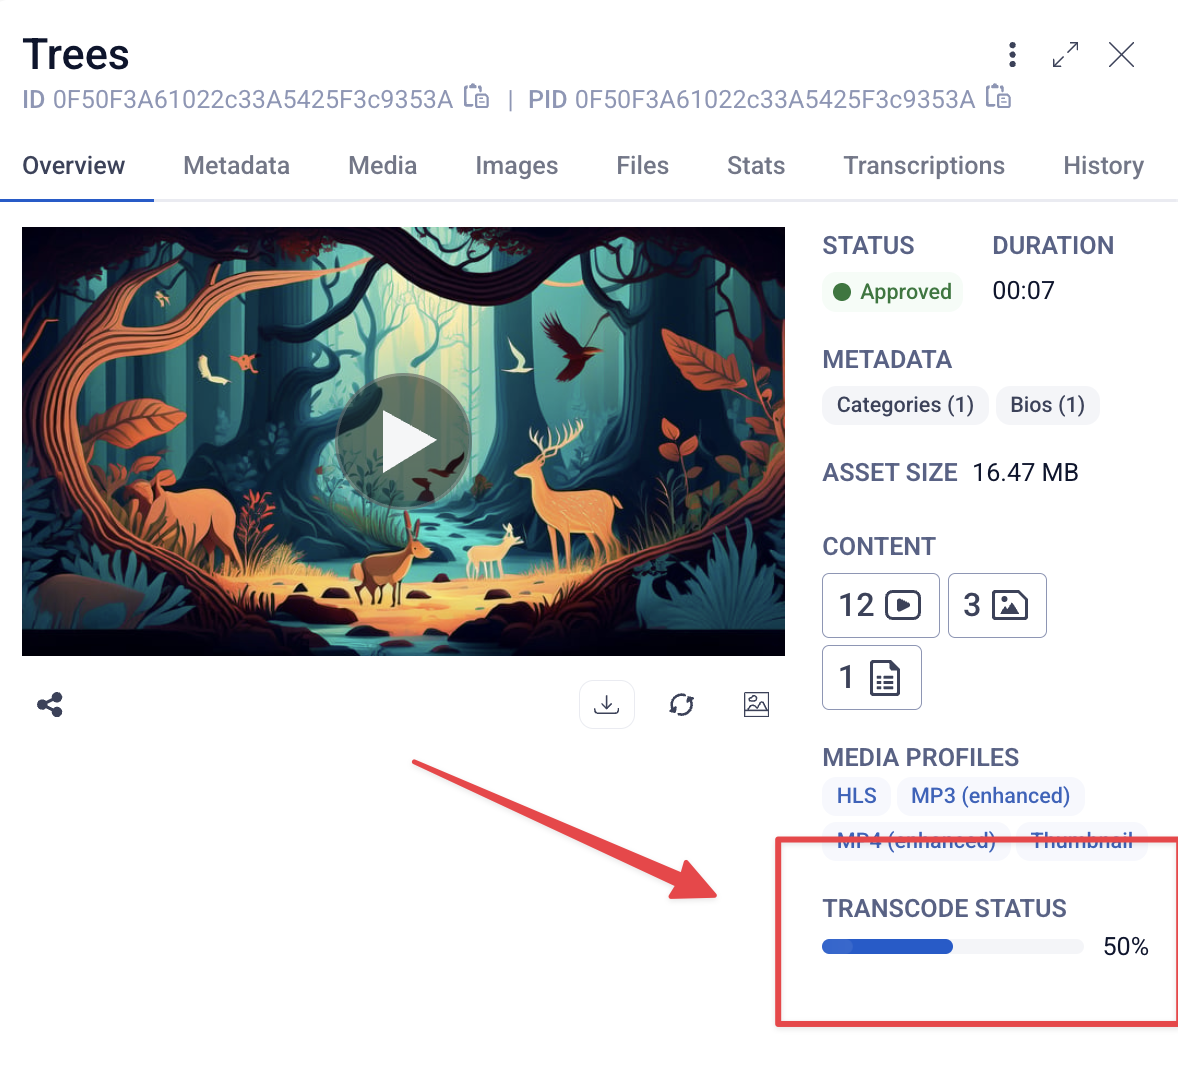
- Transcode Status: shows transcode status (Completed or will show a progress bar when an asset is currently transcoding)
Quick Actions
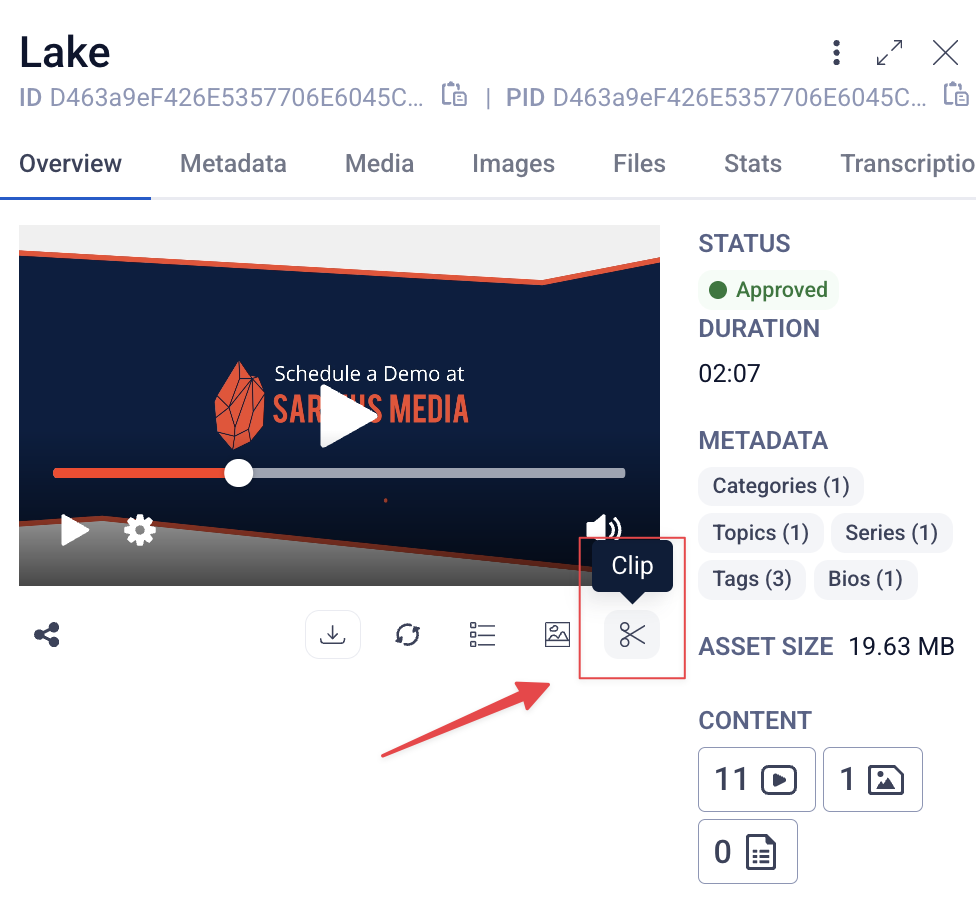
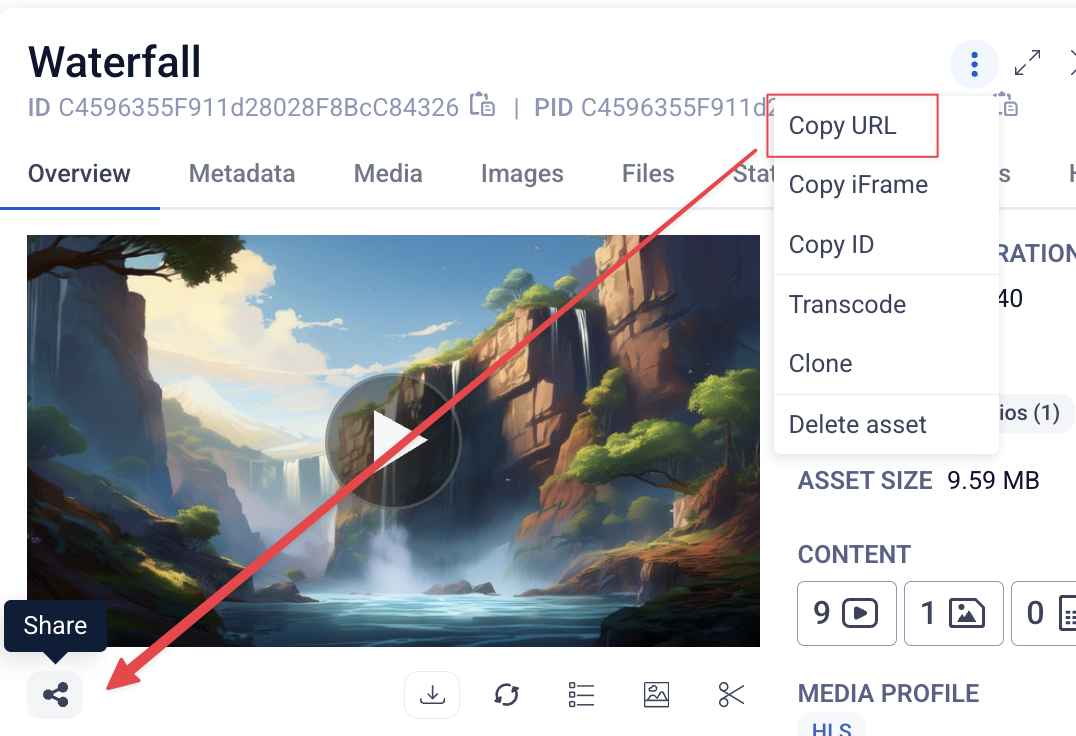
Quick Actions are available below the thumbnail image of the Asset. From here, you can quickly access Player or Embed URLs, Create Thumbnails from the video file or clip your asset for VOD or use on social media sites. Simply hover your cursor over each icon to see what each button is.
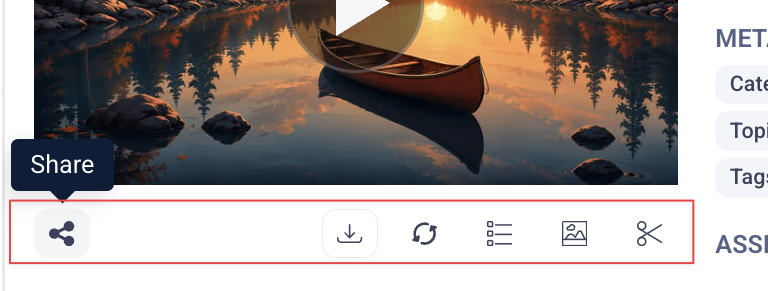
Share: opens a modal with Player and Embed URLs.
- Player URL: If the Asset is a livestream feed, production teams are often given access to a Player URL so they can see the feed as Viewers would from an existing Channel or Event Watch Page. Note: This unauthenticated link has no access restrictions, so should be shared appropriately.
- To copy the Player URL, click on the clipboard icon next to the URL link to copy onto your clipboard.
- Embed URL: If embedding the asset as an iFrame on another site, this Embed URL should be used.
- To copy the iFrame, click anywhere on the Embed URL code.You will then see a confirmation message that it has been copied to your clipboard.
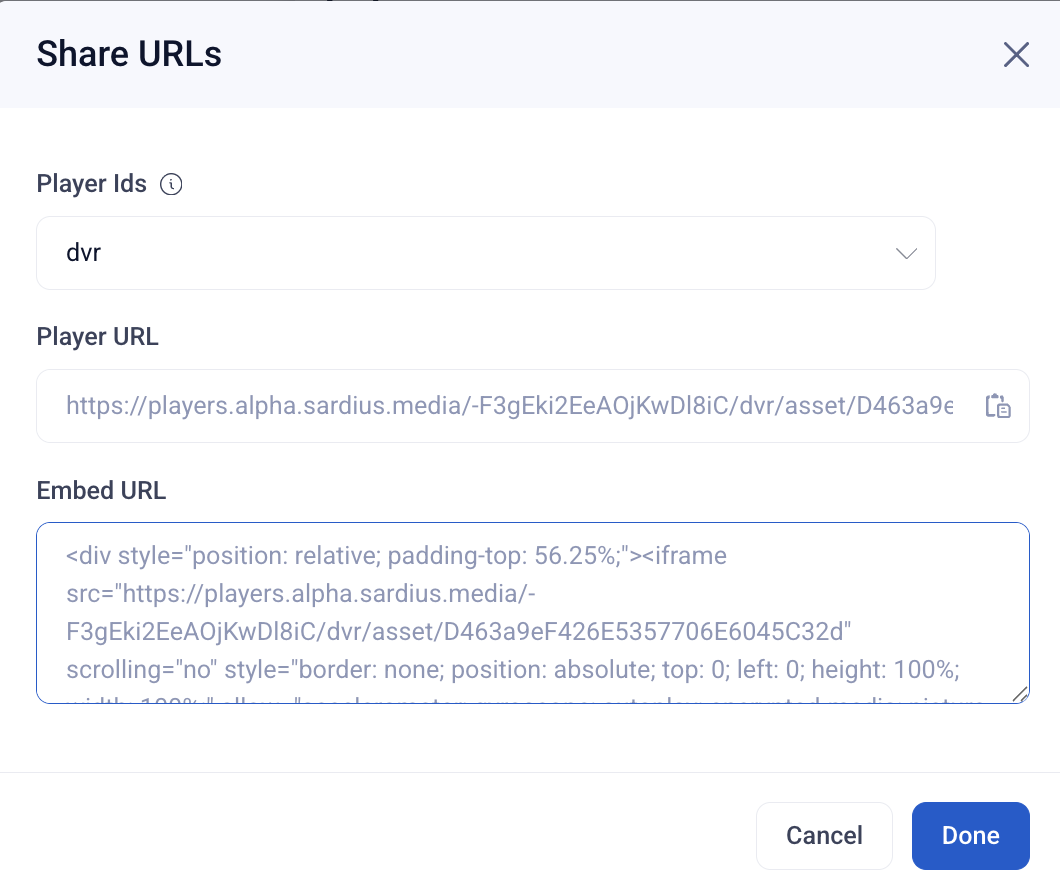
To close the Share URL window, click on either the Cancel or Done button.
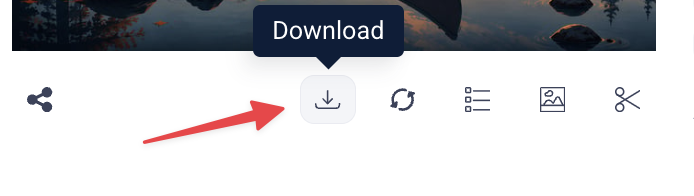
Download: Clicking this will Immediately download a copy of media file to your computer. You can rename as needed once the download is complete.
Refresh Player: For videos - when you have pressed play, the refresh player button will reload the asset and play it from the beginning.
Cue Points:
If your asset has cue points (chapter markers) set up, clicking this icon toggles their display along the video timeline. Each cue point appears as a labeled marker showing its name and time range, making it easy to jump to a specific moment or start a clip right from that point.
**
**
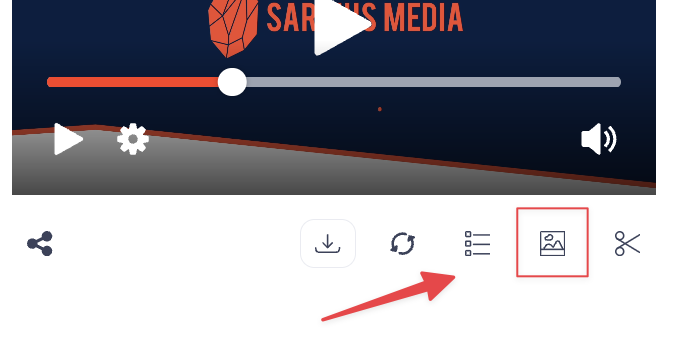
Create Thumbnail: Use this action if you want to create a thumbnail from a frame in the video file. This is a quick and easy way to ensure an appropriate “visual hook” to encourage Viewers to play your asset. As an alternative, you can also upload a thumbnail to the Images tab and set it as the default thumbnail.
To get started click on Create Thumbnail.
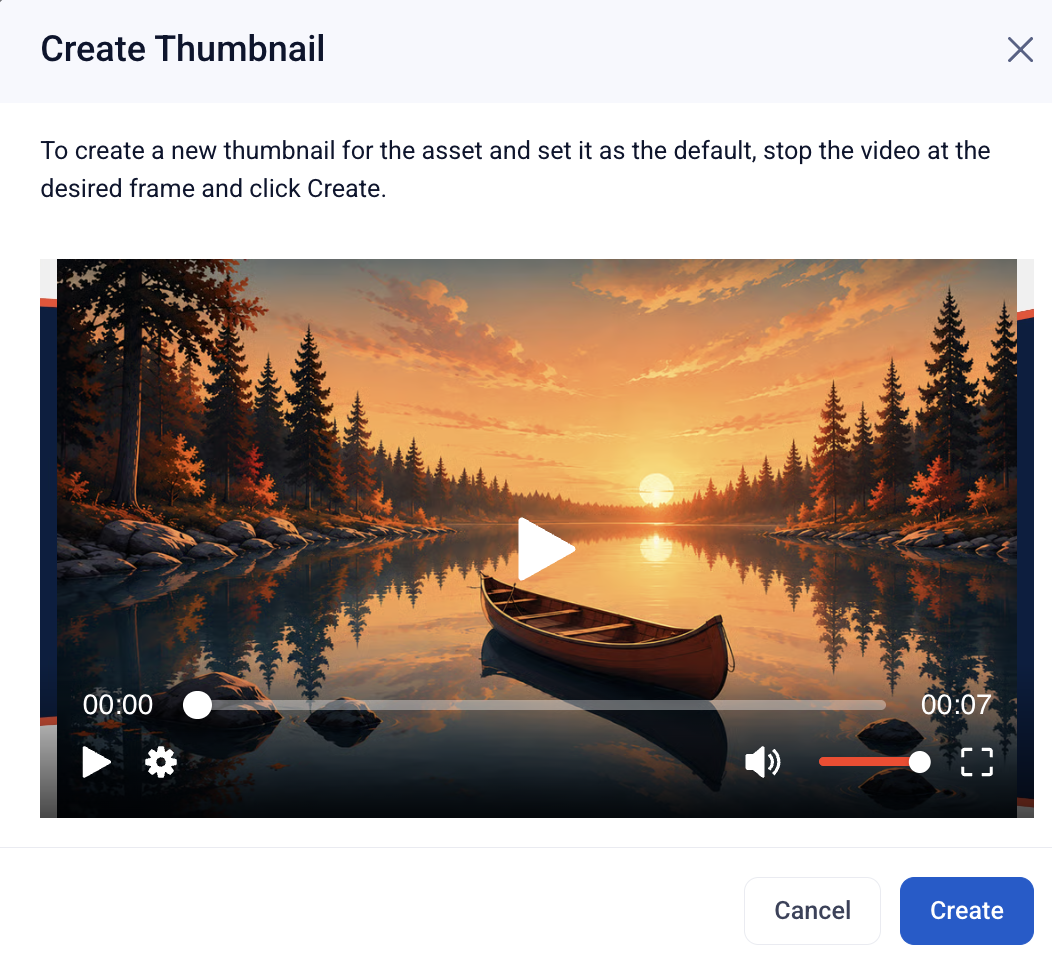
An instructional window will appear explaining how to create a thumbnail by pausing the video on the frame you want your default thumbnail to be set to. The default thumbnail is the frame Viewers will see before initiating the video to play, so it is helpful to capture a frame that best reflects the asset content.
Once you’ve found the desired frame, click the Create button to set it as your default thumbnail.
**
Clip:** There may be times when you want to clip out a portion of a longer asset for the purpose of posting it on social media, create a VOD asset from a livestream asset, etc.
Permissions Actions
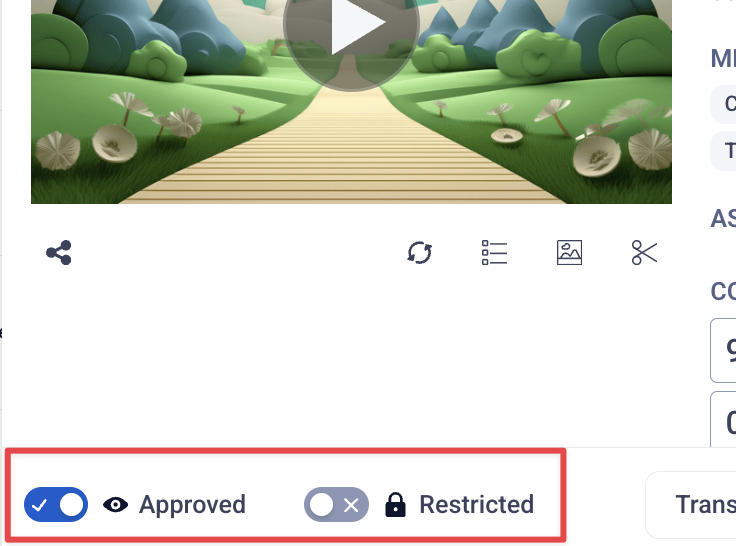
Below the Quick Actions available under the Player, you will also see the Permissions Actions.
This gives you a quick view of whether the asset is approved to show up in a feed or has been restricted to being a private asset only.
To change the status, click the Toggle to turn the setting ON or OFF.
-
ON: indicated by the blue toggle with checkmark
-
OFF: indicated by the gray toggle and ‘X”
Approval Actions
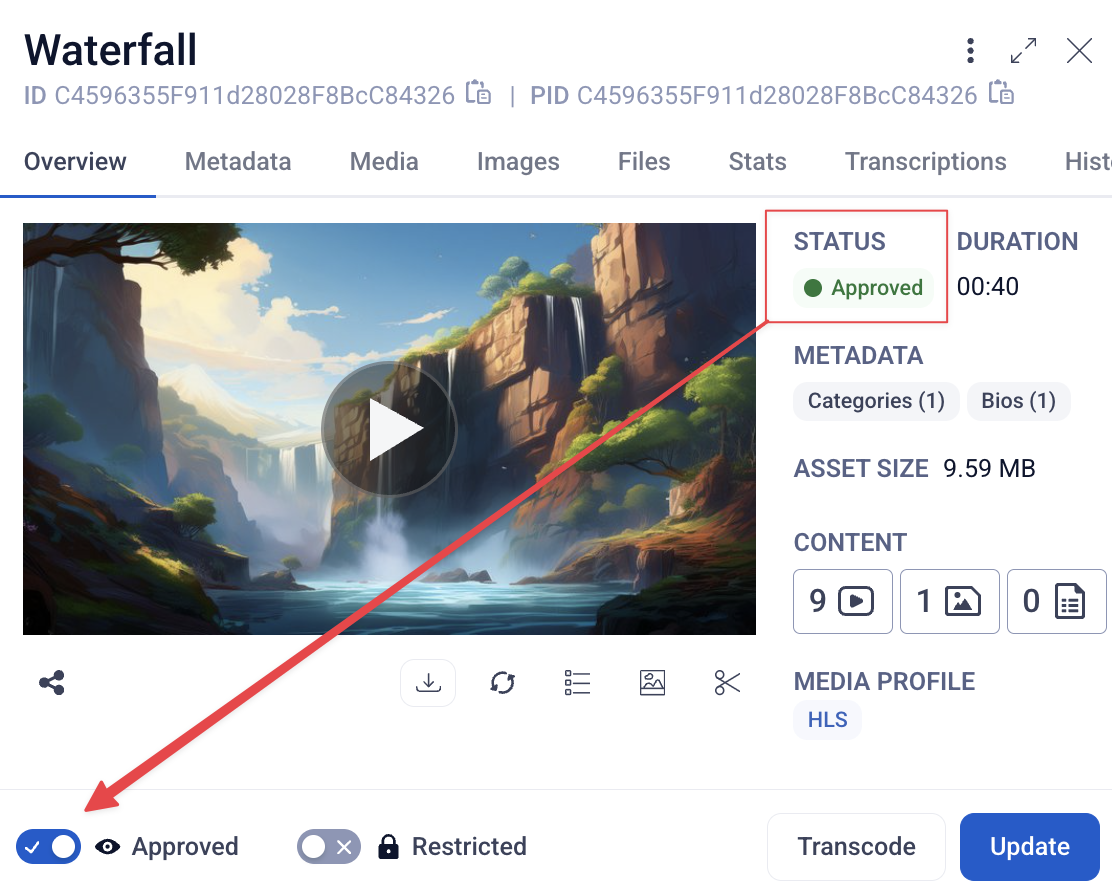
When toggled ON, the asset is Approved to appear in any feeds it has been added to. **If the asset is not approved, it will not show up in any private or public feeds.
**
-
When an Asset is approved, the thumbnail is no longer grayed out from the list view, and the icon in the bottom left corner is removed, indicating that its visibility in feeds has been approved.
-
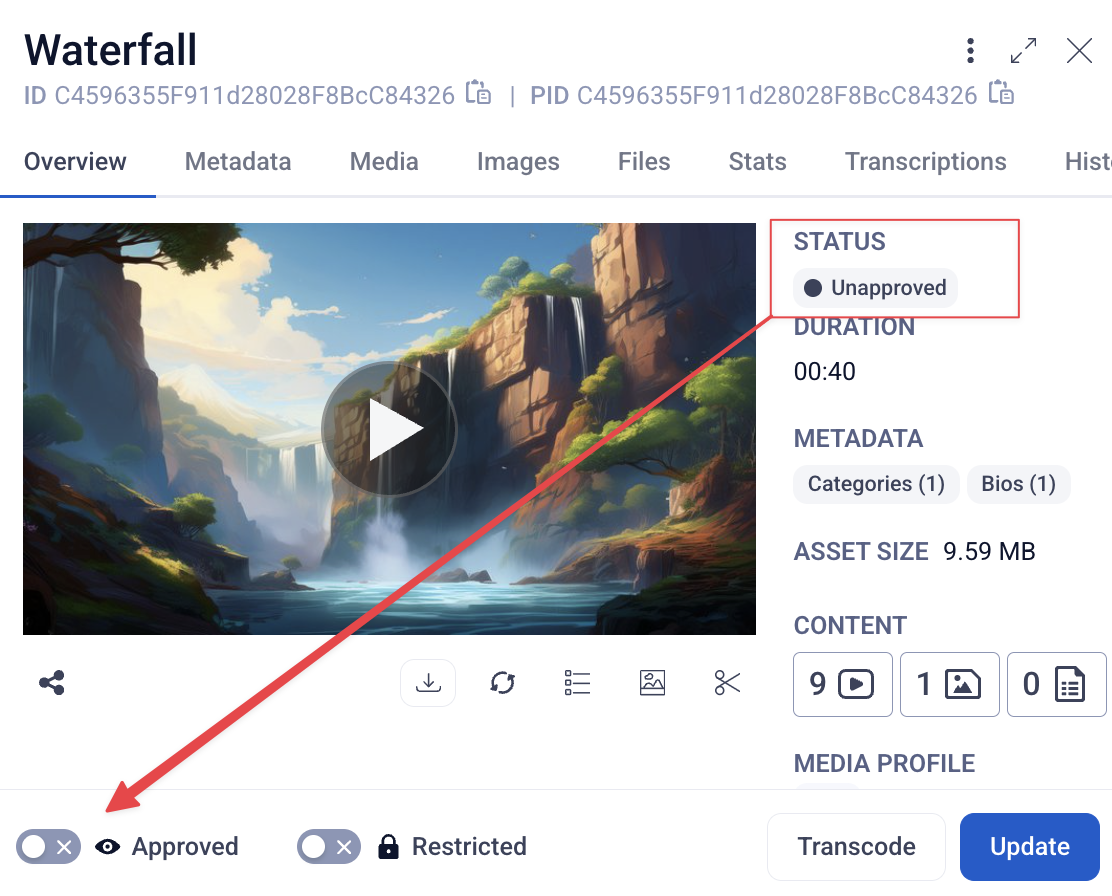
The Status in the top right of the asset confirms the approval state.
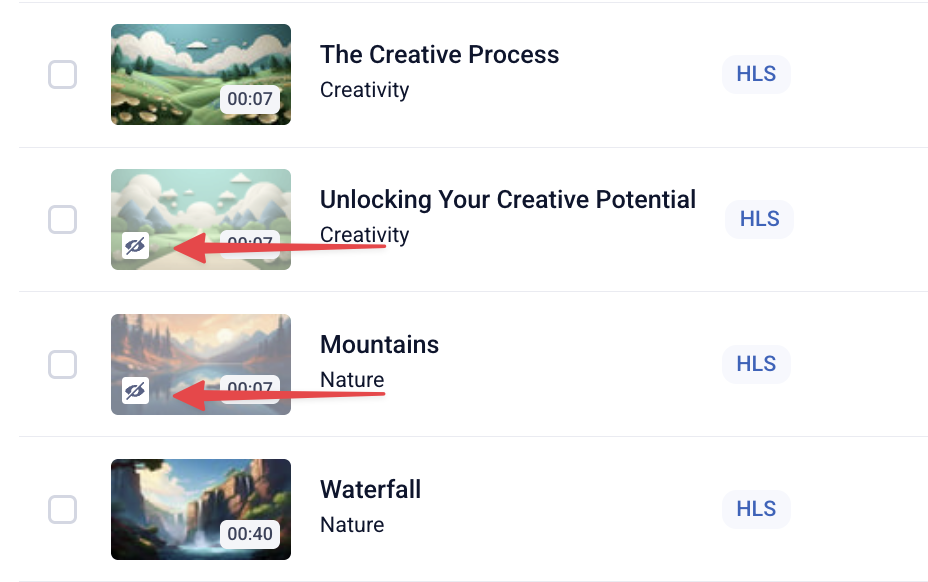
Toggle OFF to unapprove an asset. Unapproved assets will not appear in any public or private feeds until approved.
-
Unapproved assets are quickly identifiable in the list view because they are grayed out and show the “no visibility” icon on the thumbnail.
-
The status in the top right also confirms the unapproved state
Restriction Actions
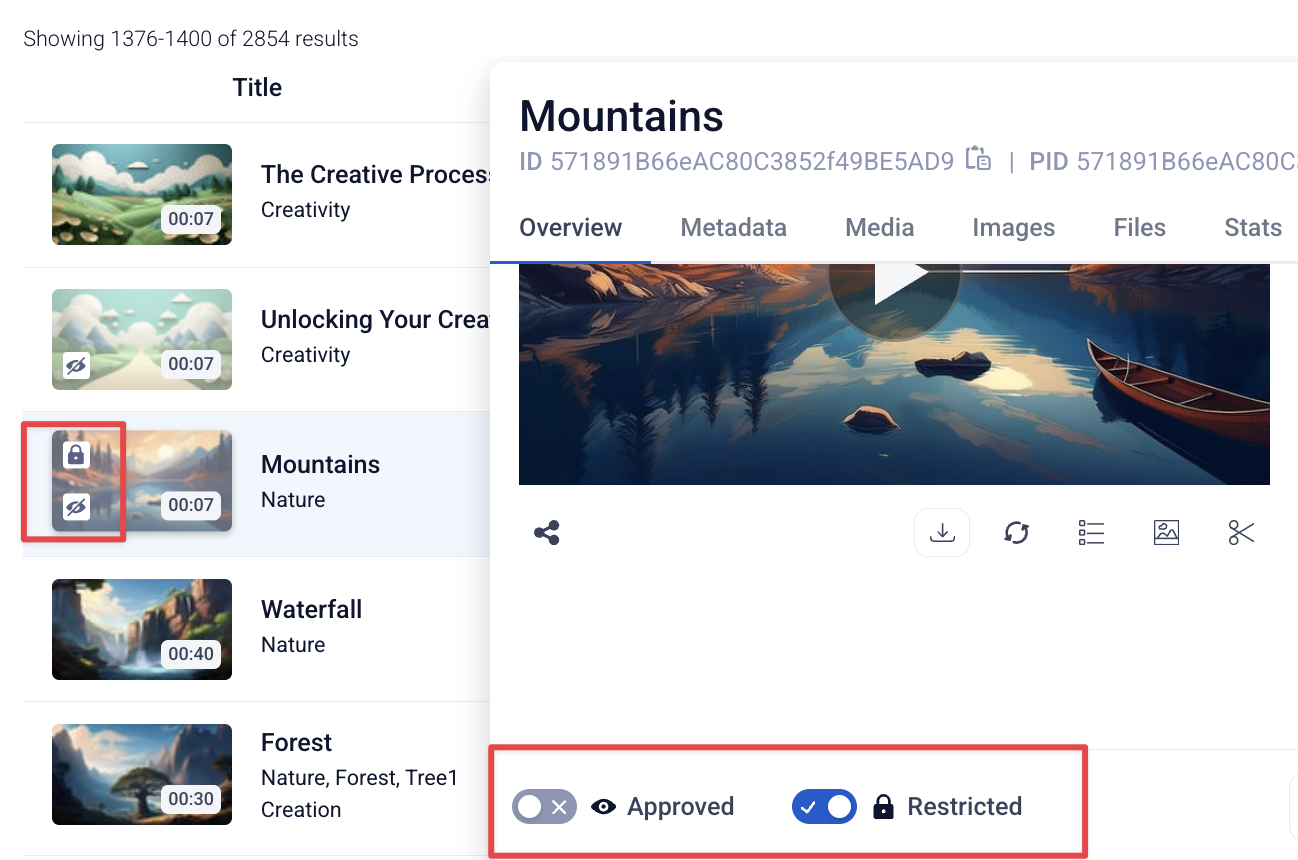
Toggle ON to hide asset in a Public Feed but make visible in Private Feeds.
- **This setting only works when "Enable Private Feed" toggle is also ON in Feed Restrictions.
**
Restricted assets are depicted in the list view by the lock icon over the thumbnail, indicating it has restrictions added.
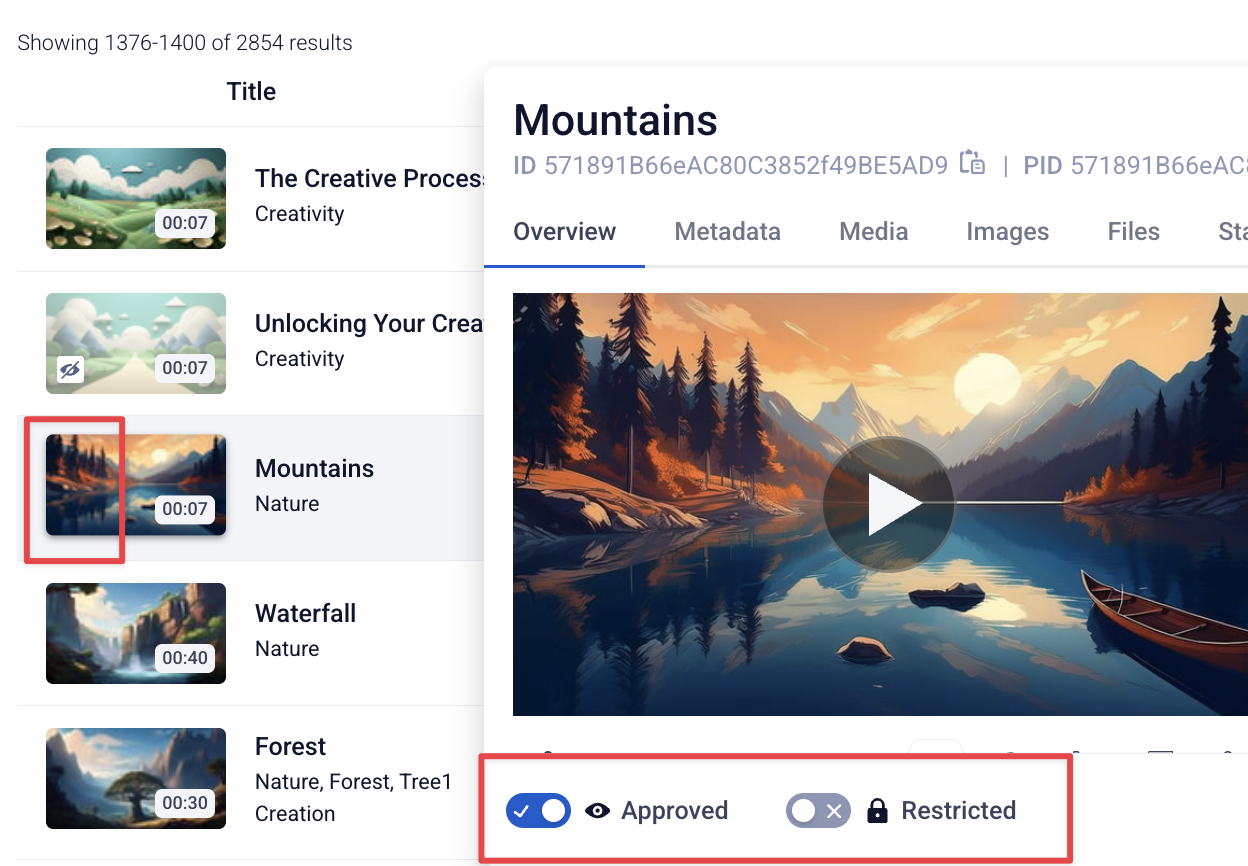
Toggle OFF to ensure this asset is available to all viewers, in any feeds it is added to.
- Unrestricted assets do not show the lock icon on the thumbnail when viewing from the list, indicating they will not be hidden from any viewers.
Transcode Asset
You can transcode your asset into multiple media profiles (HLS, MP4, MP3, etc.)
Traanscoding as an MP4 or MP3 makes this asset available for download in these media file types as well. For more info, refer to the Downloadable Links article.
Transcoding as HLS makes this asset available for use in workflows such as Sardius SimLive.
MP4s are best suited for Advanced SimLive streams.
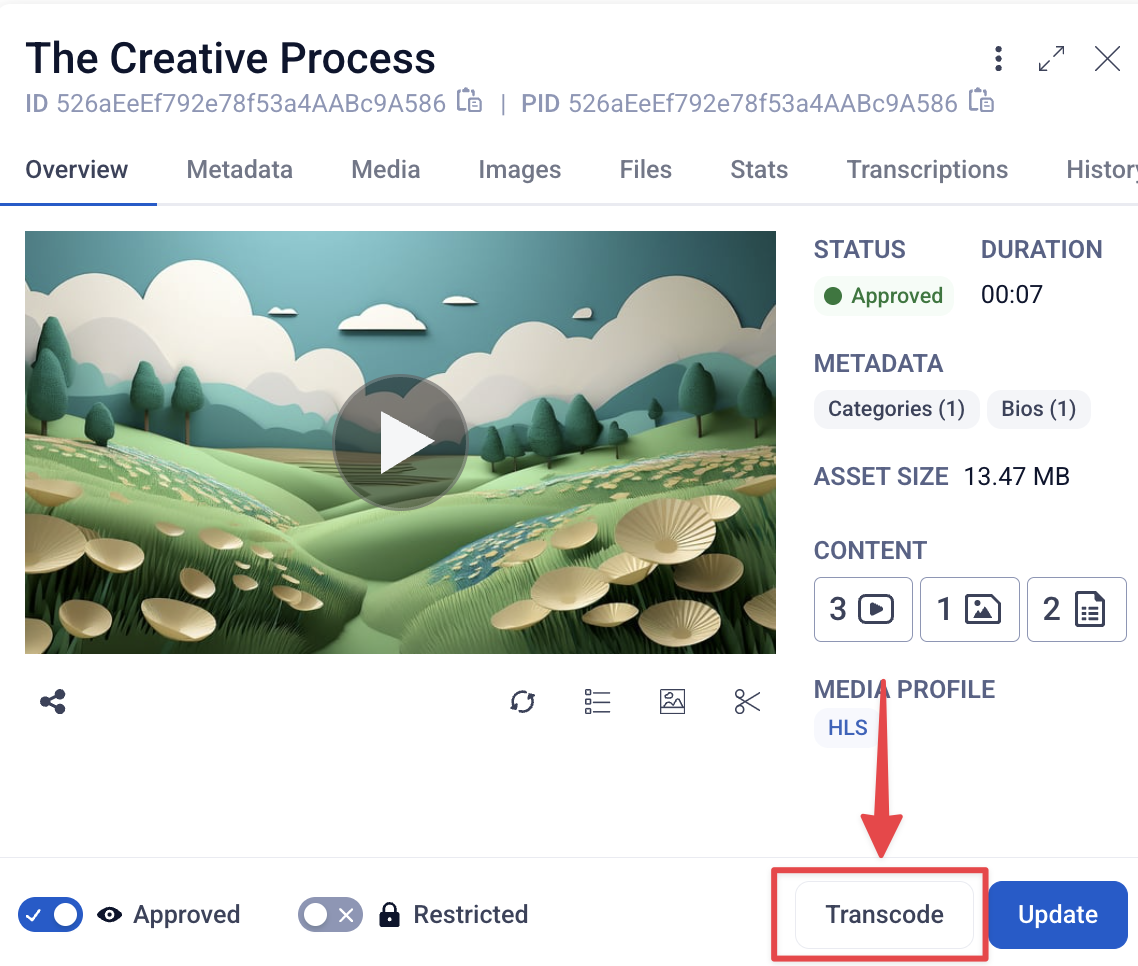
To transcode an asset, find it in the list view and click on the specific asset to open the detailed window. The Transcode button is always visible in the lower right hand corner from any of the asset tabs.
**Click on the Transcode button to open the Transcoding modal.
**
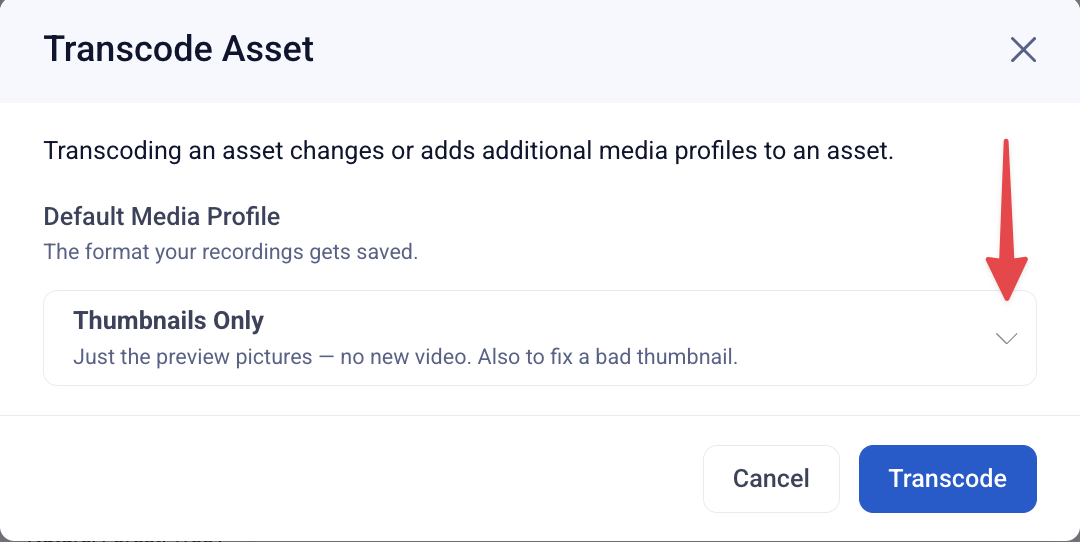
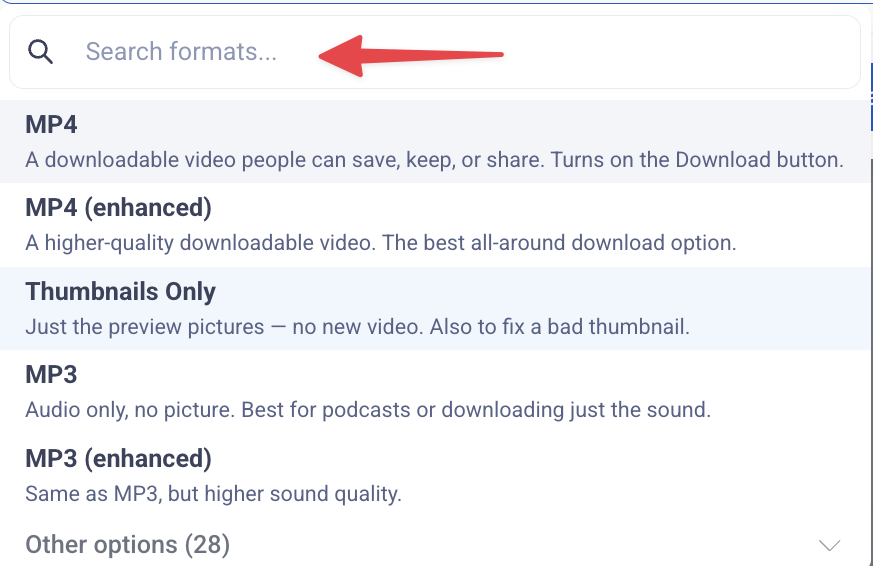
When the modal appears, select the appropriate media profile from the list of dropdown options and click the Transcode button when finished.
As your file transcodes, you can view your Transcode Status in the Overview tab, to the right of the Player.
Once the Transcode process is complete, you will see the status updated and all existing Media Profiles listed in the Overview tab, to the right of the player.
Additional Actions
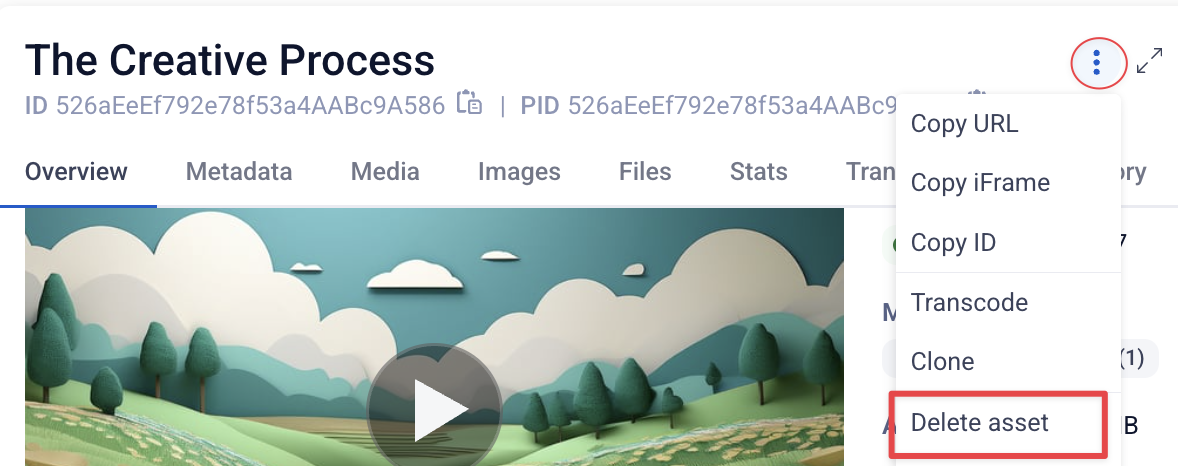
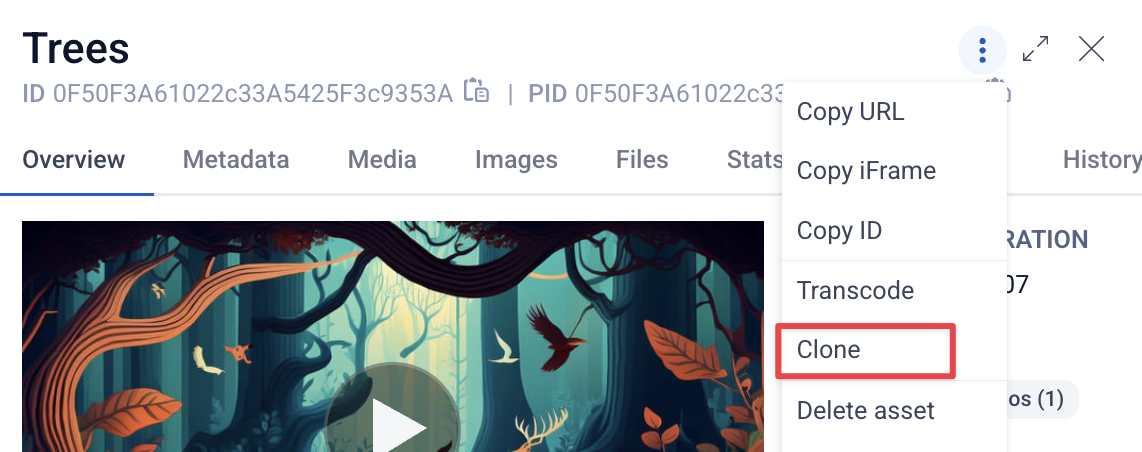
Additional actions are accessible from the hamburger menu in the upper right hand corner of the asset.
From here you can: Copy the asset URL, iFrame or ID or Transcode, Clone or Delete an Asset.
Copy URL & Copy iFrame
The Copy URL and Copy iFrame option will copy the same information found from the Share quick options below the player on the asset. This is just another way to easily access and copy that info to your clipboard.
Copy ID
Copy ID option does the same thing as copying the ID from the Basic Information area at the top of the asset. This is just another way to easily access and copy that info to your clipboard.
The PID is also listed here
-
The PID is generated upon creation to match the asset ID.
****While the asset ID is not changeable, you are able to update the PID to use a unique identifier here before implementing the asset for use
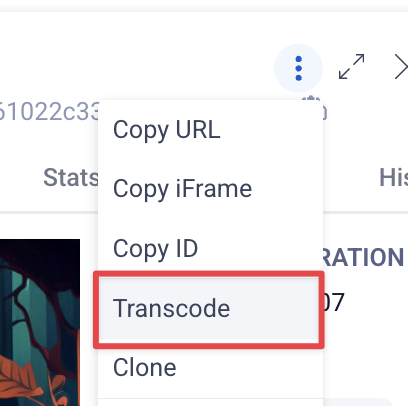
Transcode
Transcode option does the same thing as clicking the Transcode option button at the bottom right of the asset. This is just another way to transcode your
asset.
Clone
To clone an asset, select Clone from the hamburger dropdown menu (click on the three vertical dots to see the option) in the upper right hand corner of the asset.
This pulls up a confirmation modal about cloning the asset.
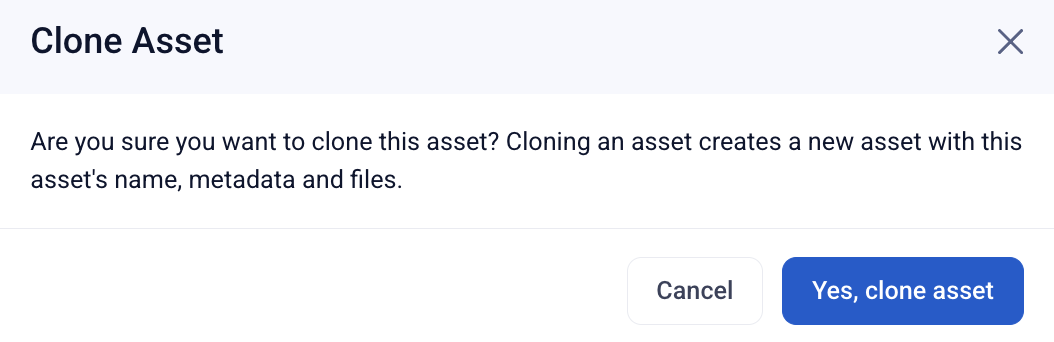
If you are sure you want to clone the asset, click the blue “Yes, clone asset” button.
Delete
If you need to delete an asset, you can also do this from within that same hamburger menu on the top right of the asset.
To delete an asset, click on the hamburger menu and select Delete Asset from the dropdown options. This will open a confirmation modal. If you are sure you want to delete the Asset, click on the red “Yes, Delete Asset” button on the bottom right.