
Setup and Change Default Stream Settings
Updated
Important Update: A new version of our stream stepper has been released, sporting new features and improved performance. Default stream settings are configured through the Stream Stepper and automatically apply to newly created events. You can still override these defaults on a per-event basis when specific needs differ.
What Are Default Stream Settings?
Default Stream Settings define how your channel will be pre-configured when creating a new live event using the Stream Stepper. These settings save time and ensure consistency across events by automatically pre-populating your source, encoder, and outputs.
Key points:
-
Defaults apply only to new events created after they’re set.
-
Defaults can be changed at any time.
-
You can override defaults for individual events if needed.
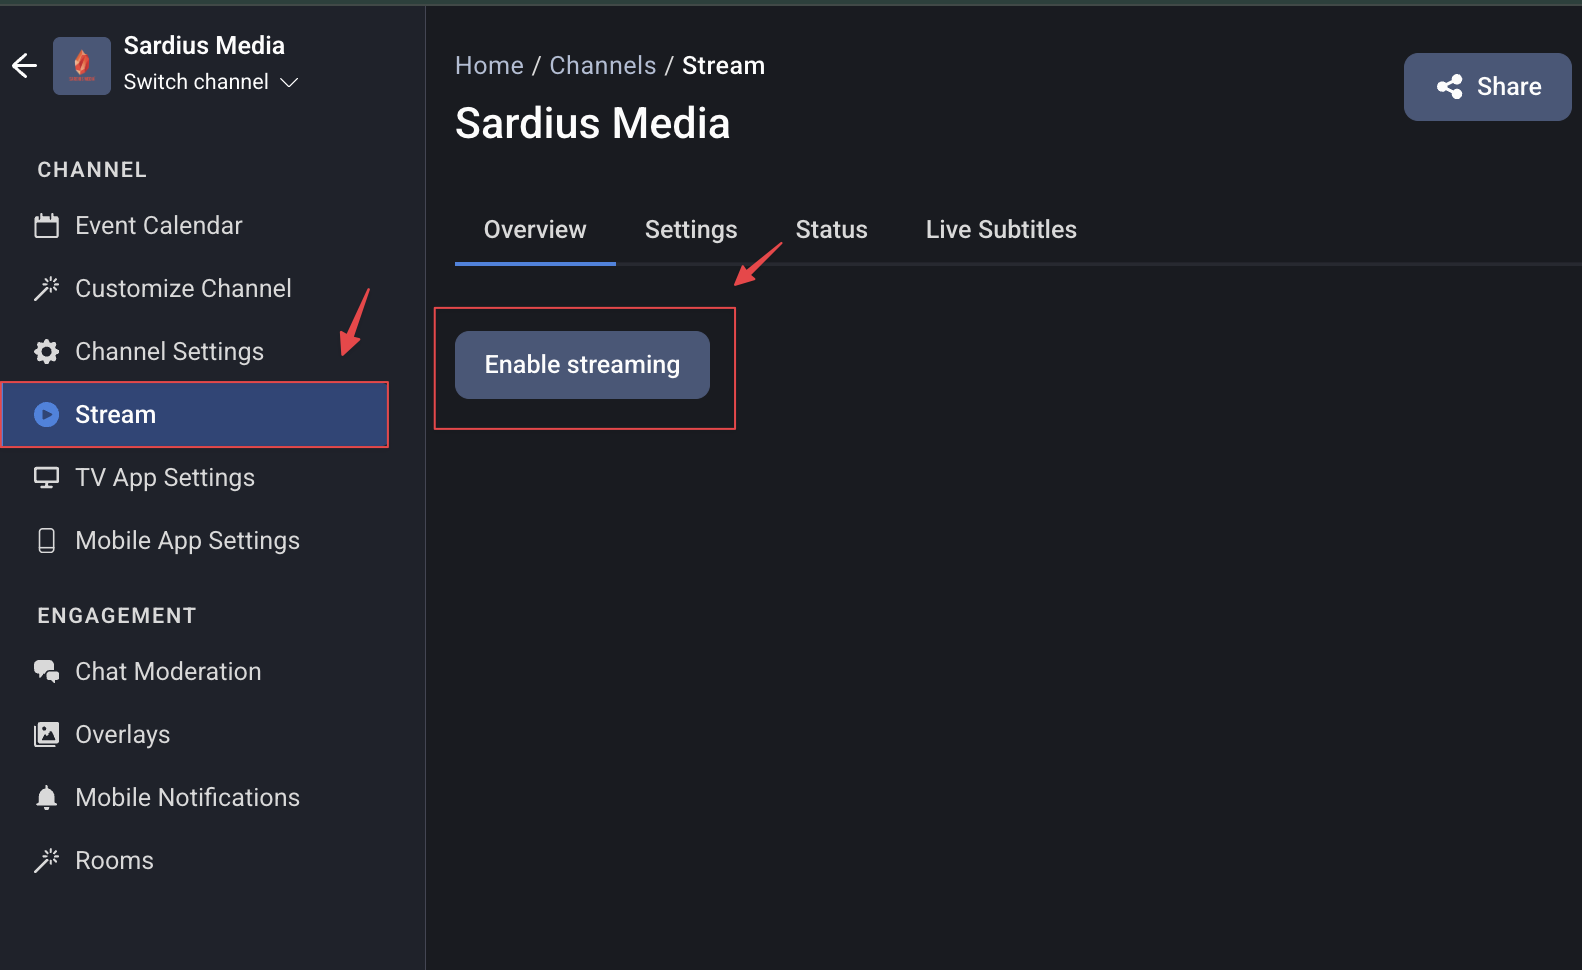
1. Enable Streaming for Your Channel
Before creating defaults, make sure streaming is enabled on your Sardius Channel:
-
Open the Control Panel and navigate to Channels.
-
Select the channel you want to configure.
-
In the sidebar, click Stream.
-
Click Enable streaming.
Once streaming is enabled, you'll be prompted to start defining your default stream settings
2. Configure Your Default Stream Settings
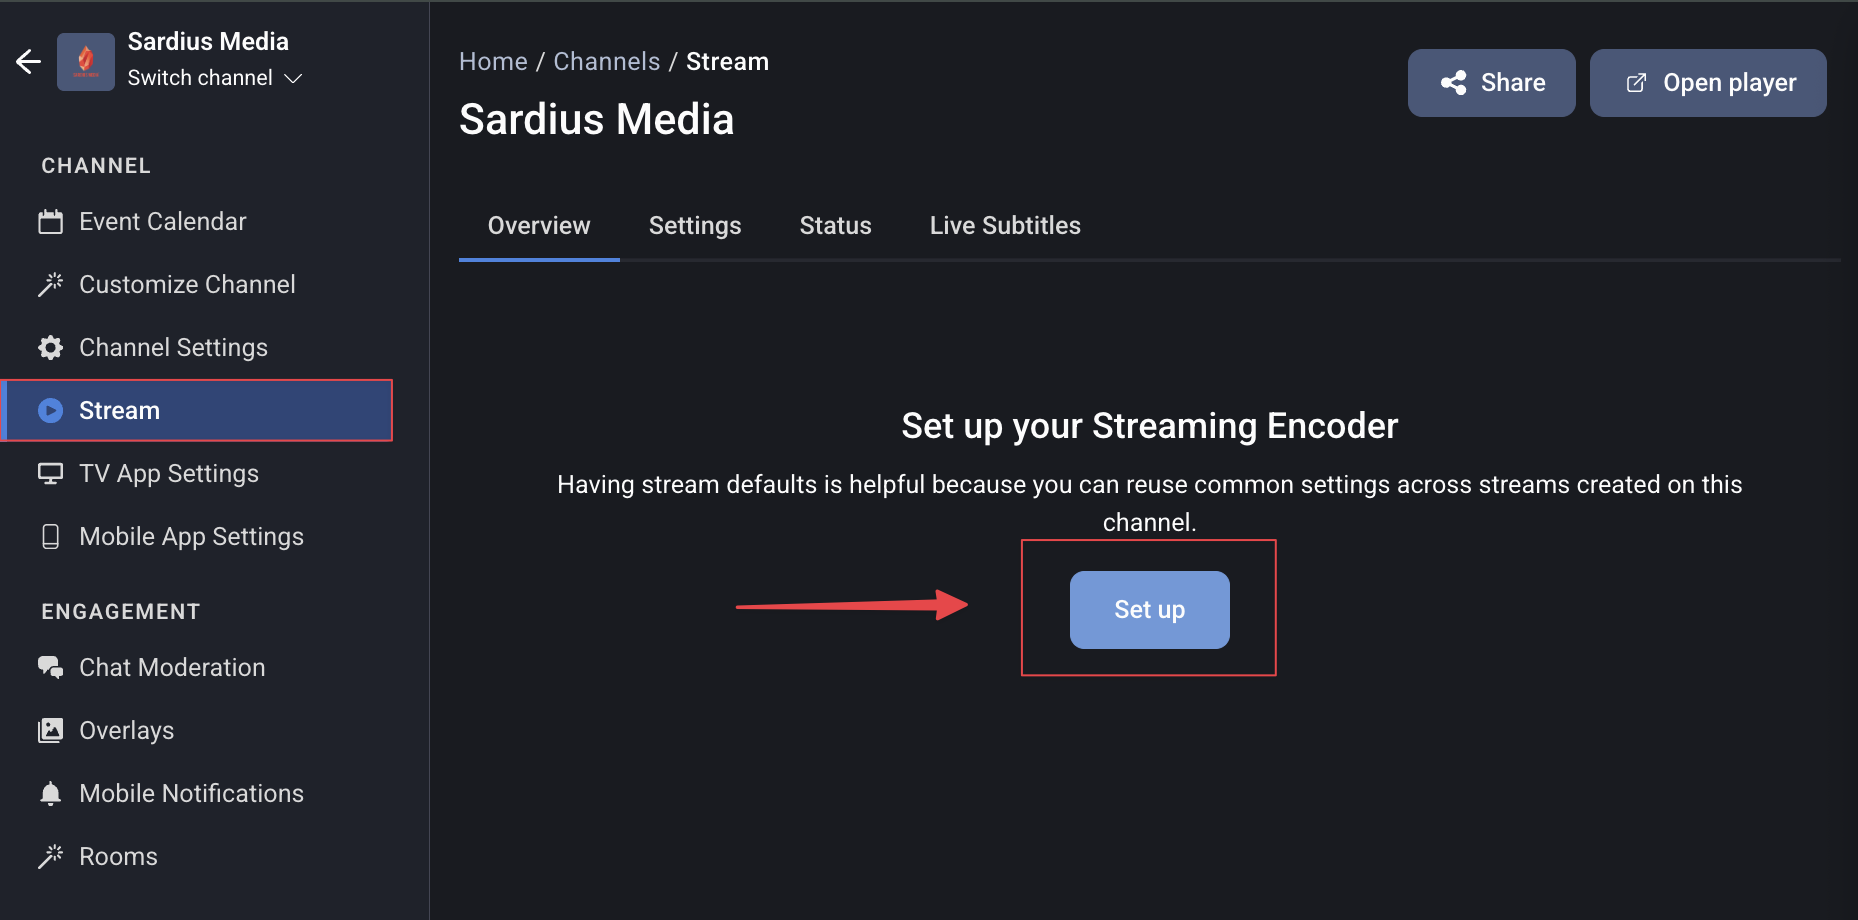
When you click Set defaults, the Stream Stepper will open and guide you through the configuration:
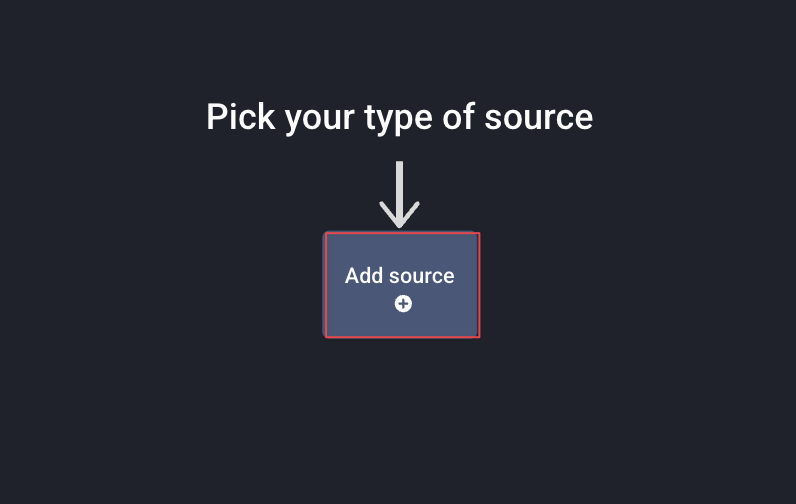
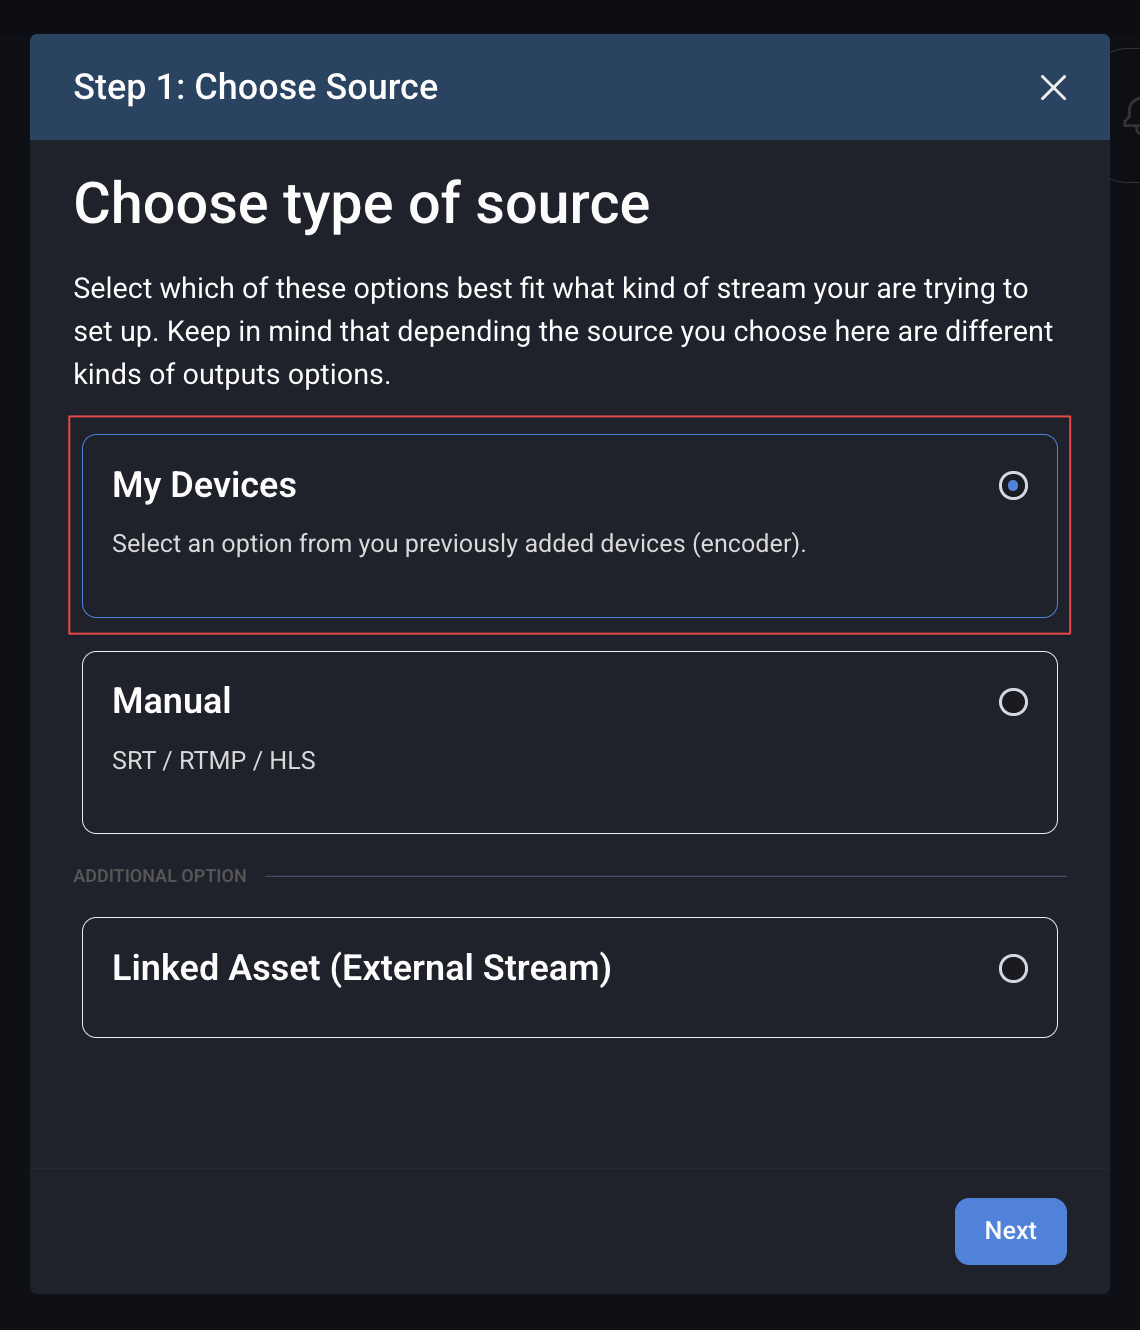
Step 1: Choose Source
Select the source type you want to use by default for automatic event setup — for example, My Devices will allow you to choose from your paired encoders.
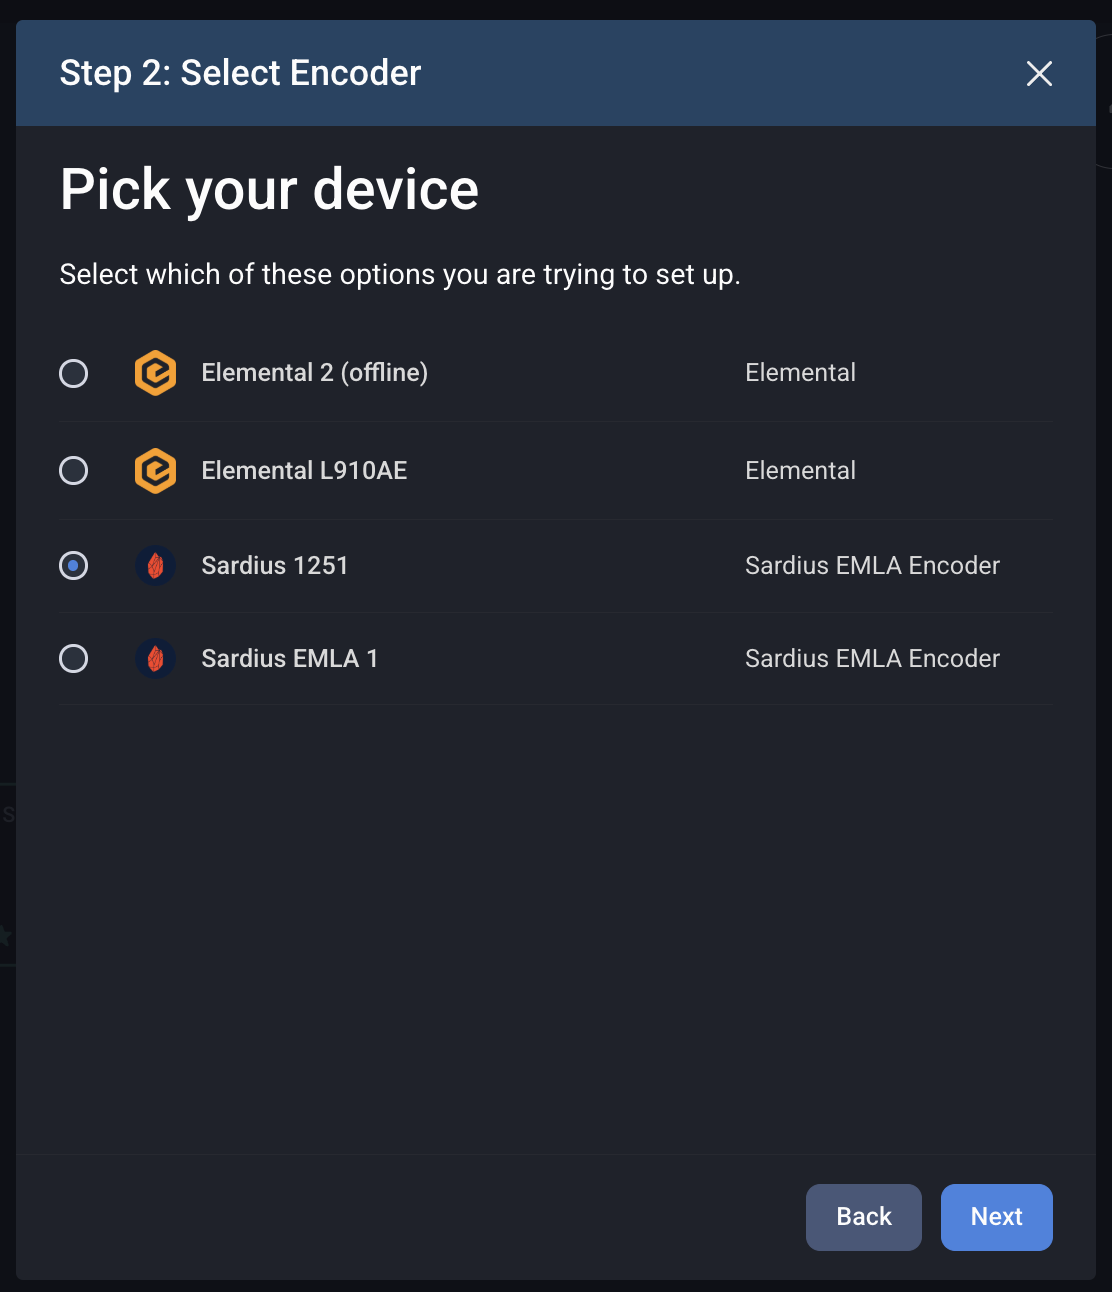
Step 2: Select Encoder
Choose a previously paired encoder that should be selected by default.
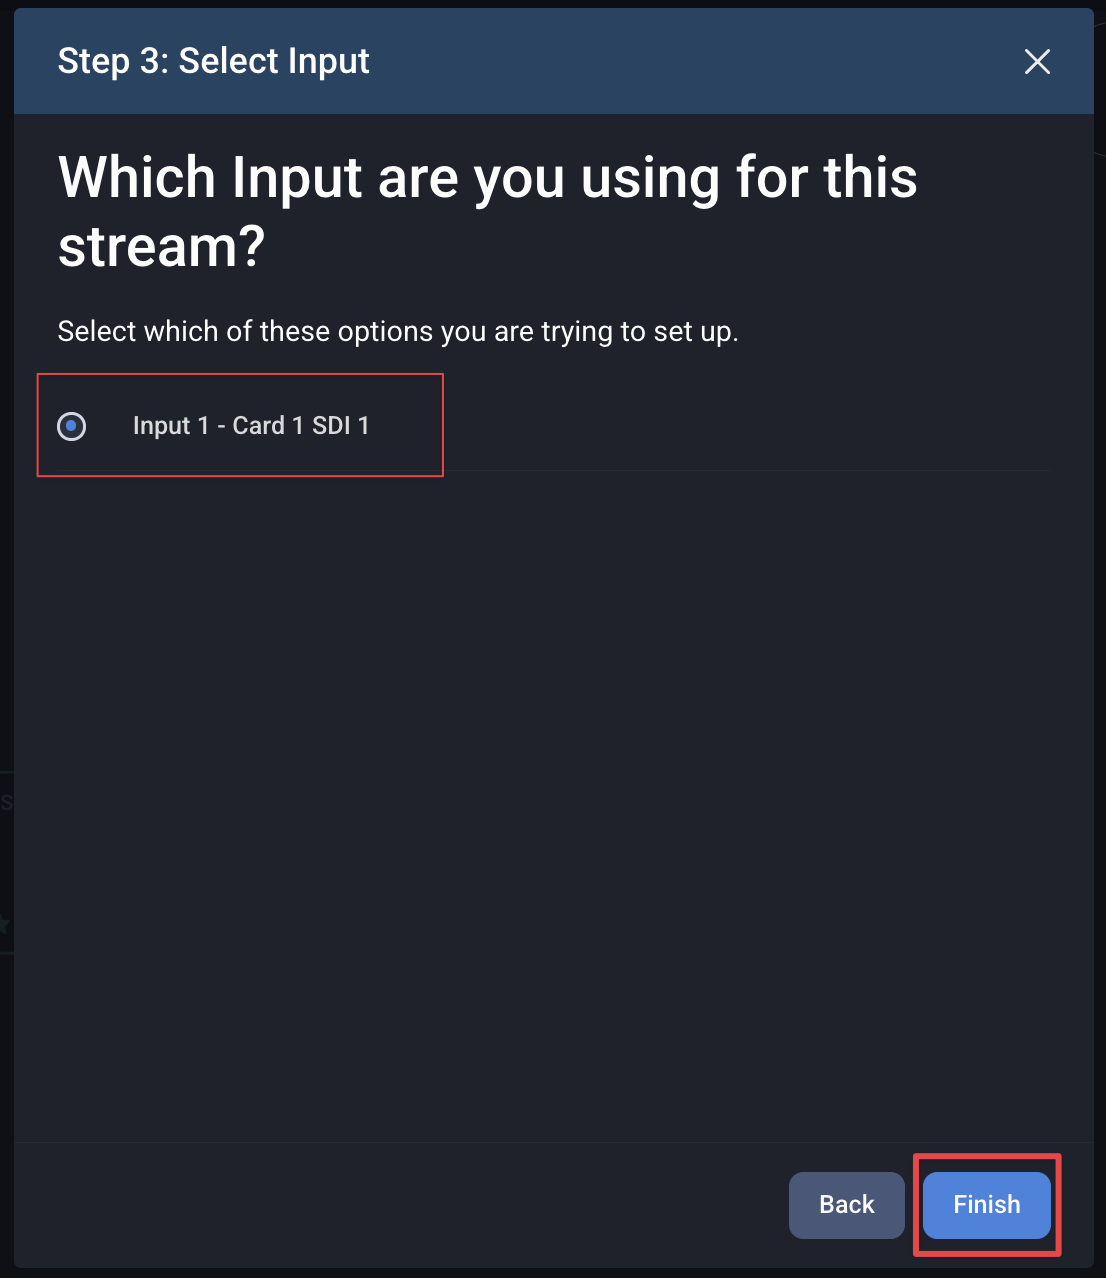
Step 3: Encoder Input
After selecting your encoder, Sardius will prompt you to confirm which input from that encoder should be used for the stream.
If multiple inputs are available, choose the input that corresponds to your active video feed (for example, SDI or HDMI) then click Finish.
Step 3: (If Applicable) Stream URL & Key
If you selected a Manual source, the Stream Stepper will provide stream URLs and keys after you complete and save your settings.
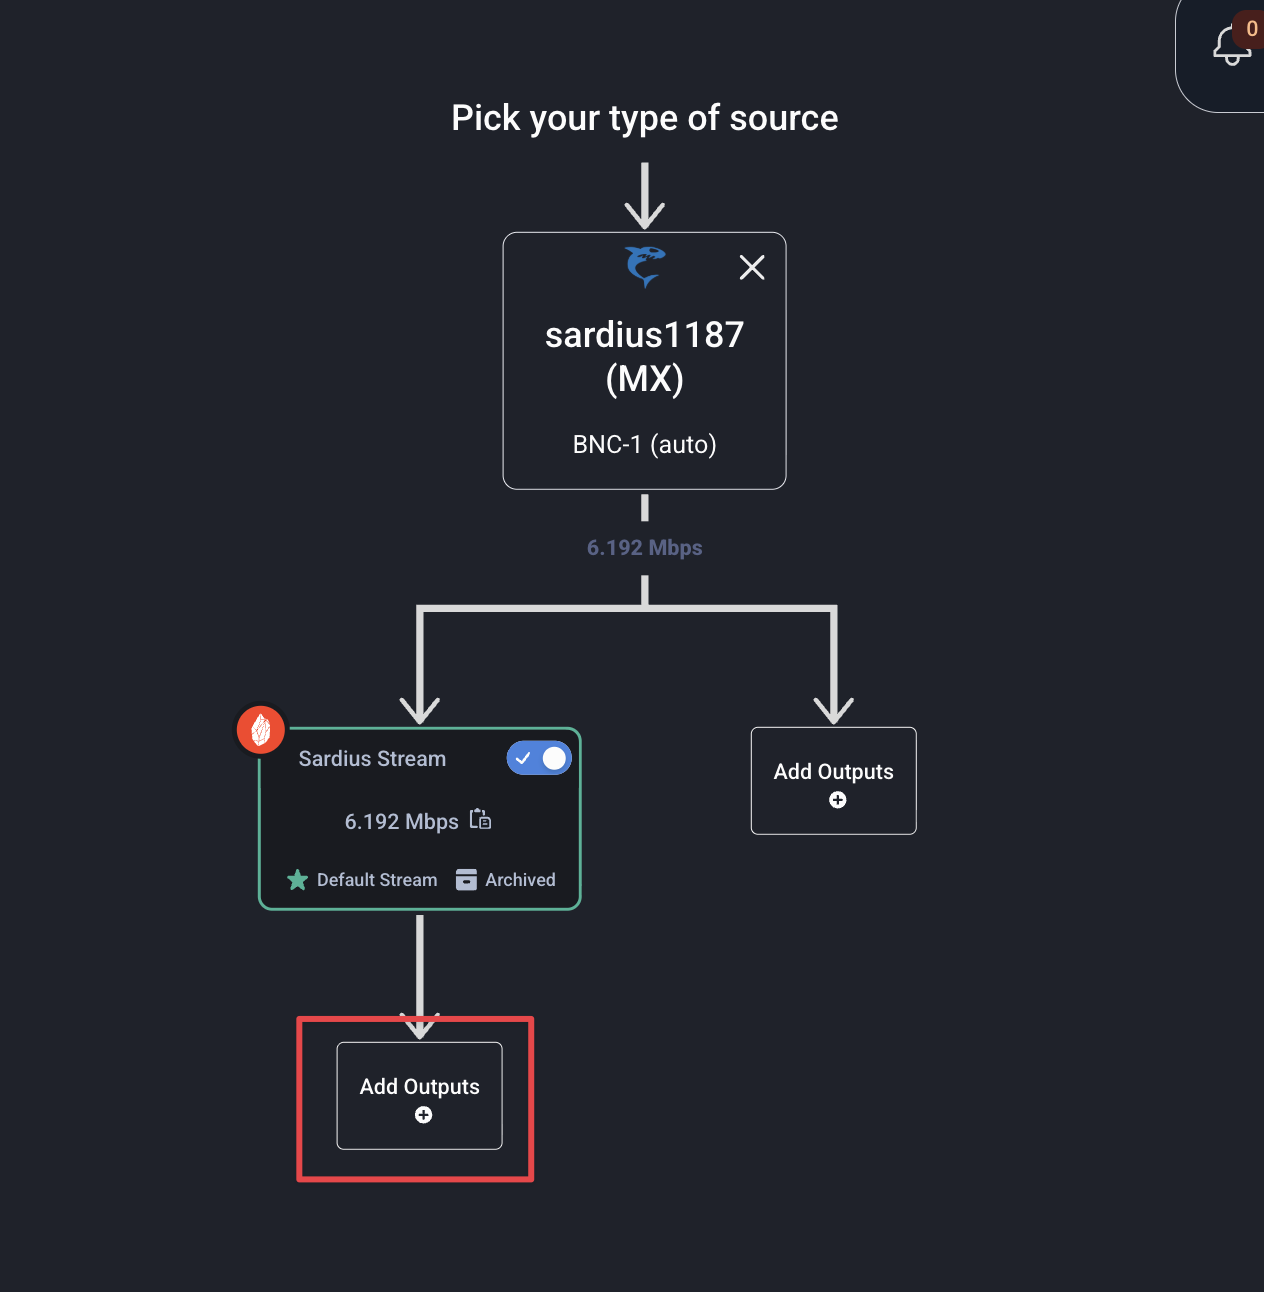
Step 4: Add Outputs
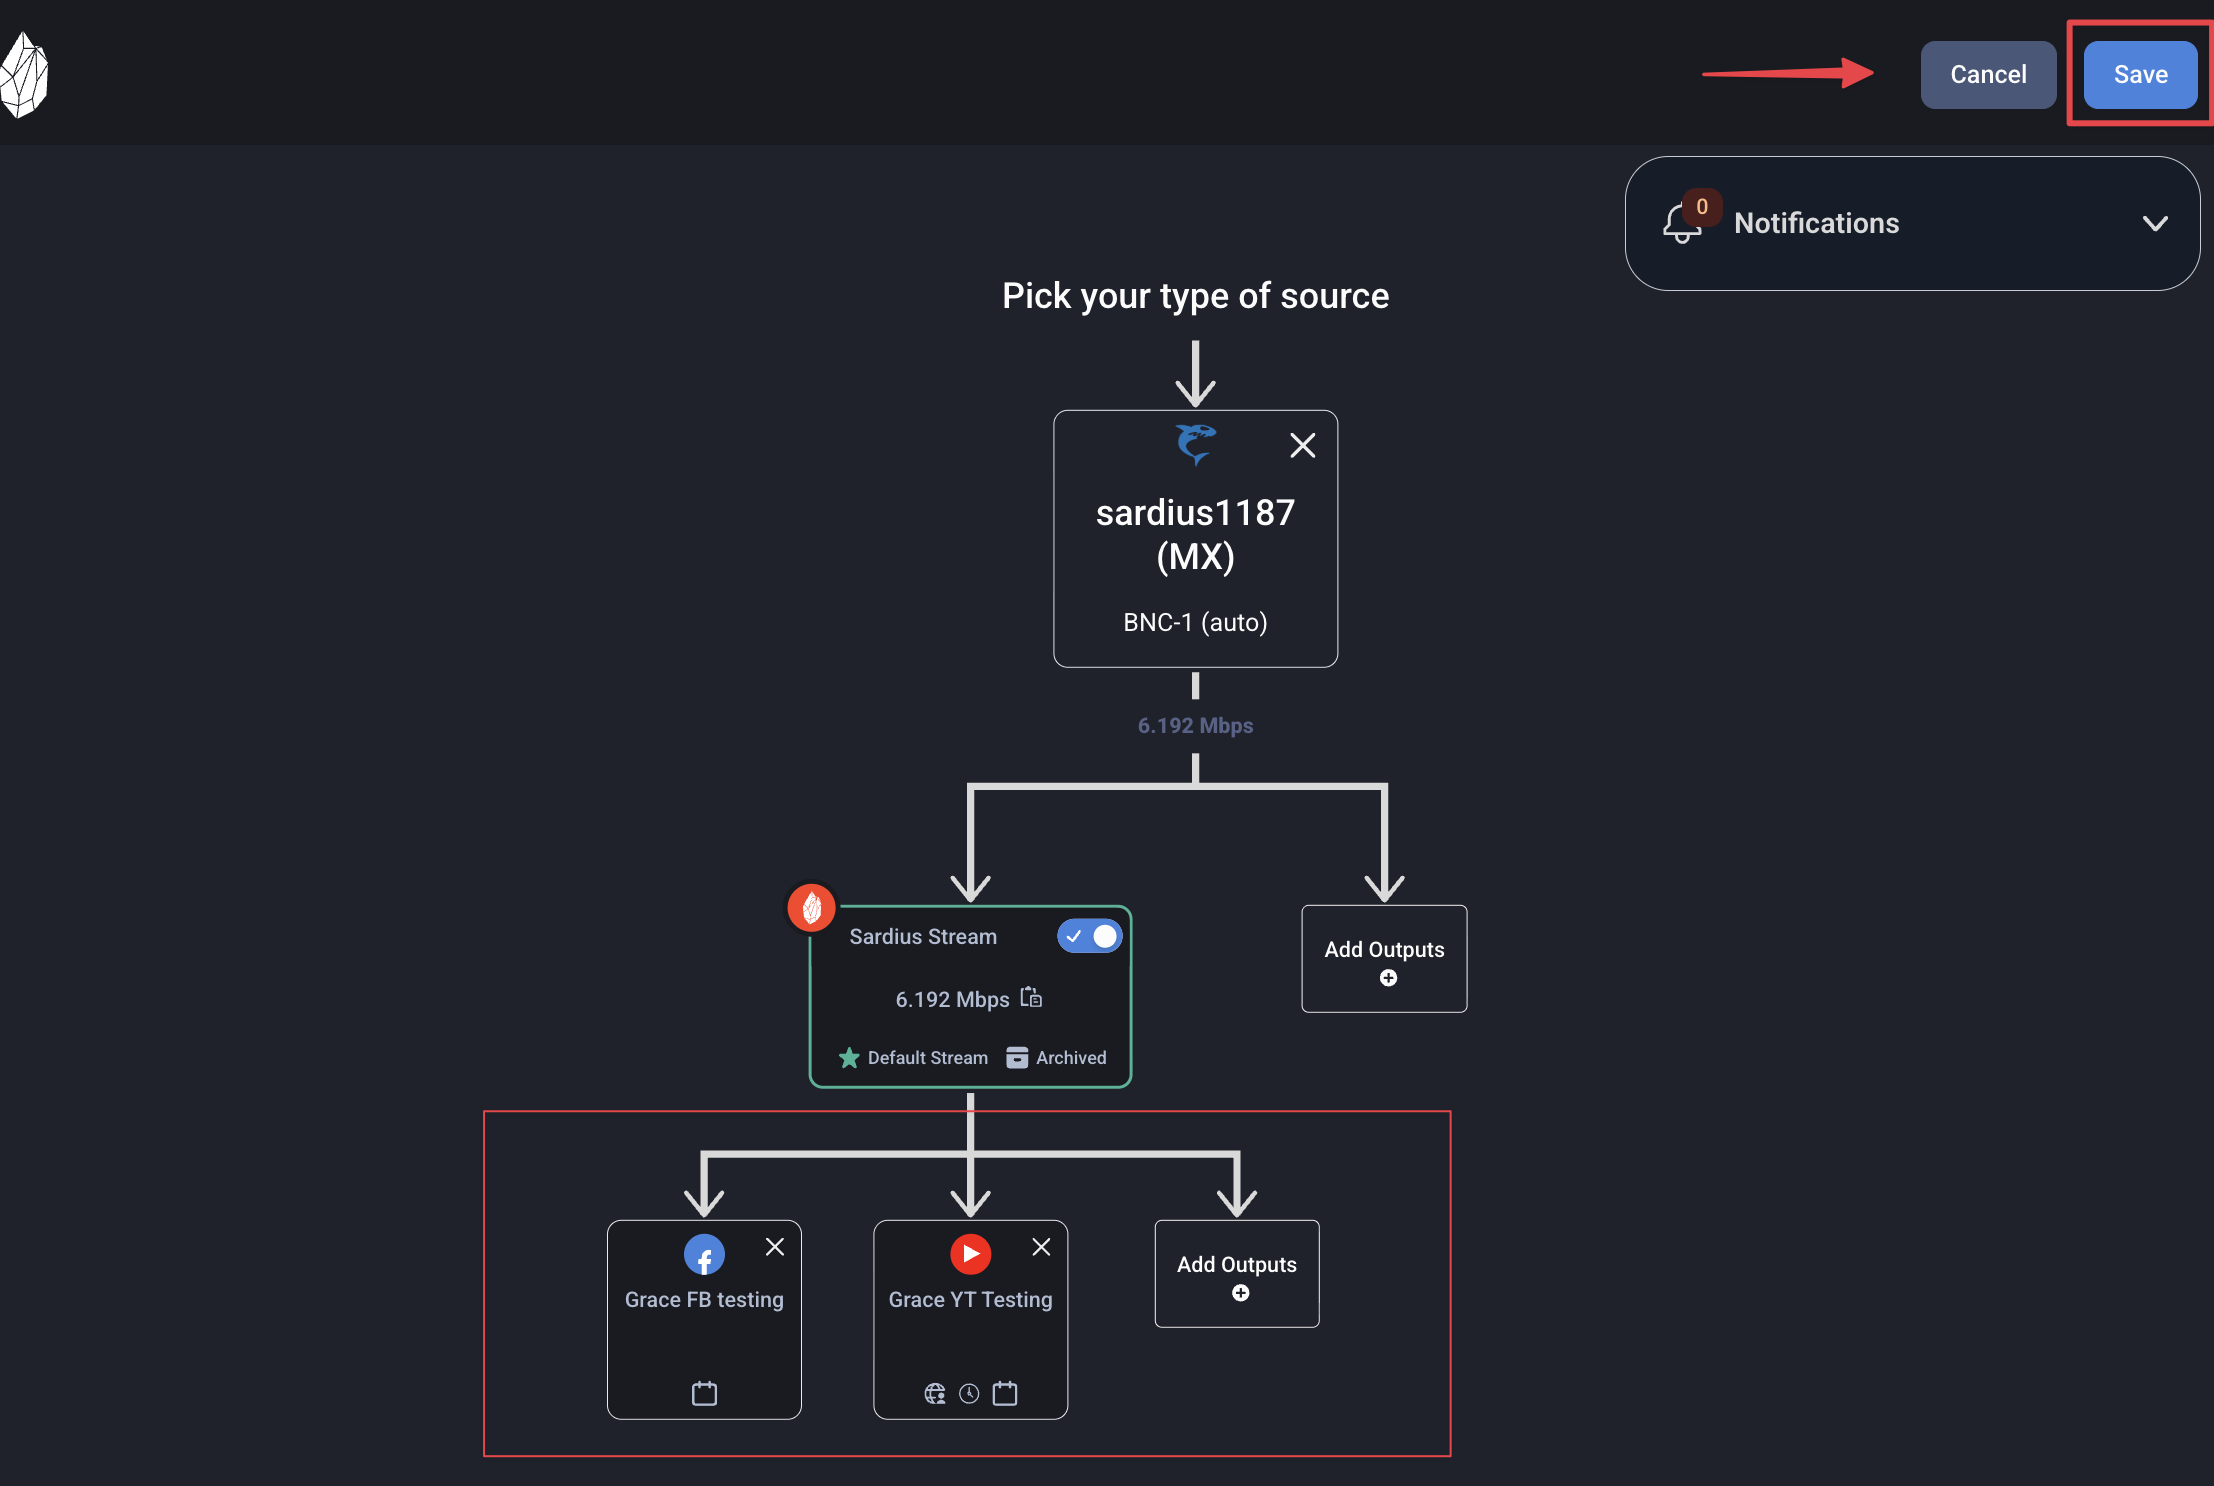
Next, if desired, select the outputs that should be included on every new event:
-
Channel Stream (default embed)
-
Facebook
-
YouTube
-
RTMP destinations you’ve created
Once all steps are complete, click save in the top right corner to complete setting up your channel’s default stream settings.
How Defaults Work When Creating Events
When you create a new event:
-
The Stream Stepper will automatically pre-populate the source, encoder, and outputs based on the defaults you set.
-
You still must step through the Stream Stepper to confirm or modify settings before publishing the event.
Overriding Default Settings for a Specific Event
If a particular event needs different configuration:
-
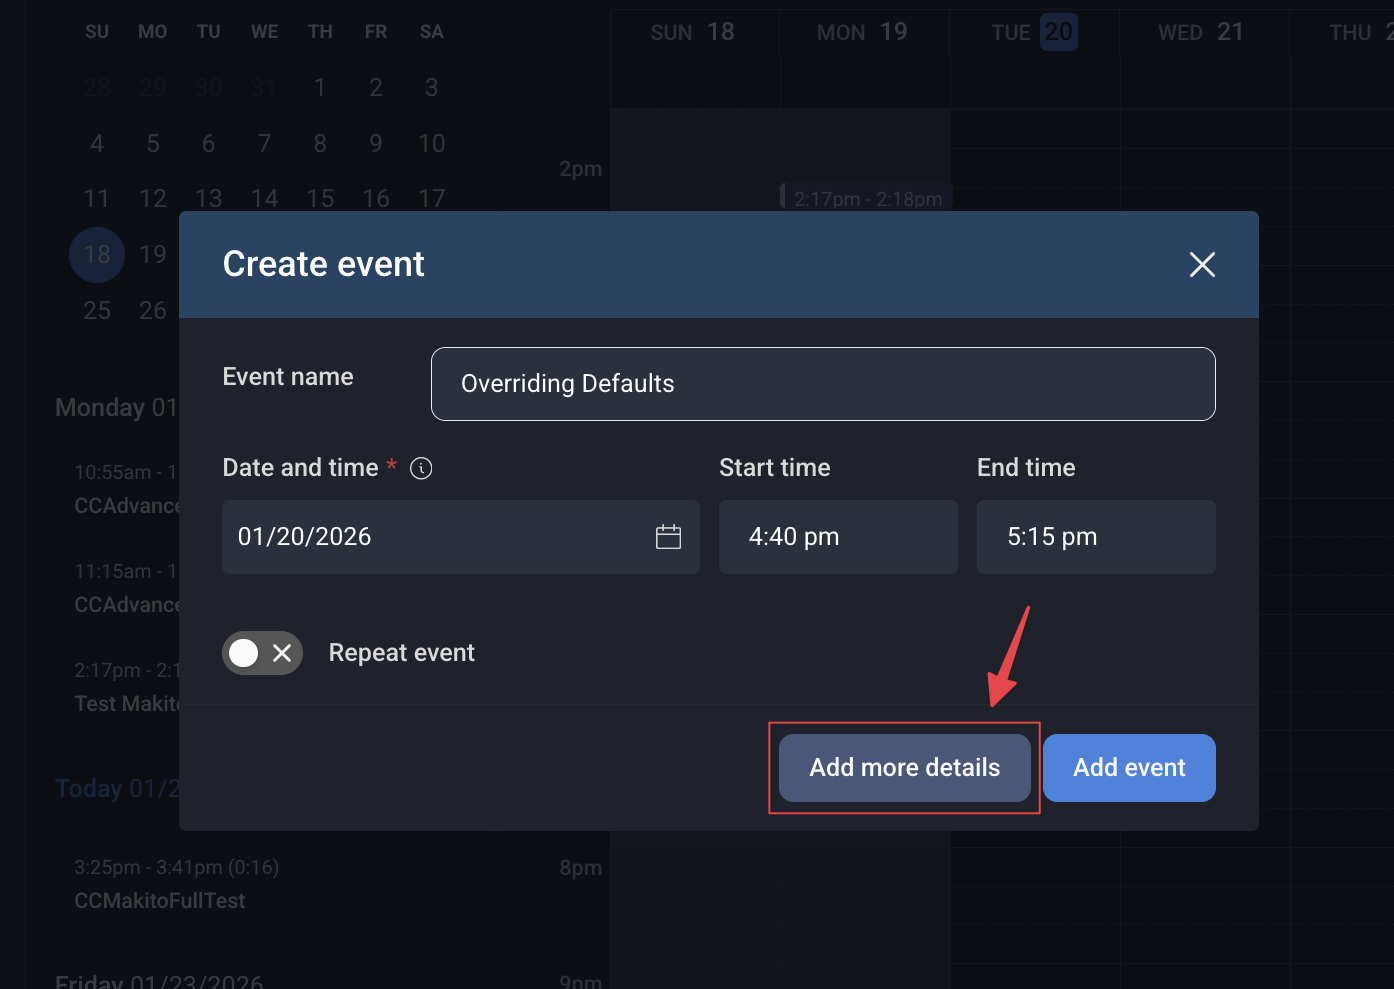
Create or open the event in your calendar and click Add More Details
-
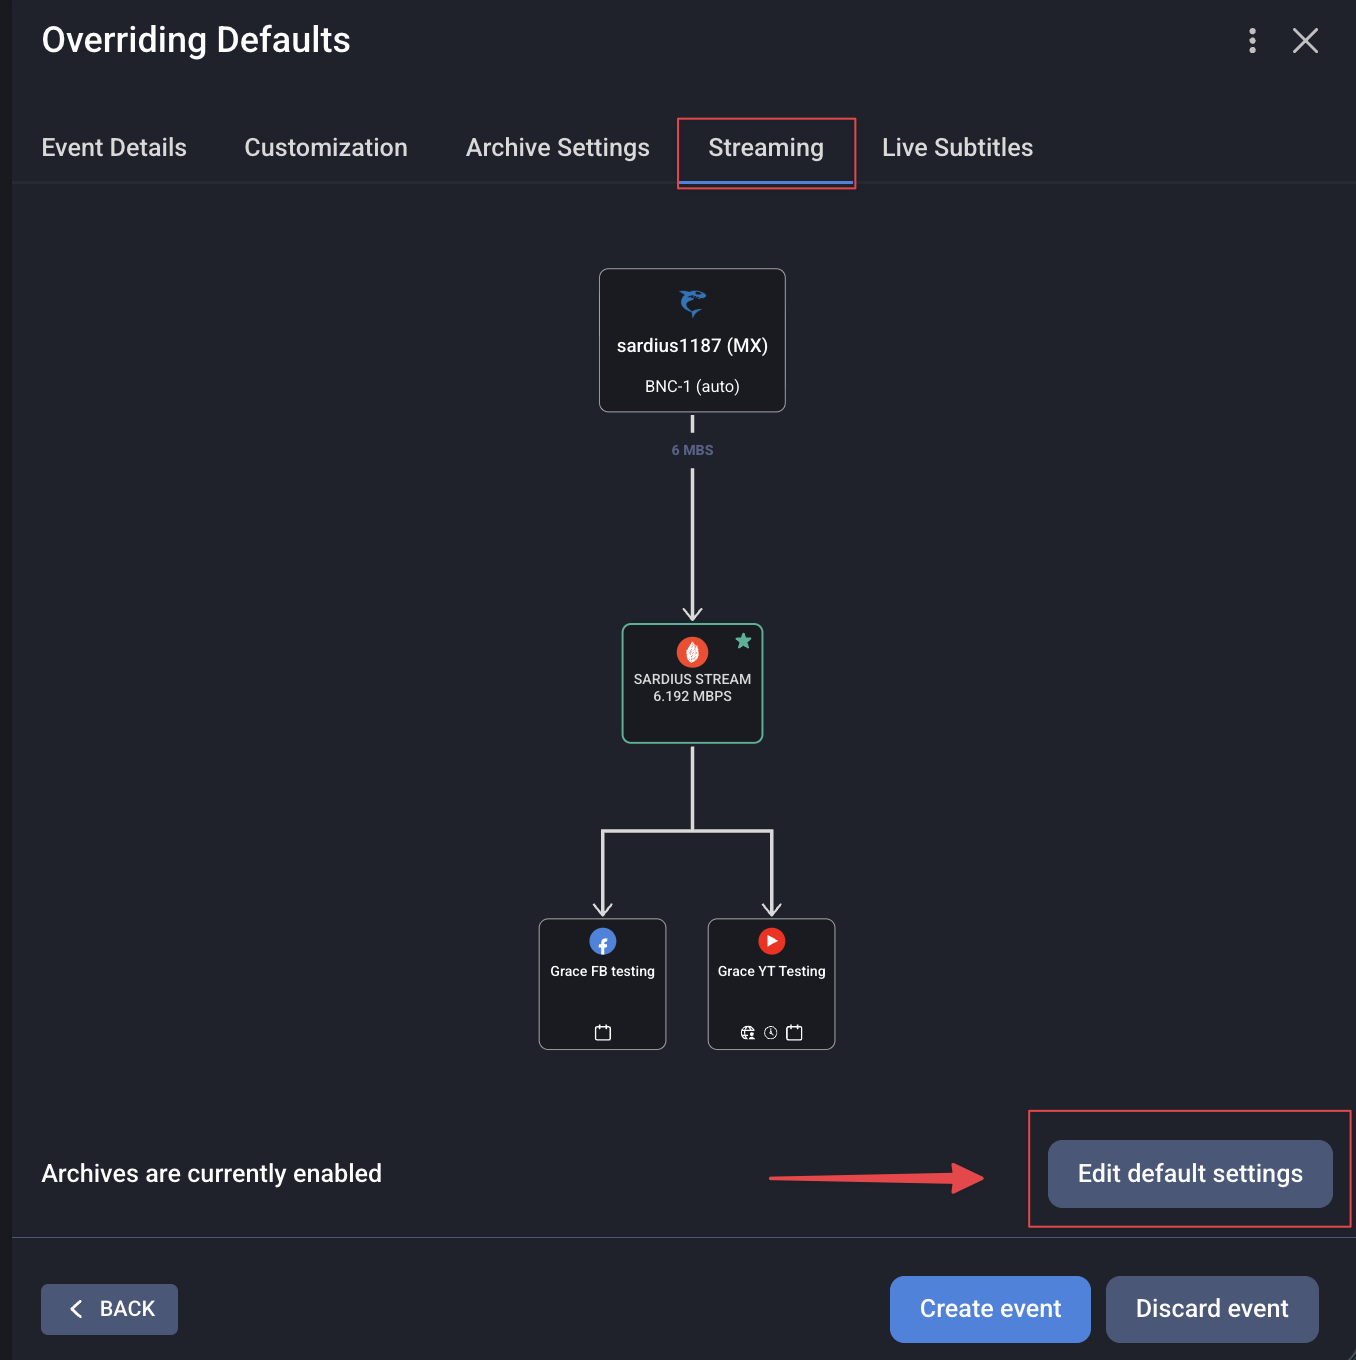
Go to the Streaming Settings section.
-
Select Edit default settings.
-
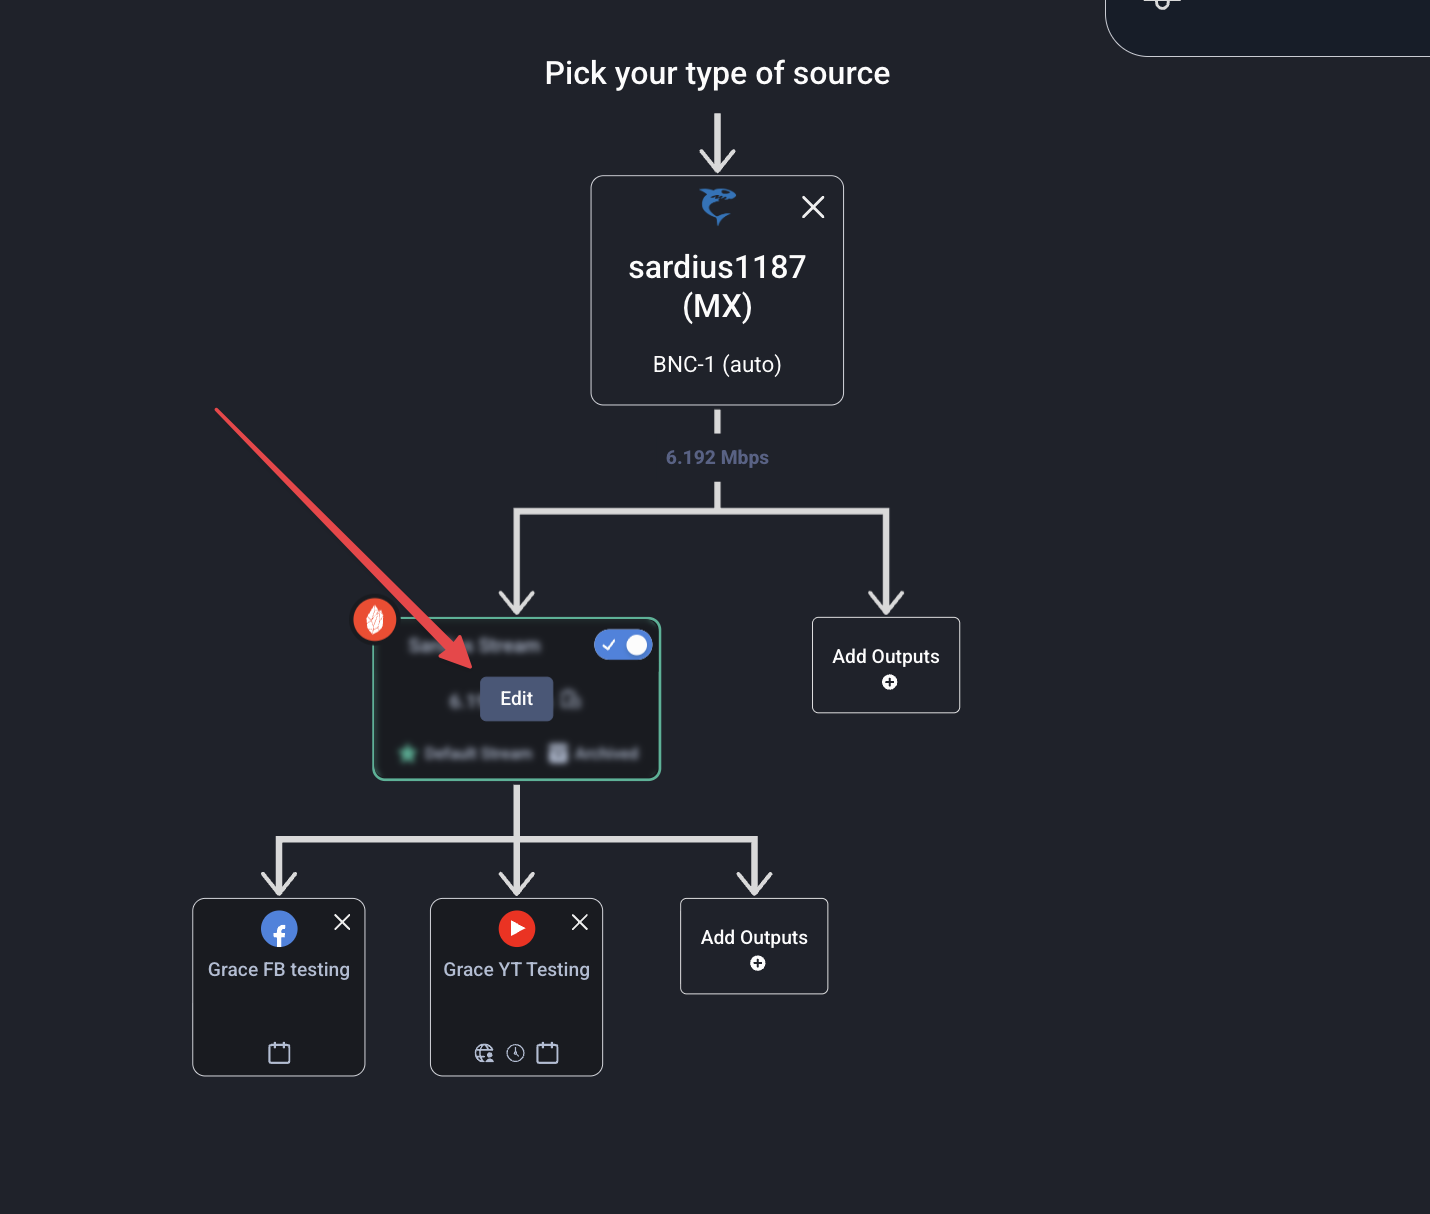
The Stream Stepper will open with defaults pre-filled.
-
To make changes at any step, simply hover over the modal and click edit
-
Make sure to click save when done.
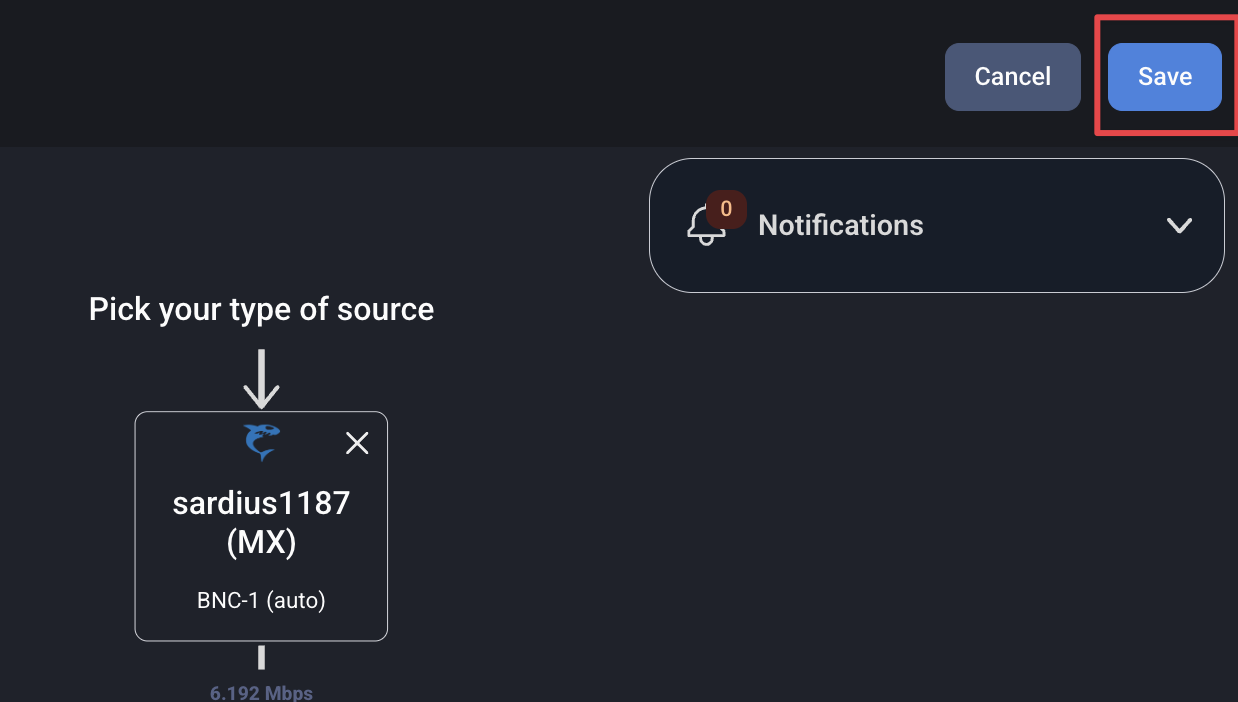
This allows each event to have unique parameters while leaving your channel’s defaults intact.
Changing Your Default Settings
To update your channel’s defaults:
-
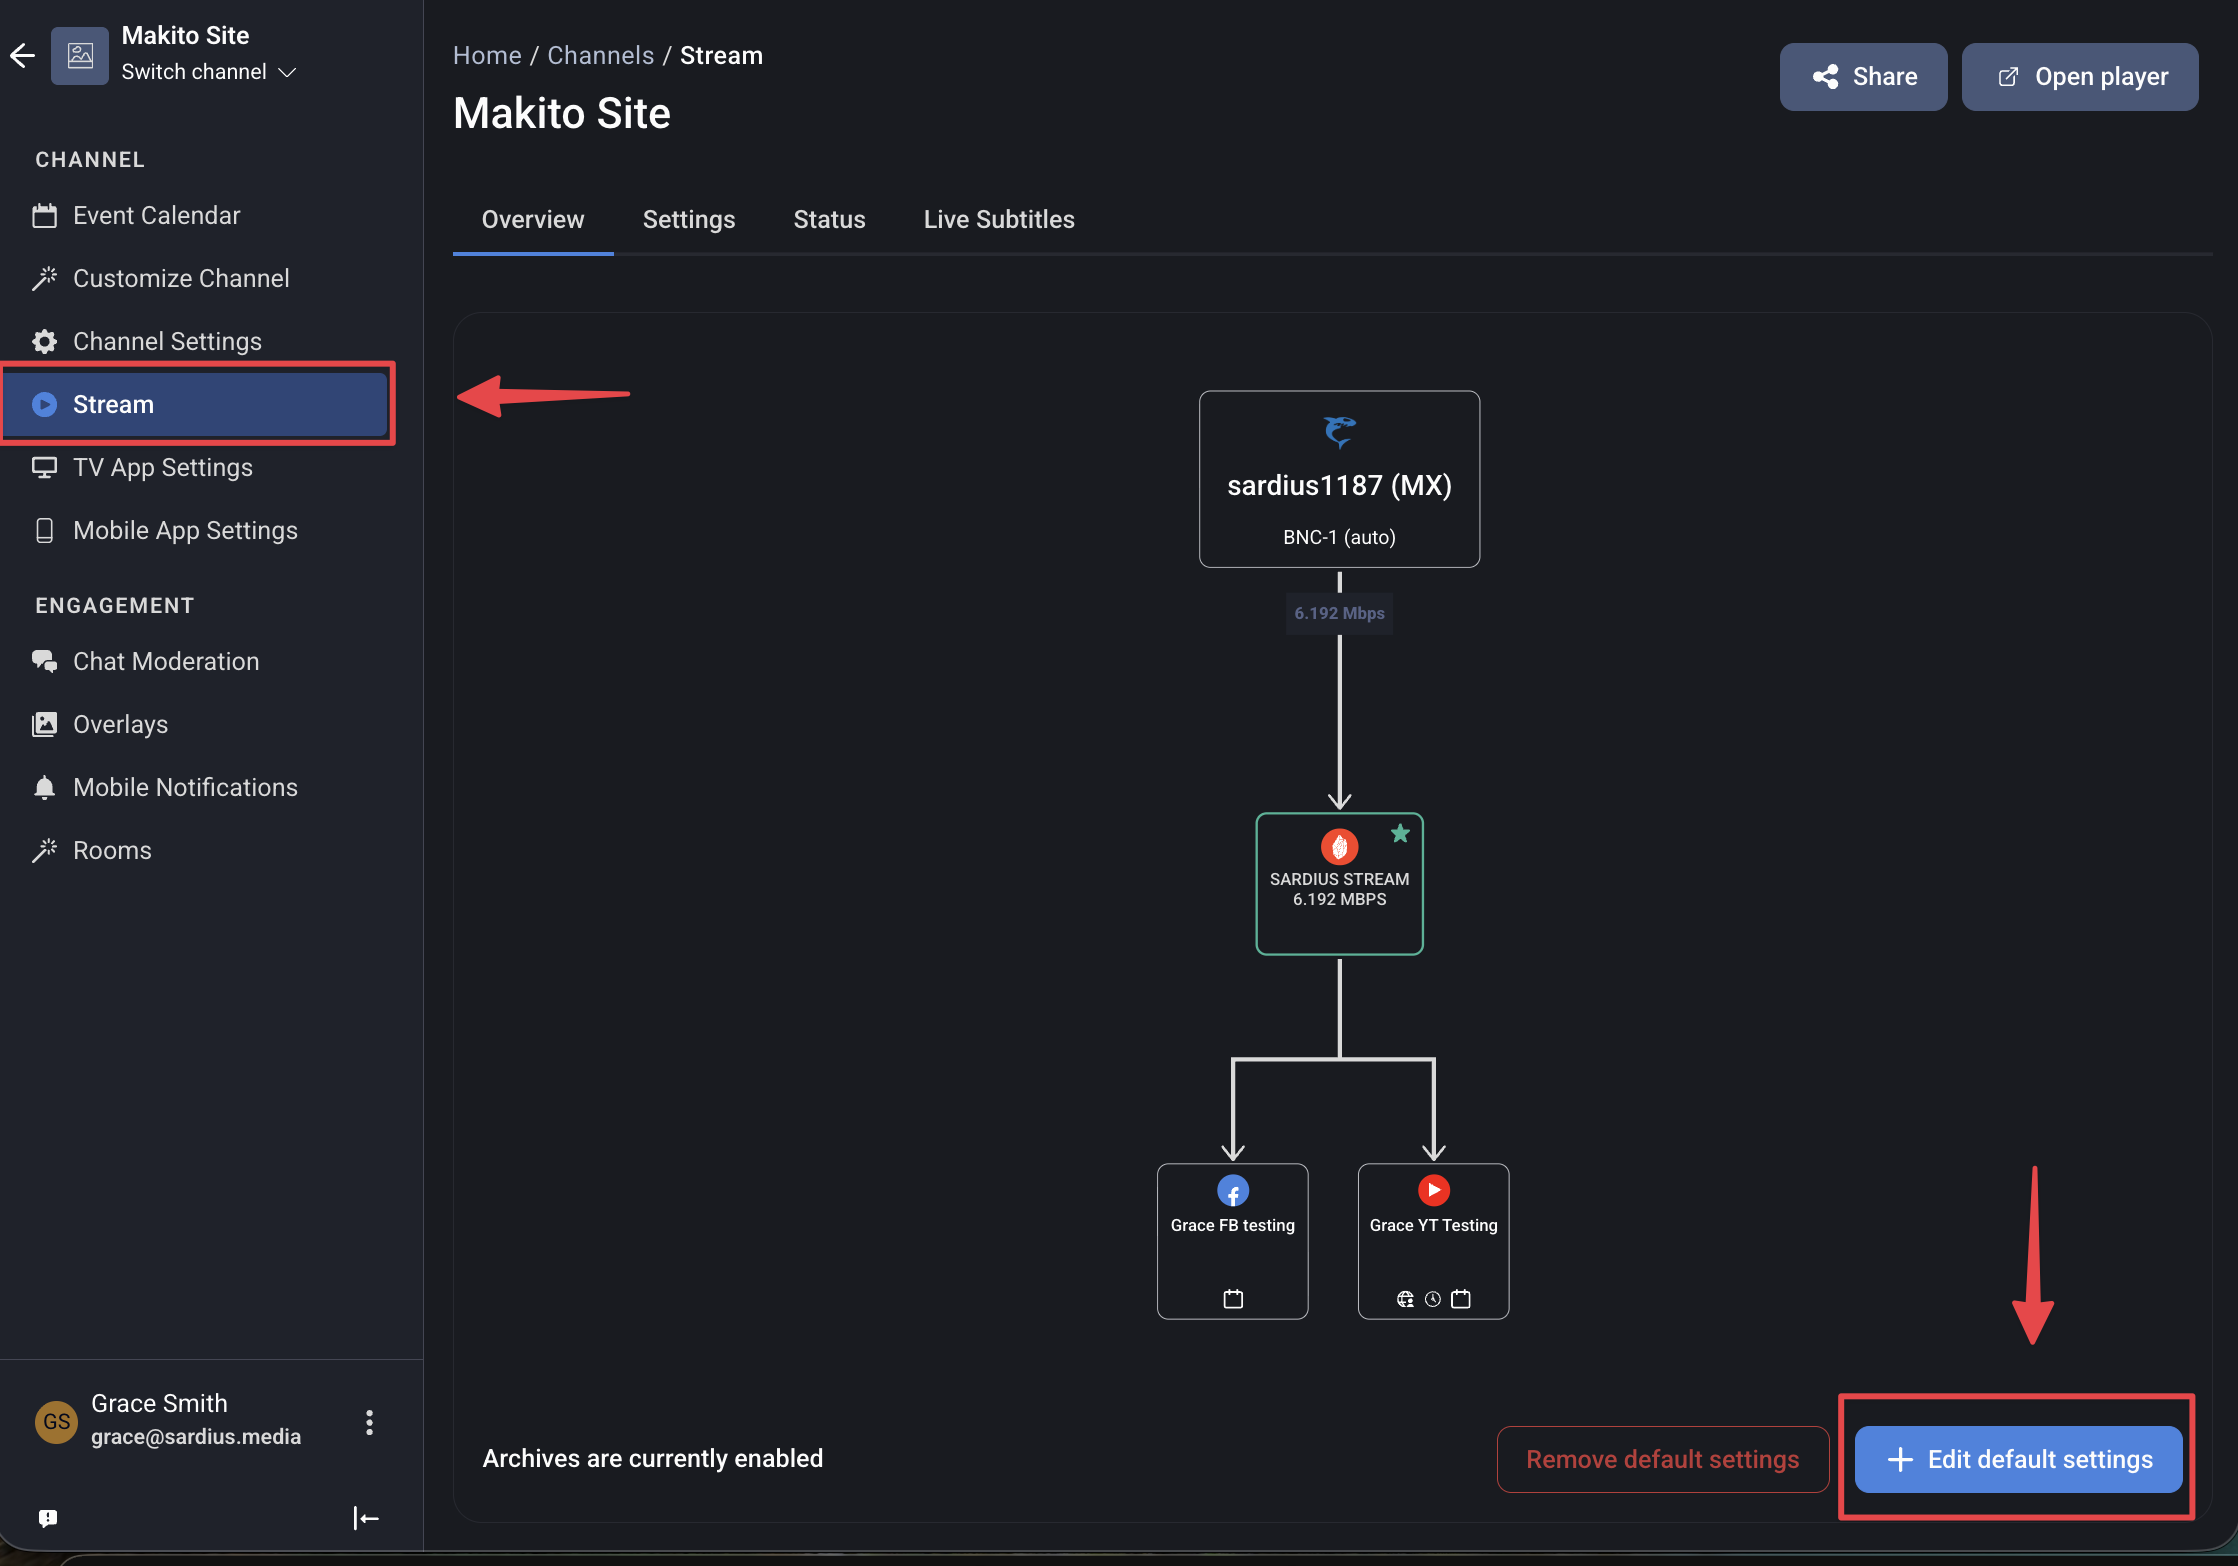
Navigate to your channel’s Stream settings.
-
Click Edit default settings (bottom right).
-
The Stream Stepper will open with your current defaults pre-loaded.
-
Make any changes by clicking edit at any step, then click save.
Removing Default Settings
If you no longer want default stream settings:
-
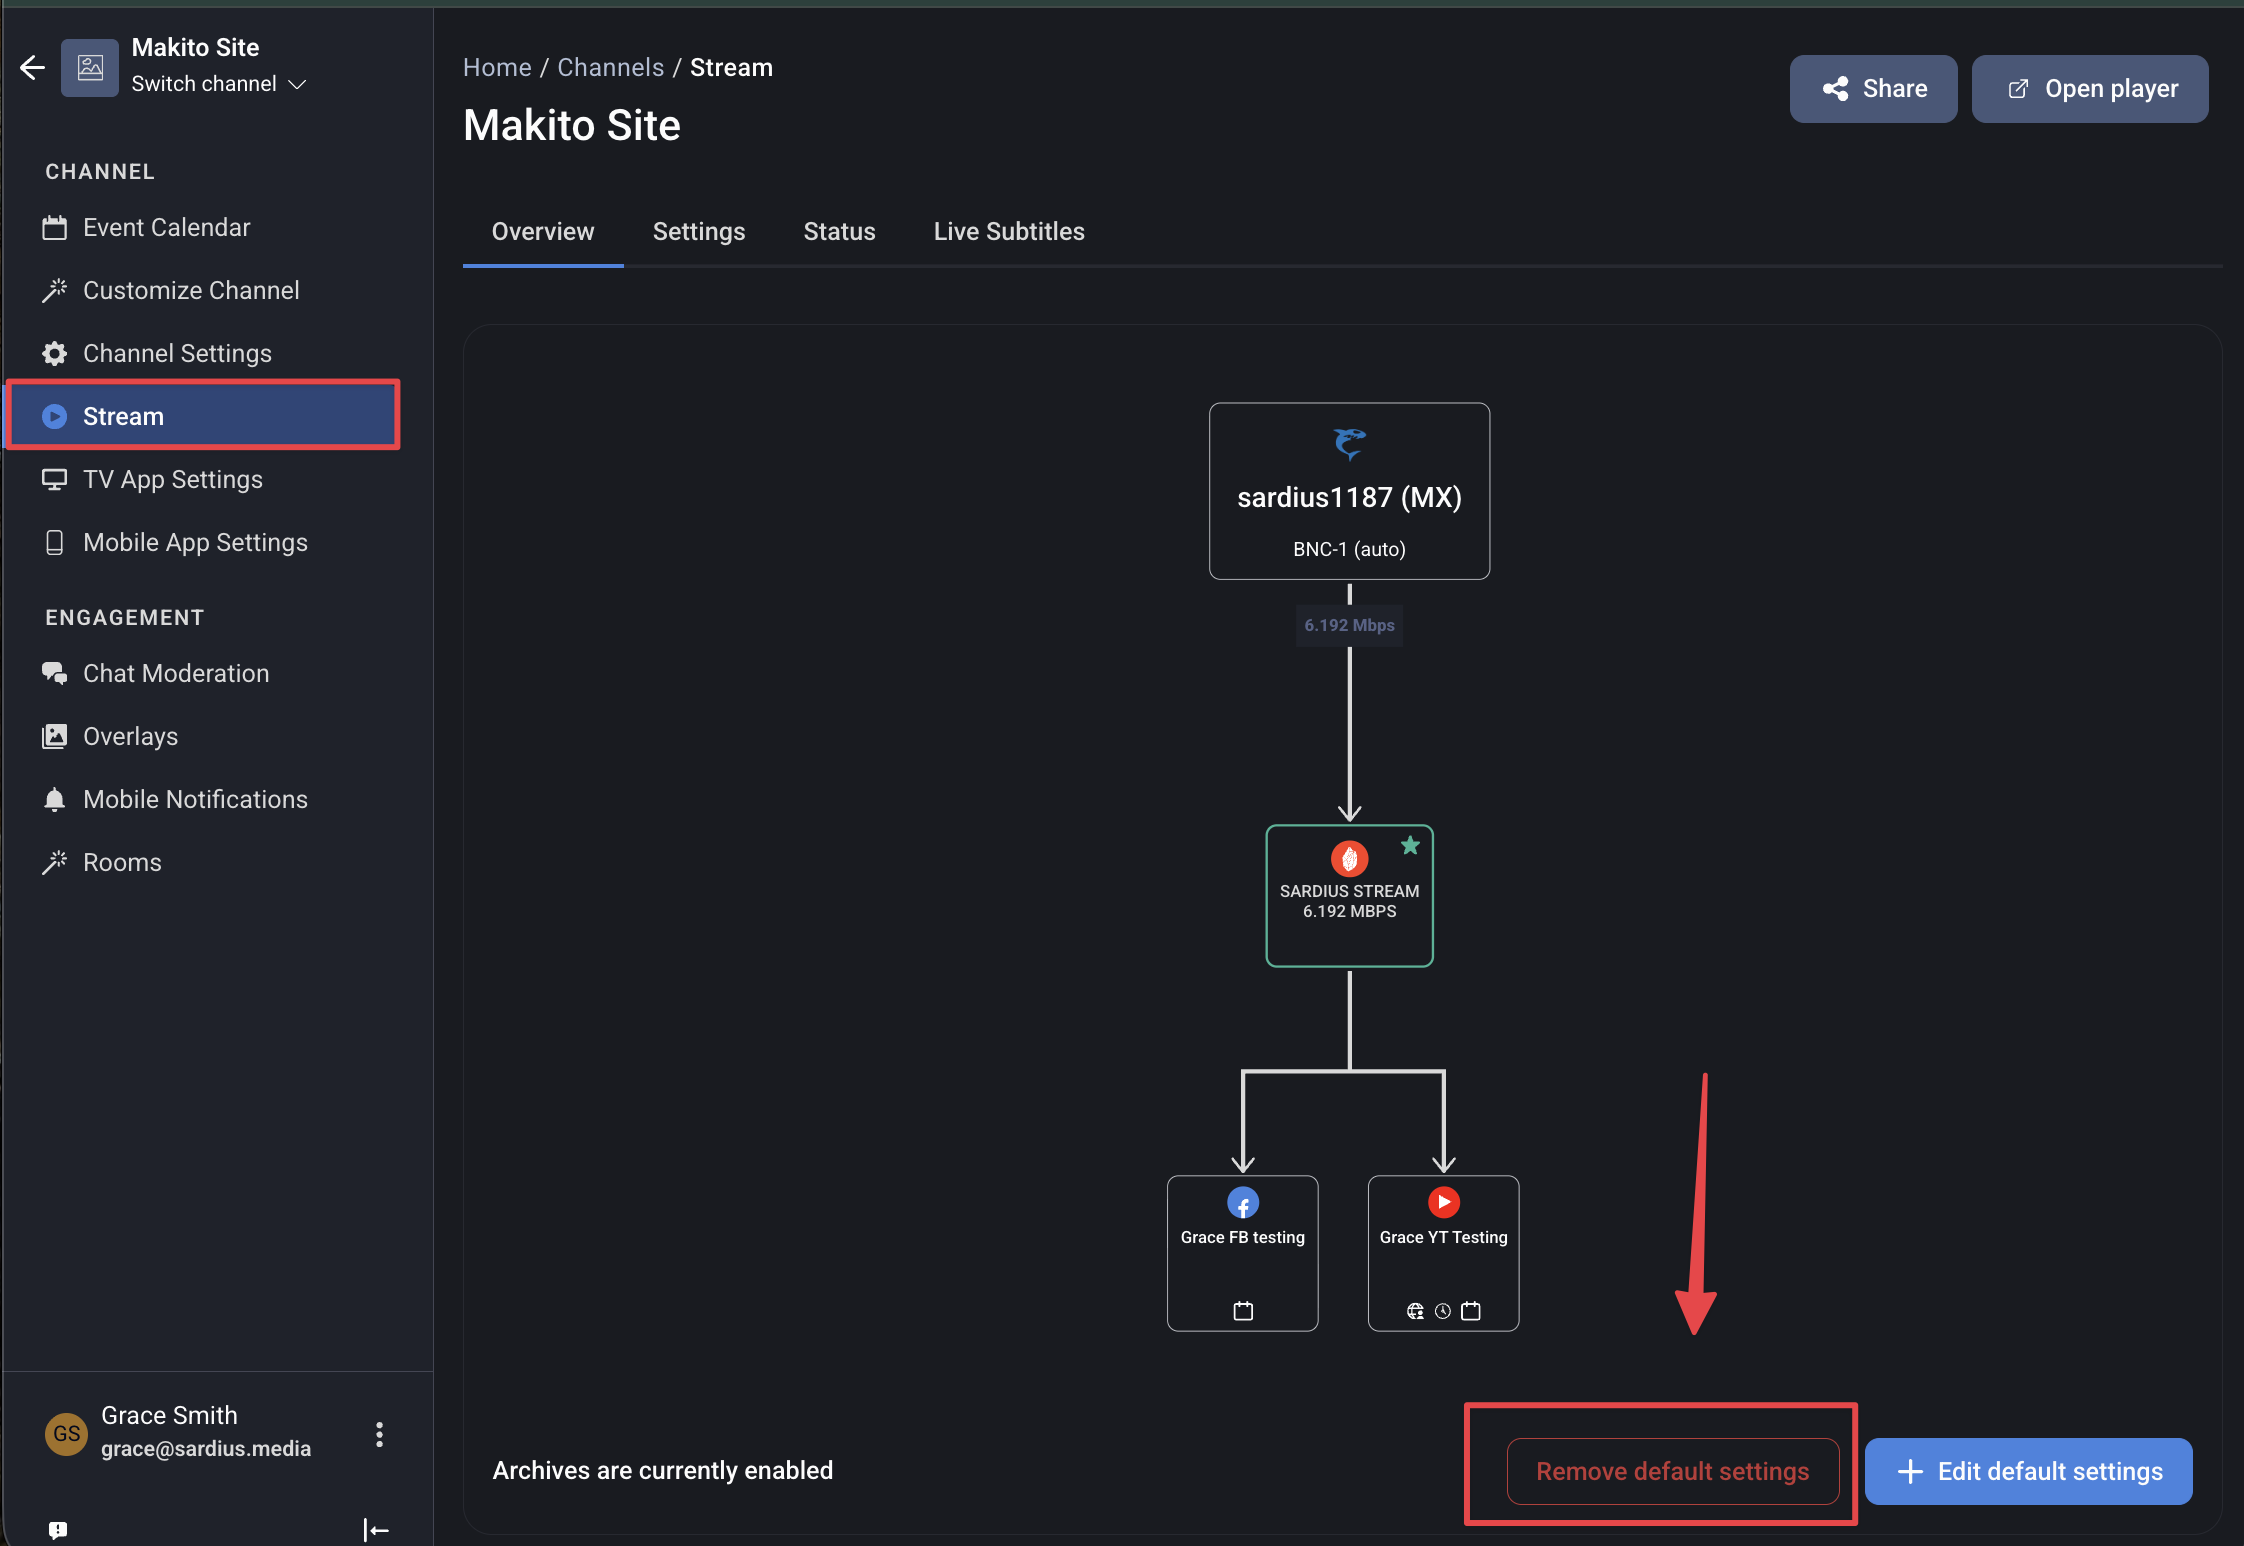
Open your channel’s Stream Overview page.
-
Next to your encoder or manual configuration, click Remove default settings.
-
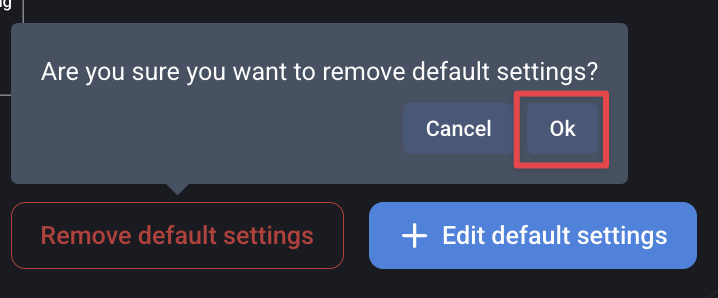
Confirm by clicking OK.
That’s it! By following these steps, you have successfully set up your Channel’s default stream settings.