
Cue Points can be added manually, generated by AI (If Sardius AI Discover is enabled on your account), or both. No matter the source, you control exactly what appears on the player for your viewers to use and see.
Our Cue Points feature currently supports VOD assets only.
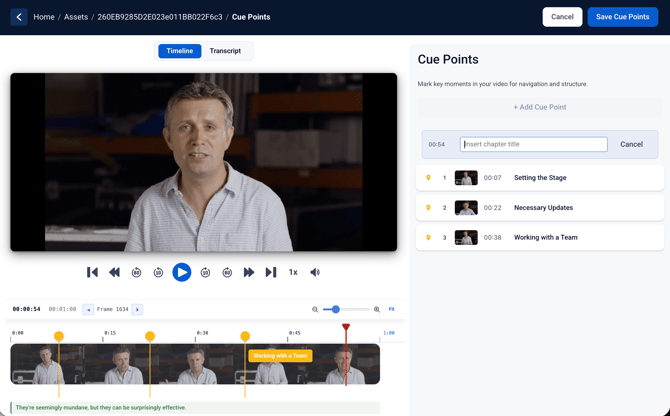
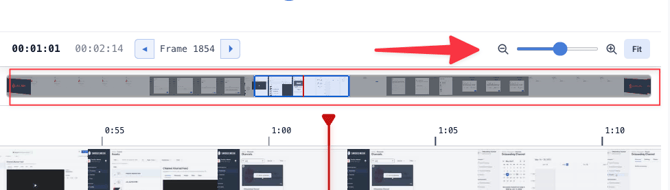
The editor gives you a visual timeline, a filmstrip view, an audio waveform, and a transcription panel — everything you need to place markers with precision.
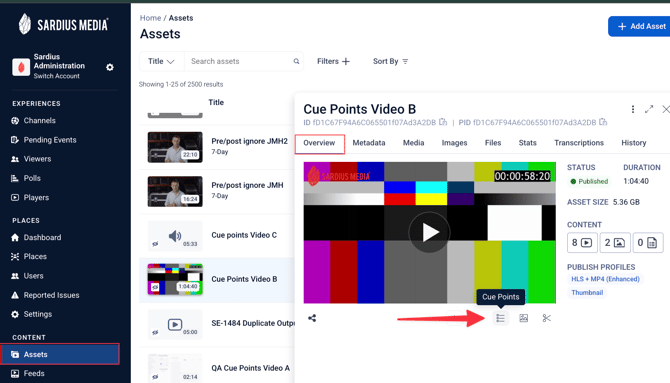
How to Access the Cue Points Editor
- In the Sardius Control Panel, navigate to Assets.
- Open the asset you want to work with.
- Click the chapter marker icon on the asset — this opens the full-screen Cue Points editor.
Understanding the Editor Interface
The Cue Points editor is a full-screen workspace with several key sections:
| Area | What It Does |
|---|---|
Filmstrip |
Frame-by-frame visual of the video. Only visible if thumbnails have been generated for the asset. If not, a blue progress bar displays instead.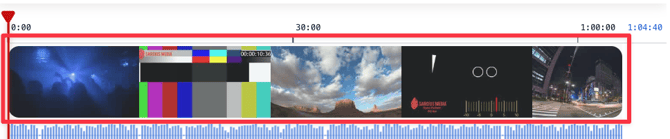 |
Waveform |
Audio waveform below the filmstrip to help identify content shifts. |
Transcription Panel |
A searchable transcript of the asset. Search for a keyword to jump to that moment in the timeline. |
Timeline Zoom |
Scroll in/out to zoom the timeline. A mini-strip appears when zoomed in, keeping your cursor centered. |
Playback Controls |
Play/pause, 10-second skip, skip to start, skip to end, and playback speed. |
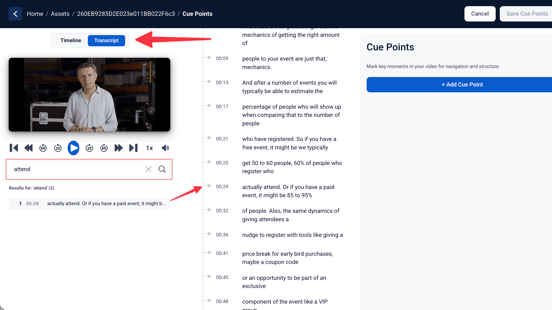
Heads Up: Transcript search is only available if the asset has a supported VTT file.
Creating Cue Points
Method 1: Manual Cue Points
Manual cue points give you full control over placement and labeling.
To add a manual cue point:
- Scrub the timeline (or play the video) to the timestamp where you want a marker.
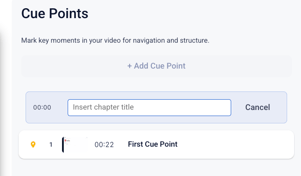
- Click Add a Cue Point.
- Type a chapter title (e.g., "Worship," "Message," "Prayer") and press Enter.
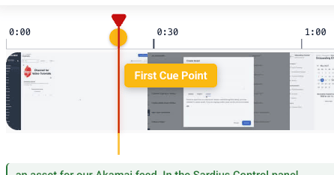
The cue point is saved immediately and displayed as a yellow marker on the timeline.
Manual cue points cannot be removed by AI actions.

Proximity rule: You cannot place two cue points within 5 frames of each other. If two cue points share the exact same timestamp, you will see an error. If they are only a few milliseconds apart, the system will automatically adjust the time slightly and notify you.
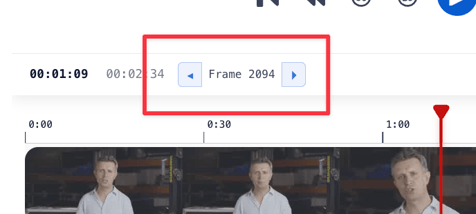
To land on the exact frame you want, you can use the ◄ ► toggle arrows next to the frame counter in the timeline. These step through the video one frame at a time, giving you precise control over placement.
Method 2: AI-Suggested Cue Points
For accounts with AI Discover enabled, the Cue Points editor includes an AI tab where the system can analyze the asset and suggest cue points at natural break points.
Requirements before generating:
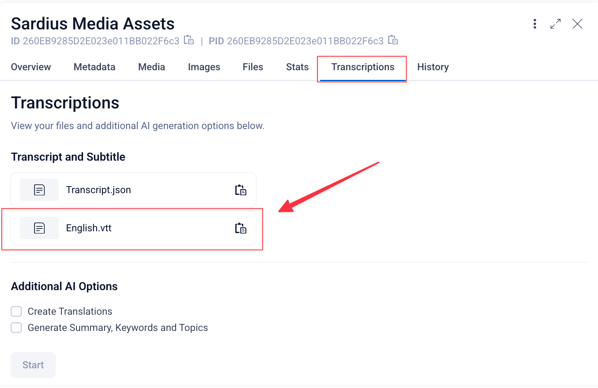
- The asset must have a transcript already generated. If no transcript exists, AI generation will fail. Generate the transcript first, then return to Cue Points.
- AI Discover (Tier 1 or Tier 2) or the Create feature must be active on the account.
For more on creating Transcriptions, Click Here
To generate AI Cue Points:
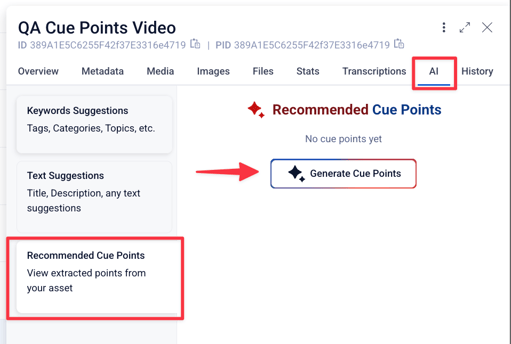
- Within your asset that has transcriptions: click the AI tab.
- Click Generate Cue Points with AI (or Recommended Cue Points).
- The system will process the asset — you'll see a loading indicator during generation.
- Once complete, the suggested cue points appear in a review queue.
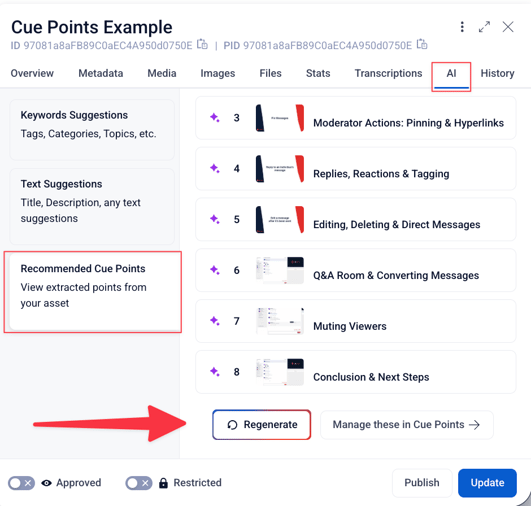
Regenerating AI Cue Points:
You can regenerate at any time by clicking Regenerate. A warning will appear confirming that this action will wipe all AI-generated cue points — including any you've previously approved or dismissed. Manually created cue points are not affected by regeneration.
AI Approval Settings (Account-Level)
How AI cue points are handled on your account is configured by the Sardius team on the backend. There are two modes:
| Mode | Behavior |
|---|---|
| Manual Approve | AI suggestions appear in a review queue. You must approve each one before it goes live. |
| Automatically Add | AI-generated cue points are approved and published immediately without review. You can still edit or remove them afterward. |
If you'd like to change the approval mode for your account, reach out to your Sardius representative or request a demo here.
Editing or Deleting Cue Points
Any cue point — whether created manually or by AI — can be edited at any time.
Navigate to Assets → Cue Points management screen
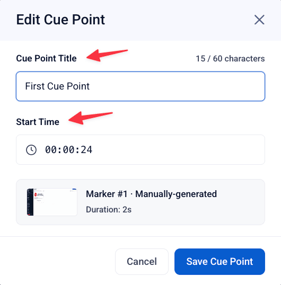
Editable fields:
- Title — Update the label for the section.
- Start Time — Adjust the timestamp. The duration will automatically recalculate based on where the next cue point begins (or the end of the asset, if it's the last marker).
On the same dropdown, you will find the option to Delete

Note: After saving edits to a cue point, it can take up to 5 minutes for changes to reflect on the Sardius Player. If a someone checks immediately after an edit and sees the old version, ask them to refresh after waiting a few minutes.
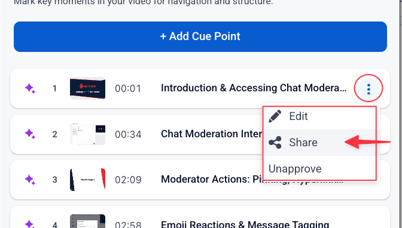
Sharing Cue Points (Internal Team Use)
Each cue point has a Share button that generates a deep link — this copies a direct link to that specific timestamp in the Sardius Control Panel (not the public player).
This is intended for internal team collaboration: editors can share a link with colleagues so they open the asset at the exact cue point for review or feedback.
This will create a cue point link which you can then paste into the search.
Once searched, the tab will re-open with that cue point highlighted in the filmstrip 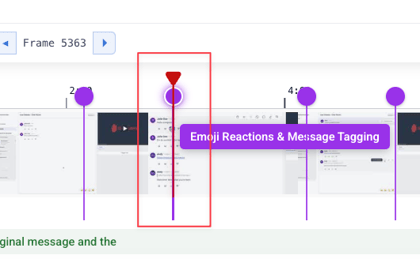
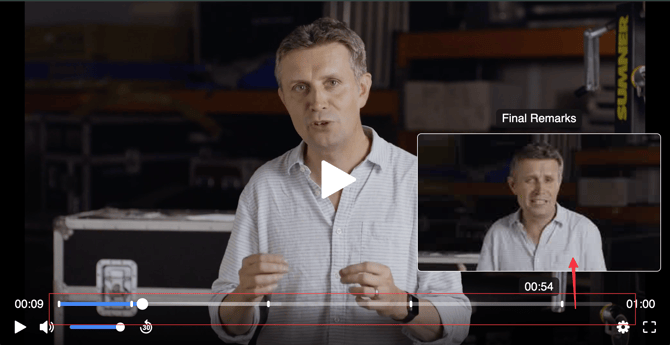
How Cue Points Appear on the Player
Once cue points are approved and saved, they become visible as markers on the Sardius Player scrub bar for all viewers watching the embedded asset.
Viewers can click any marker to jump directly to that section of the video.
Timing: After saving, cue points can take up to 5 minutes to appear on the player. Viewers may need to refresh their player to see newly added or updated markers. Set this expectation proactively when training clients or responding to support inquiries
Warning: Sardius Player is required for Cue points to appear on your player.
They will not display on the Legacy Player. If cue points aren't appearing after the cache window has passed, confirm your channel is using the Sardius Player.
Cue Points and Clipping
If a VOD asset with existing cue points is clipped, the cue points automatically adjust their timestamps to account for the new start time and duration. You will be notified during the clipping workflow that this adjustment will occur.
Troubleshooting
Cue points aren't appearing on the player.
- Confirm you have both approved the cue points and clicked Save.
- Wait up to 5 minutes for the player to update.
- Ask the viewer to clear their player cache and reload the page.
AI generation failed.
- Check that the asset has a transcript. If not, generate one and retry.
- Confirm that AI Discover is enabled on the account. If not, the client should contact their account representative.
Cue points look out of sync after clipping.
- Refresh the asset view. If the issue persists, contact Sardius Support.
"409 Conflict" error on save.
- This means another user edited the same cue point at the same time. Refresh the page to load the latest state, re-apply your changes, and save again.
AI Cue Points were wiped unexpectedly.
- Regeneration wipes all AI-generated cue points (approved or not). If this occurred, the original AI suggestions may be viewable in the asset's AI tab history.
Related Articles