
The Clipping Tool is available for any asset whose media files are stored in the Sardius ecosystem.
Accessing the Clipping Tool
- Go to Assets in the Sardius Control Panel.
- Open the asset you want to clip.
- On the asset overview, click the Scissors icon in the lower-right corner of the player.
The clipping tool will open full screen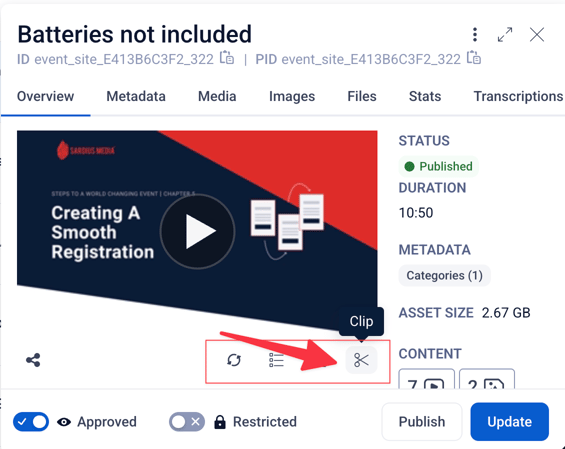

Interface Overview
The top header bar contains:
Element |
What it Does |
|---|---|
|
Breadcrumb Navigation |
Return to Assets or the Control Panel at any time. This also will show the Asset ID of the asset you are clipping from.
|
|
Clipping Status |
Opens a modal showing the progress and status of all your clip exports
|
? Button |
Opens the Keyboard Shortcuts reference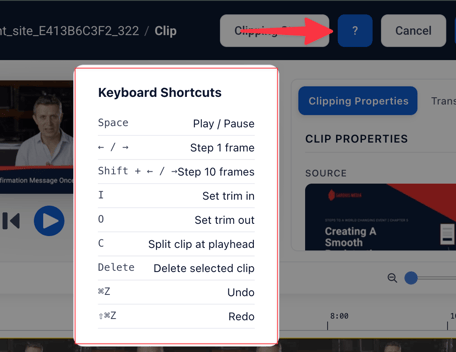 |
Cancel |
Exits the Clipping Tool. Note: canceling will discard all unsaved changes.
|
Export |
Opens the export modal when your clip is ready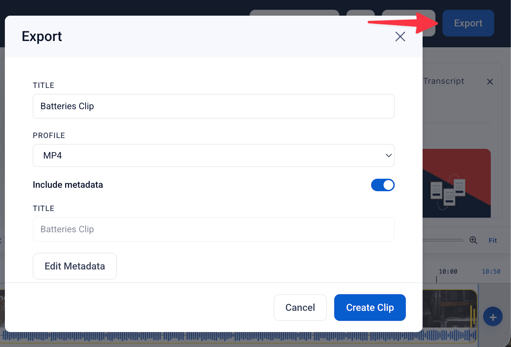 |


Player Controls
Below the preview window: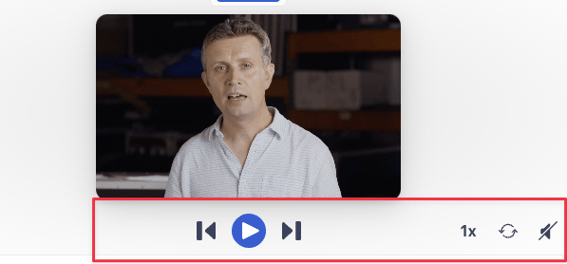
Control |
What it Does |
|---|---|
|
Skip to Beginning |
Jumps playback to the start of the clip
|
|
Play / Pause |
Starts or stops playback
|
|
Skip to End |
Jumps playback to the end of the clip
|
|
1x |
Adjusts playback speed
|
|
Loop |
When enabled, loops the current clip selection continuously during preview
|
|
Mute / Unmute |
Toggles preview audio
|


Clipping Properties Panel (right side)
The right panel has two tabs: Clipping Properties and Transcript.
Click the × to close the panel entirely.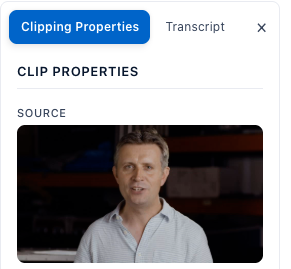
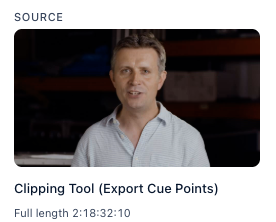
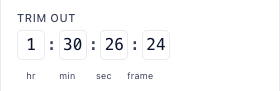
When a clip segment is selected on the timeline, the Clipping Properties tab shows:
Field |
What it Does |
|---|---|
|
Source |
Thumbnail, title, and full length of the source asset
|
|
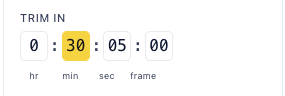
Trim In |
The exact start point of the clip. Format adapts to asset length: shorter assets will show min : sec : frame; assets over 1 hour show hr : min : sec : frame
|
|
Trim Out |
The exact end point of the clip. Same adaptive format as Trim In. You will not be able to set this value lower than the Trim In point.
|
Transcript Tab
Click the Transcript tab to switch to the transcript view. If your asset has a transcription or a custom VTT file you uploaded, the text will display here, synced to playback. If no transcription is available, you will see: "No transcript available for this clip."
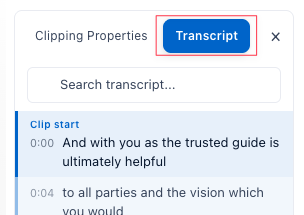
- Search transcript — search bar at the top lets you quickly find a key word or phrase.
- Clicking a specific line jumps playback to that moment in the video.
- The transcript scrolls in sync with playback as it progresses.
- Scrubbing the timeline moves the highlight to the matching point.
- Clicking a line in the transcript jumps playback to that moment.
For more on uploading VTT files to an existing asset, Click Here
For more on Transcriptions, Click Here
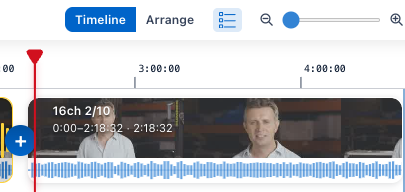
Timeline
The timeline at the bottom shows your asset and all clip segments. Above the timeline, you'll find the editing controls:![]()
Control |
What it Does |
|---|---|
|
Trim In |
Trims everything on the selected asset before the playhead
|
|
Trim Out |
Trims everything on the selected asset after the playhead
|
|
Split at Playhead (↔) |
Splits the asset at the current playhead position
|
|
Undo |
Steps backward through edits
|
|
Redo |
Steps forward through edits
|
|
Timeline / Arrange toggle |
Switches between the full timeline view and the simplified Arrange view |
| Cue Points |
Toggles the display of cue point markers below the timeline |
|
Zoom controls / Fit |
Zoom the timeline in or out, or fit the whole asset into view |
Note: The trim in/out times will automatically adjust and reflect in the clipping properties when the yellow trim handle is dragged
Precision Editor
Double-click any segment on the timeline to open the Precision Editor — a pop-up for frame-exact trimming.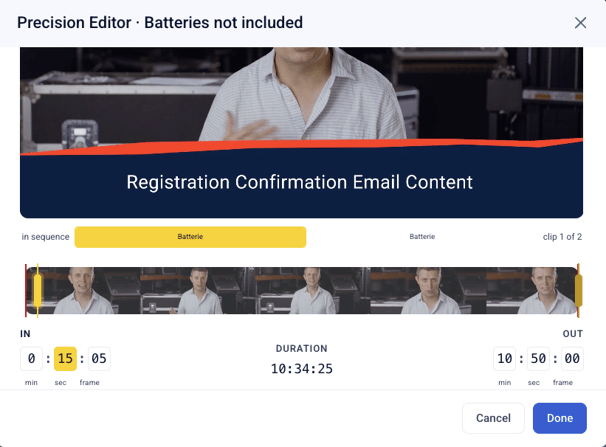
-
The "in sequence" selector" shows all clip segments as scrollable tabs. The currently selected clip is highlighted yellow, and a counter (e.g., "clip 6 of 8") tells you which segment you're editing
-
Using the Filmstrip yellow handles you can drag to set in/out (red boundaries mark the segment edges)
-
IN and OUT - Exact start and end points— click a unit to highlight it yellow and set the step rate, then type to set or use ← / → arrows to change frame by frame.
- Duration is auto-calculated from IN/OUT — this is read-only and cannot be customized or edited.
- Cancel discards or applies the edit back to the clip
How to Split an Asset or Remove a Section
- Move the red playhead to the start of the section you want to remove.
- Press C (or click the Split at Playhead button) to cut the clip at that point.
- To remove: move the playhead to the end of the section to remove.
- Press C again to create a second cut, isolating that segment.
- Click on the segment you want to remove, then press Delete on your keyboard or click the Delete button in the Clipping Properties Panel
The remaining segments will export as one continuous clip.
Using Cue Points
If your asset has Cue Points (chapter markers), they appear as yellow pin markers along the bottom of the timeline, each labeled with the cue point name and its time range.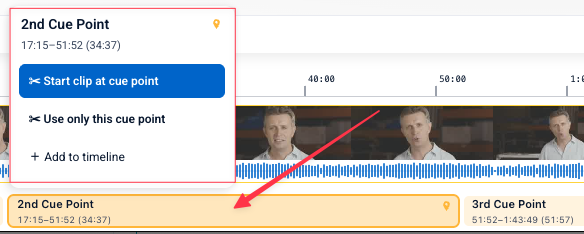
Clicking any cue point marker opens a quick-action menu:
Option |
What it does |
|---|---|
| ✂️ Start clip at cue point | Sets your Trim In to the start of that cue point |
| ✂️ Use only this cue point | Sets both Trim In and Trim Out to match exactly that cue point segment — instantly creates a clip of just that chapter |
| + Add to timeline | Adds that cue point's segment as a separate clip to the end of the timeline |
This gives you a fast way to build clips around your existing chapter structure without manually setting Trim In and Trim Out points from scratch.
Note on export: Only cue points that fall within your trim range (between Trim In and Trim Out) will be carried over to the exported clip. Their timestamps are automatically adjusted to match the new clip's boundaries. Cue points outside the trim range will not be included.
How to Add Bumpers or Additional Clips
You can add intro and outro segments (bumpers) — or any additional clips — at any point in the timeline with no limit on how many you add.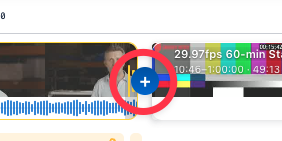
- Click the + button (blue circle) that appears between segments or at either end of the timeline.
- The asset selector will open. Search for the asset you want to add.
- Once selected, the clip appears on the timeline at that position.
- Repeat as needed.
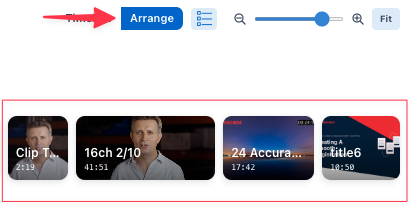
To reorder segments, click Arrange to switch to the card view and drag the clips into your preferred order. Click Timeline to return when done.
The final export stitches everything together in the order shown on the timeline.
How to Export Your Clip
When your clip is ready:
- Click Export in the upper-right corner.
- In the export modal:
- Enter a Title for the new asset. This field is required — you cannot export without it.
- Choose a publishing profile. We recommend Enhanced profiles for best results.
- Include Metadata is selected by default but optional — this carries over the title, description, dates, categories, and other metadata from the original asset. Uncheck this to start with a blank slate.
- Click Edit Metadata to customize which metadata fields are inherited. Until you've set values in Edit Metadata, you'll see "No metadata set yet" in the preview — this is normal.
- Click Create Clip.
Once submitted, a queue tray will appear on screen showing the progress of your export.
You can minimize this tray and drag it anywhere on the screen while you continue working. The queue will keep running even if you close the Clipping Tool entirely.
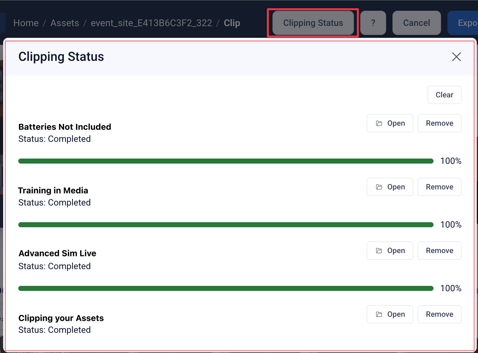
You can also click Clipping Status in the header at any time to open the full status modal, which shows all clips with their current progress. When a clip finishes, you'll see Open and Remove buttons next to it. A Clear button at the top removes all completed entries from the list.
The clipped asset is treated as a brand new, independent asset in the system with its own metadata and thumbnails — it is not linked to the original.
About Publishing Profiles
We provide multiple publishing profiles to allow you to export your clip in a manner of your choosing.
- HLS for Online Viewing
- MP4 for Downloads or Advanced SimLive workflows
- MP3 for Downloads or Podcasts
- And any combination of the above
We provide standard and enhanced profiles to suit your preferences. While both produce excellent quality, we recommend the enhanced profiles for best accuracy and results.
If your clip has one or more segments or assets involved, standard profiles will not be available.
For more about Publishing Profiles, Click Here