
Sardius Channel Setup - Part 1 of 2
In the Sardius Channel that the client will use, locate “Stream” on the sidebar. Then click “Set Up”

Select "Add Source".

Select "Manual" under Choose Source

Select the option you will set up the device with under "pick your protocol", then click "next"

You first choose any output you'd like to add, then hit "save" at the top right corner.

Once you save your above settings you will able to copy the links needed to move forward. 
Open a text editor, such as Notepad or Notes and paste the Endpoint URL. This URL will have to be modified before it can be inserted into your Elemental.
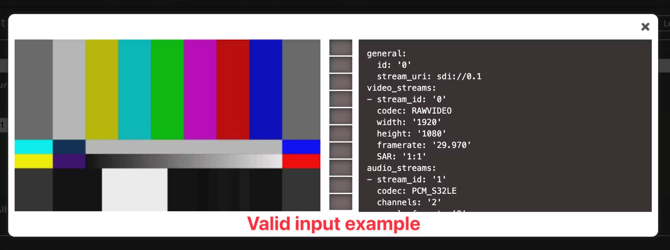
Example URL provided by Channel
https://ep2.storage.sardius.media/ep2/p/A5C4C65cB5/eyJhbGciOiJIUzI1NiIsInR5cCI6IkpXVCJ9.eyJhY2NvdW50SWQiOiI0ODc1Y0M0QWY2ZDhEODkiLCJzaXRlSWQiOiJzaXRlX0E1QzRDNjVjQjUiLCJkdnJMZW5ndGgiOjMwLCJpYXQiOjE2NzA5NzI5Njh9.7xly1SHkiqJfPTIB7zvntLsQsbZfHUFIs5e2xl6Z8e4
In order to use this URL in your Elemental, you will need to add /playlist to the end.
This is what the final URL should look like.
https://ep2.storage.sardius.media/ep2/p/A5C4C65cB5/eyJhbGciOiJIUzI1NiIsInR5cCI6IkpXVCJ9.eyJhY2NvdW50SWQiOiI0ODc1Y0M0QWY2ZDhEODkiLCJzaXRlSWQiOiJzaXRlX0E1QzRDNjVjQjUiLCJkdnJMZW5ndGgiOjMwLCJpYXQiOjE2NzA5NzI5Njh9.7xly1SHkiqJfPTIB7zvntLsQsbZfHUFIs5e2xl6Z8e4/playlist
Elemental Setup
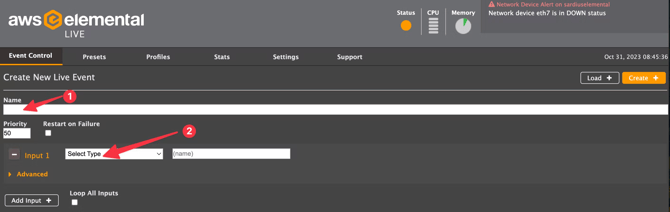
Live Event Setup

- Enter a name for the Event
- Select the Input Type. Typically, this will be an SDI input. Be sure to verify with the client which SDI input will be used.

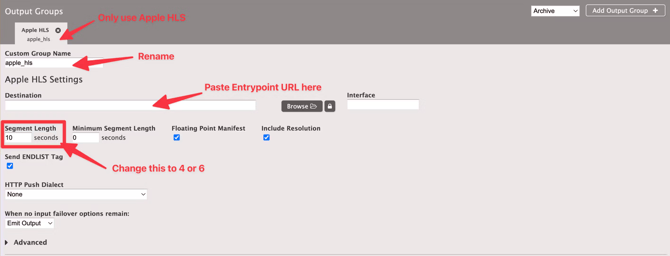
Output Groups
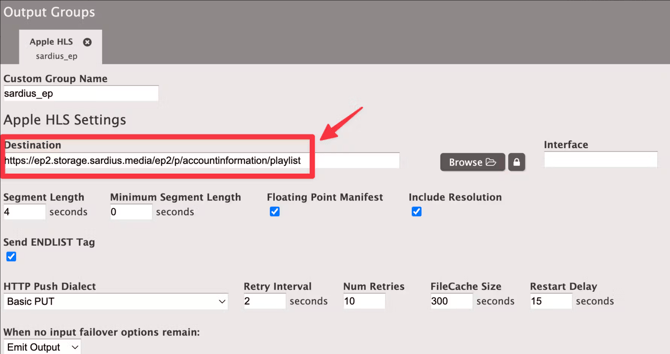
- Delete all output groups except for Apple HLS. You can do this by pressing the X next to the output group.
- Rename the Custom Group Name to something like sardius_ep
- In the Destination Field, paste the information you created from the “Final URL for Elemental” step above.
- Adjust your segment length to 4 or 6 seconds.
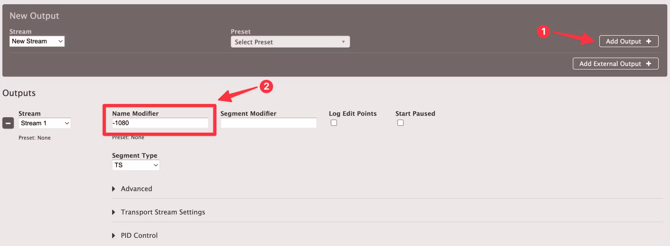
Outputs
Output 1: 1080
- In the “New Output” section, click on “Add Output+” on the right-hand side.
This will create a new output and a new stream called Stream 1 - In the Name Modifier, enter -1080
Outputs 2-4: 720, 480, and 360
Repeat the steps above to create additional outputs for 720, 480, and 360 resolutions.
Streams
Stream 1: 1080
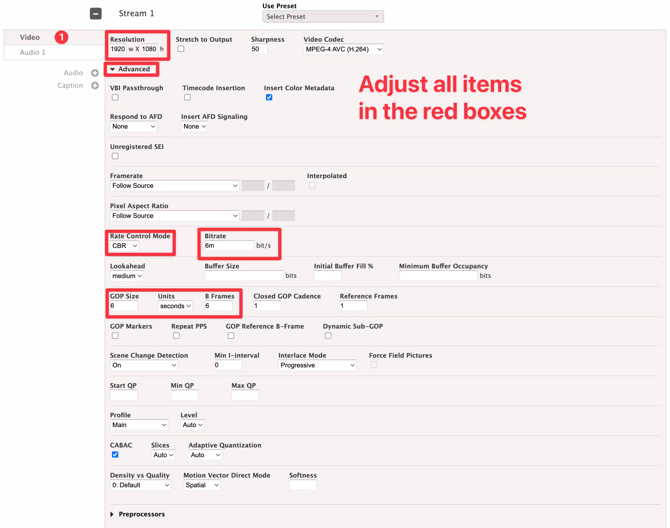
Under Video:
- Resolution: 1920 w X 1080 h
- Click on the Advanced Settings icon
- Rate Control Mode: CBR
- Bitrate: Enter 4m or 6m
- GOP Size: 4 or 6
- This MUST match the Segment Length under the Output Group
- Units: Seconds
- B Frames: 2 or 3
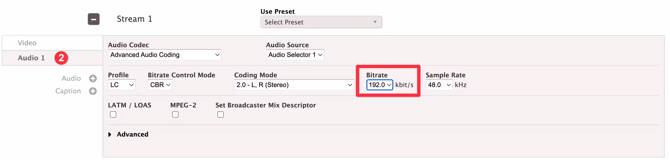
Under Audio 1
- Change the Bitrate to 192.0 kbit/s
Streams 2-4: 720, 480, 360
| Stream | Resolution | Rate Control | Bitrate | GOP Size | Units | B-Frames | Audio Bitrate |
| 720 | 1280x720 | CBR | 2m or 3m | 4 or 6 | Seconds | 2 or 3 | 192 kbit/s |
| 480 | 854x480 | CBR | 1m or 2m | 4 or 6 | Seconds | 2 or 3 | 192 kbit/s |
| 360 | 640x360 | CBR | 600k or 800k | 4 or 6 | Seconds | 2 or 3 | 128 kbit/s |
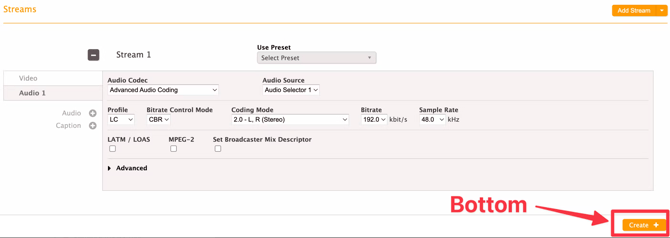
Review and Save

Sardius Channel Setup - Part 2 of 2
Congratulations!
Create an Event from a Template

- In the box that appears, click “Choose File”
- Locate your file, then click “Apply”
- With the channel loaded, scroll down to the Output Groups. Replace the HLS Destination according to what you obtained from the Sardius Control Panel.
As necessary, adjust:
- Output Groups
- Segment Length
- Outputs
- Add/Remove Outputs
- Adjust Name Modifiers
- Streams
- Resolution
- Bitrate
- GOP
- Any other Audio/Video Settings