Customizing Your Calendar Event (Turnkey)
This article is designed specifically for the Turnkey layout. There may be some features below that you will not find for normal events or other layouts.
Sites are dynamically controlled by calendar events. The site will use its respective calendar to determine when to show specific content on the page to viewers, based on your scheduled events in the site's calendar.
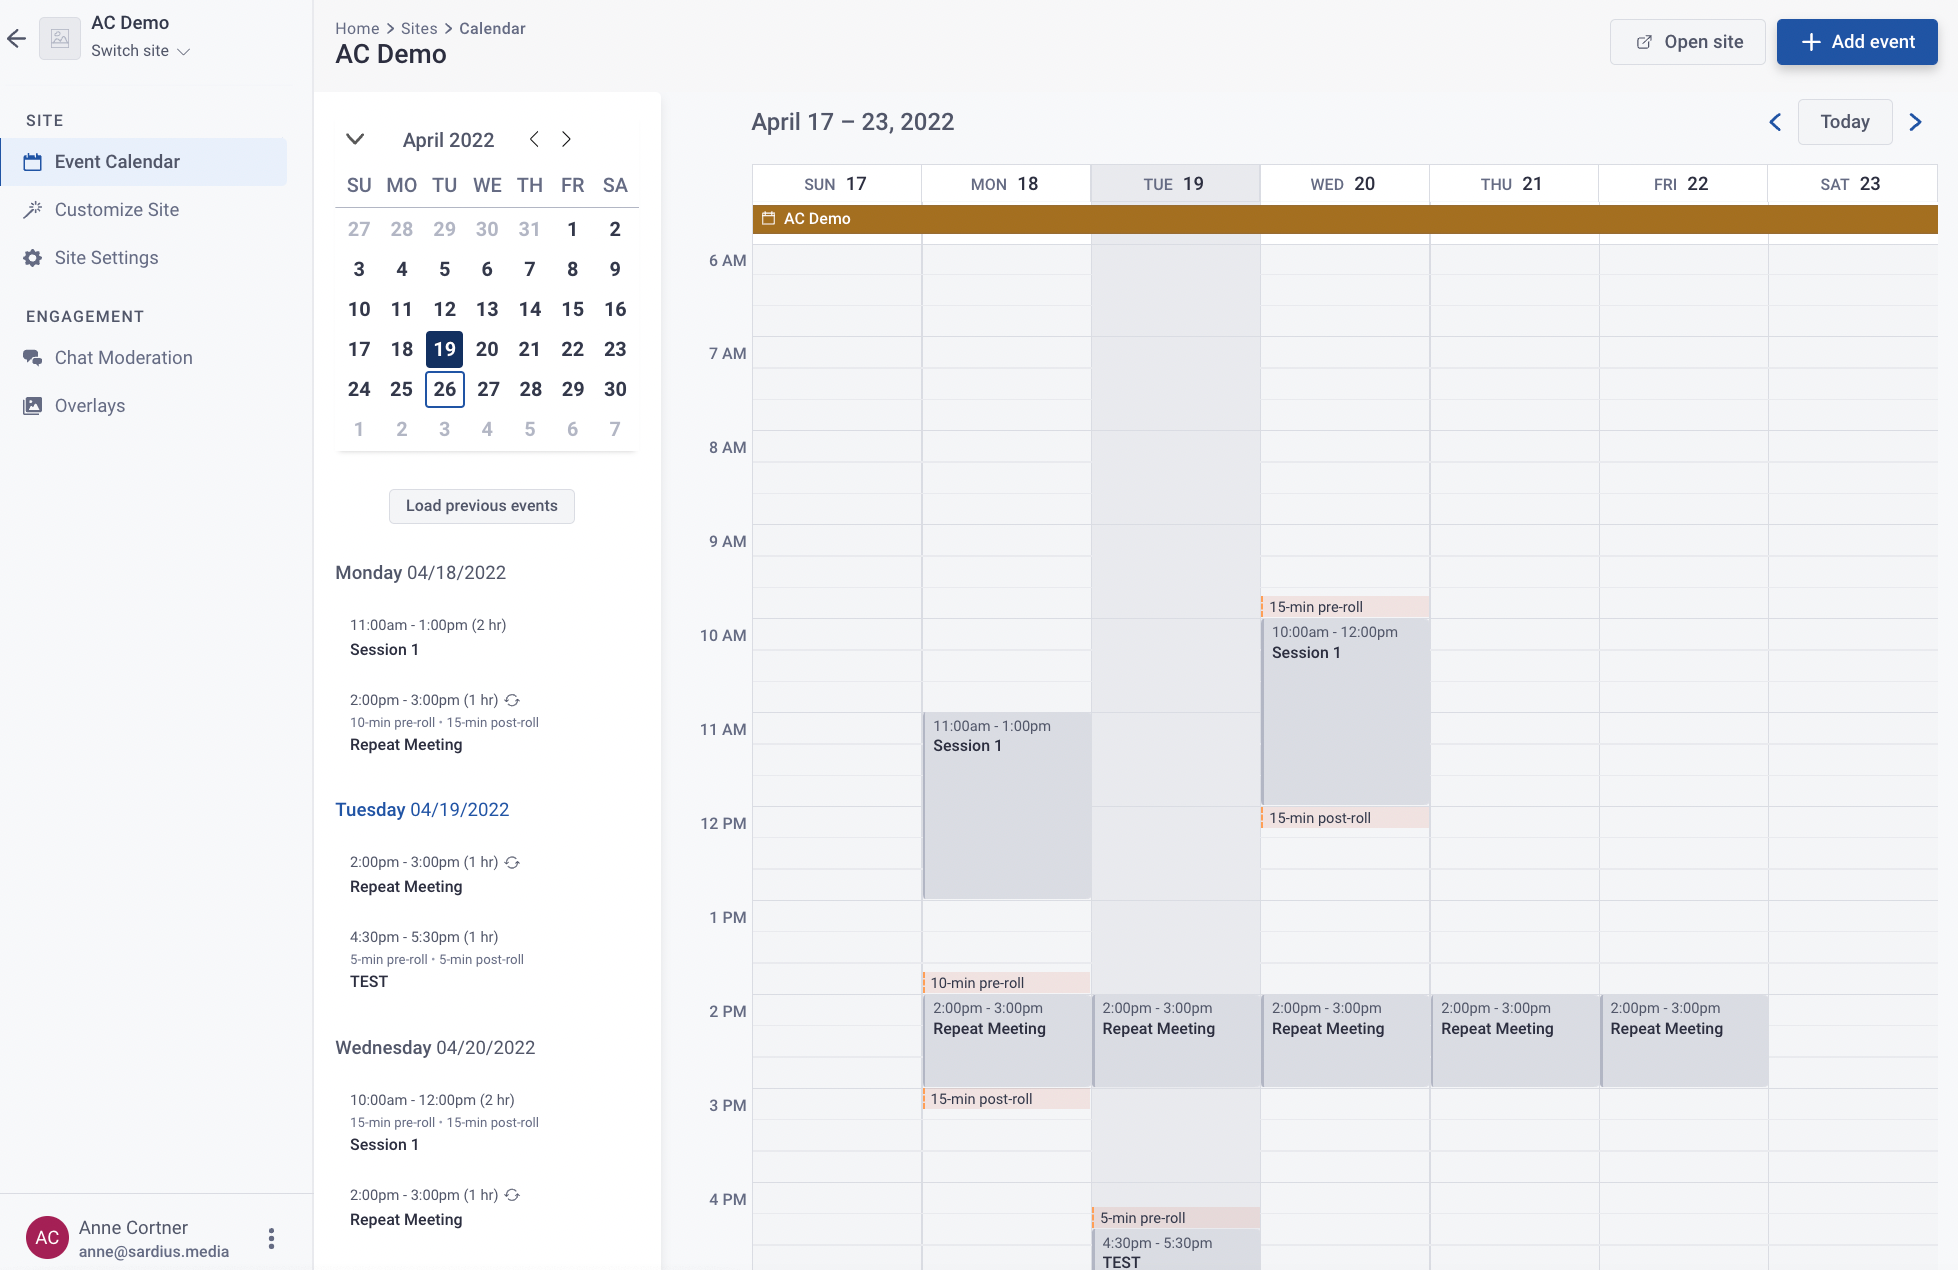
Adding More Details to Your Event
Prior to Saving, you can click on Add More Details to update your Event Details, Customization (Event Type, Breakouts, VOD, Announcement Setting, Access), and Archive Settings

Depending on which Site layout you are using, you will have various live state layout customization settings for your event. The Customization tab allows you to customize these settings across all Viewer Segments you are using for your event site.
From this tab, you have the ability to update the Event Type, add Breakouts to this event, add Video on Demand for this event, create an Announcement Setting, and Restrict Viewer Access
At the top of the page, you will be able to note your Viewer Segment (example: Default Experience). The calendar event that you are creating will only show in the Viewer Segment selected
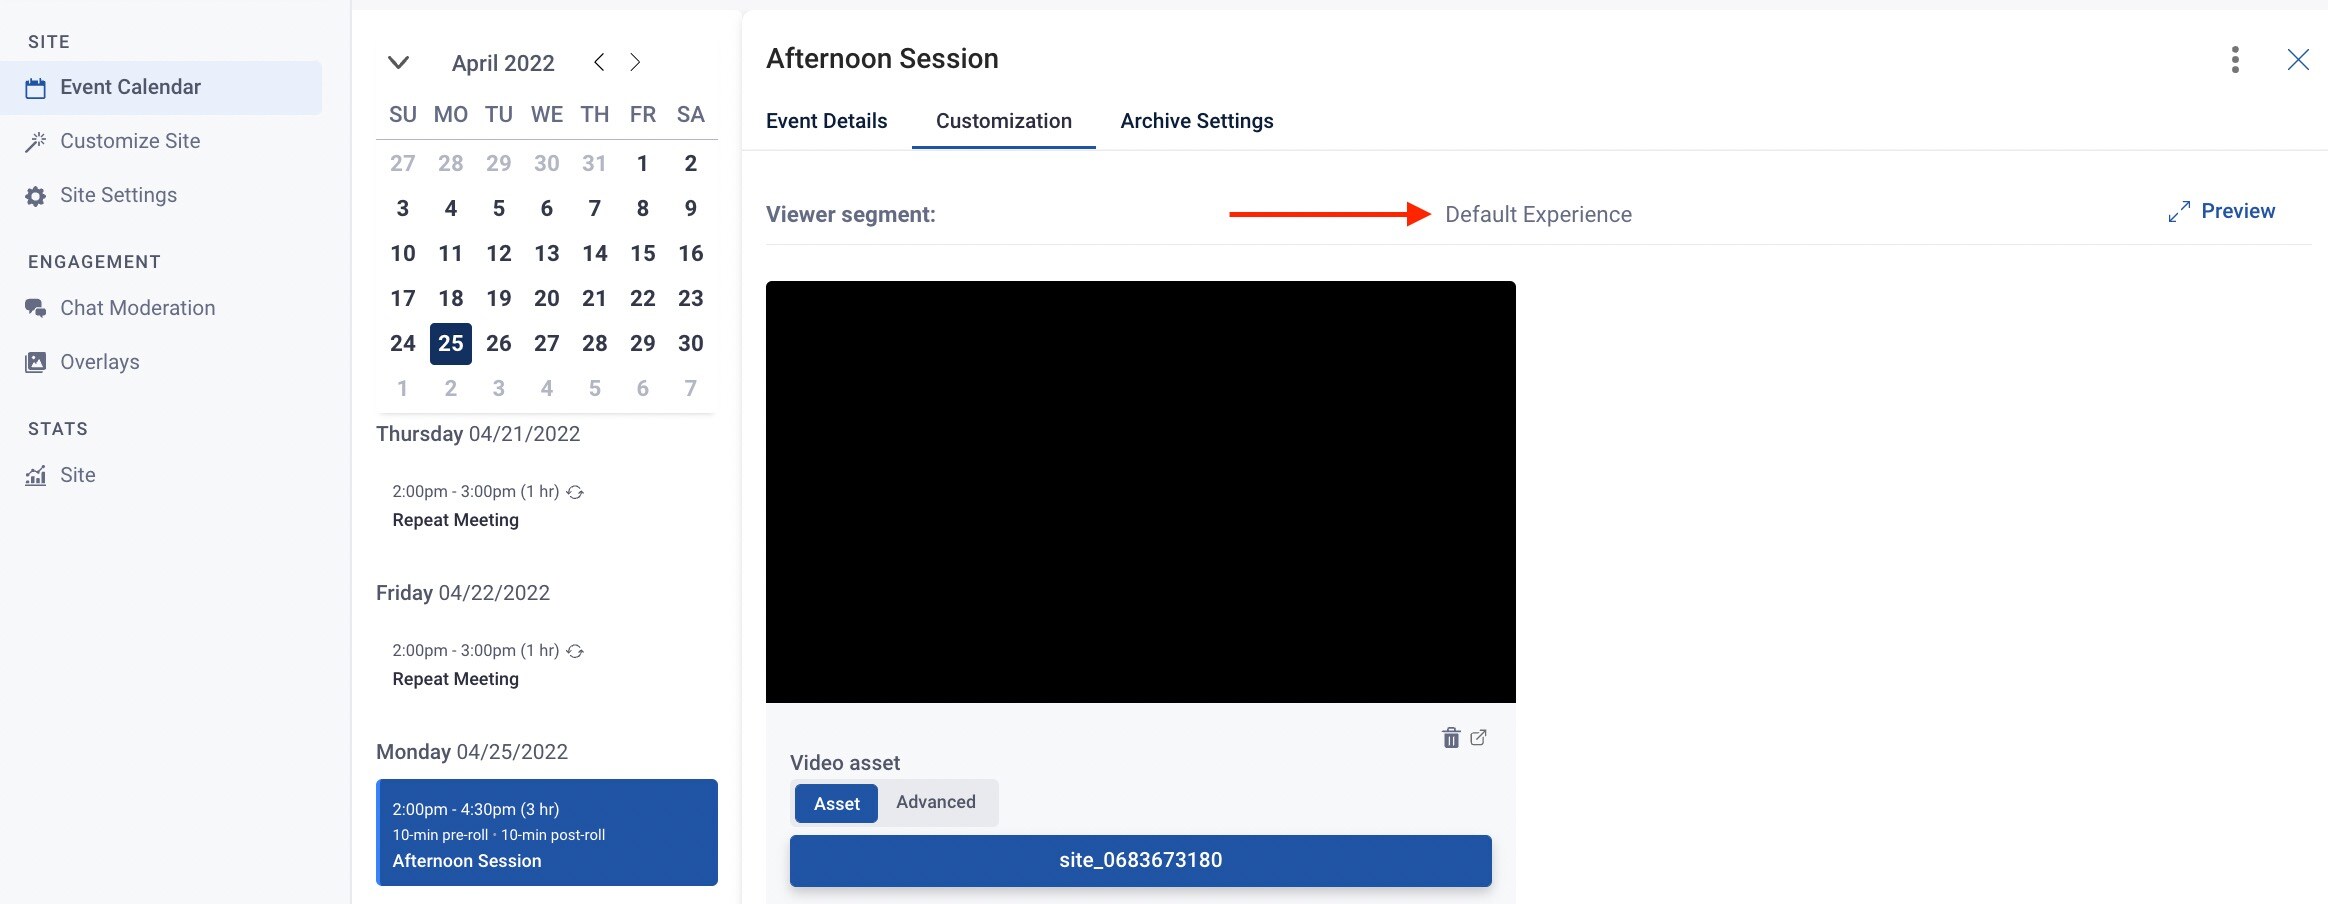
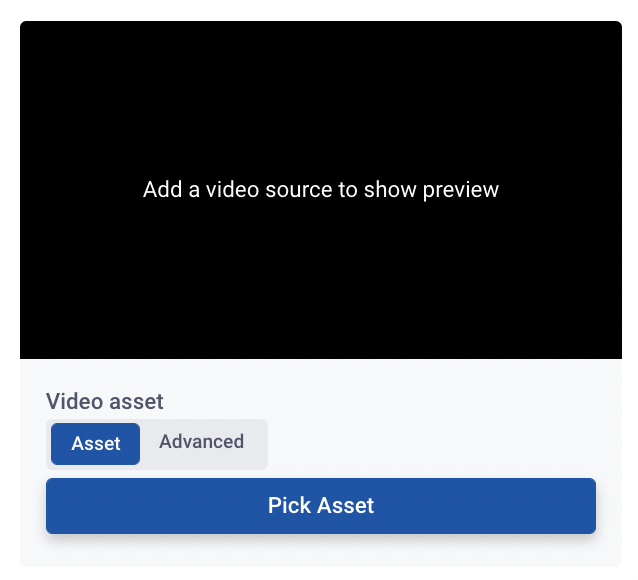
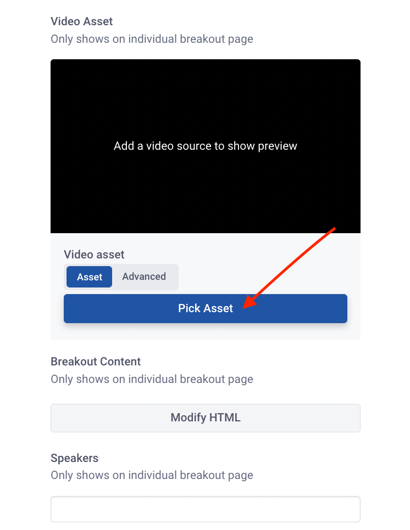
To choose the type of Asset that will be played out by clicking on the Pick Asset button
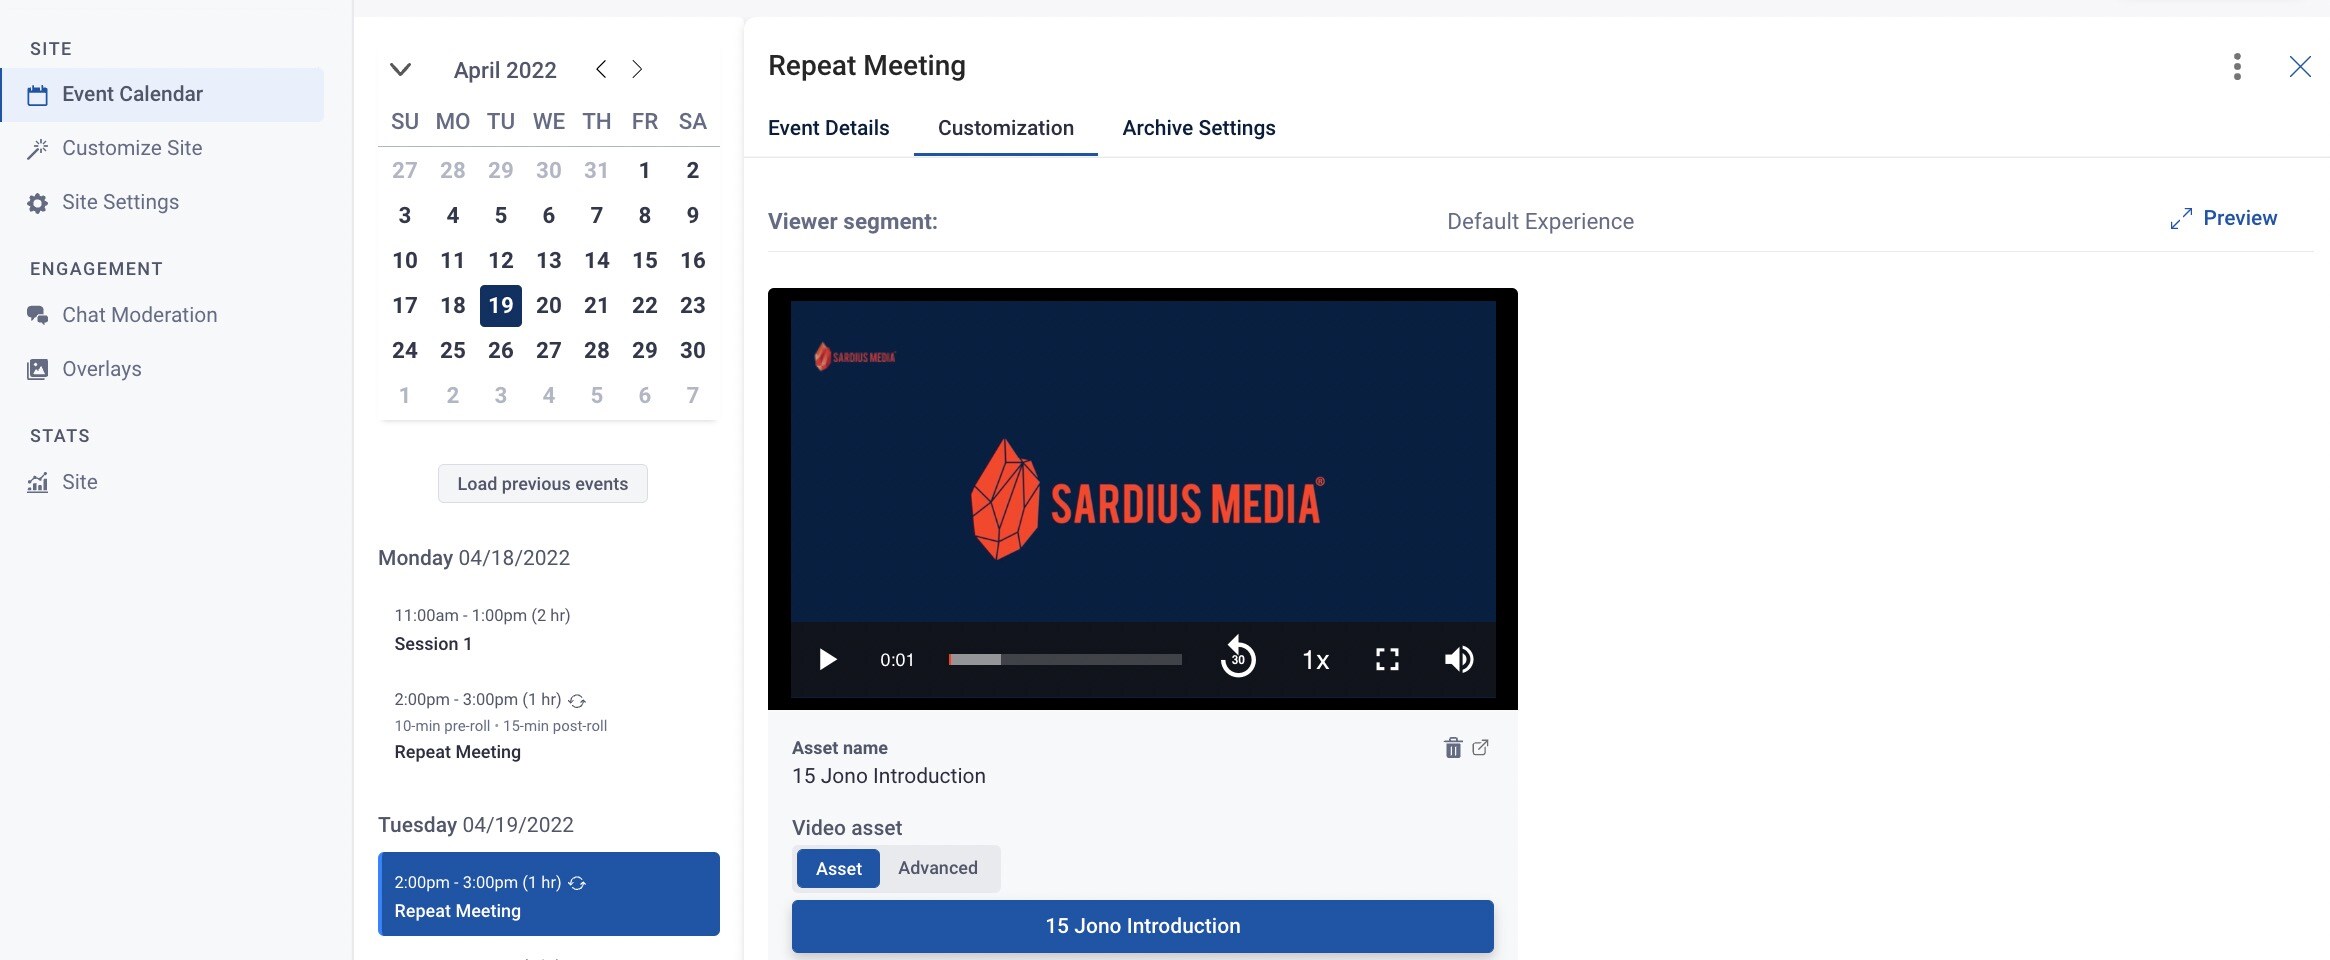
Once you successfully select your asset, you will the title of the asset appear on the blue Pick Asset button

Once an asset has been selected, you will be able to preview it
Advanced Options
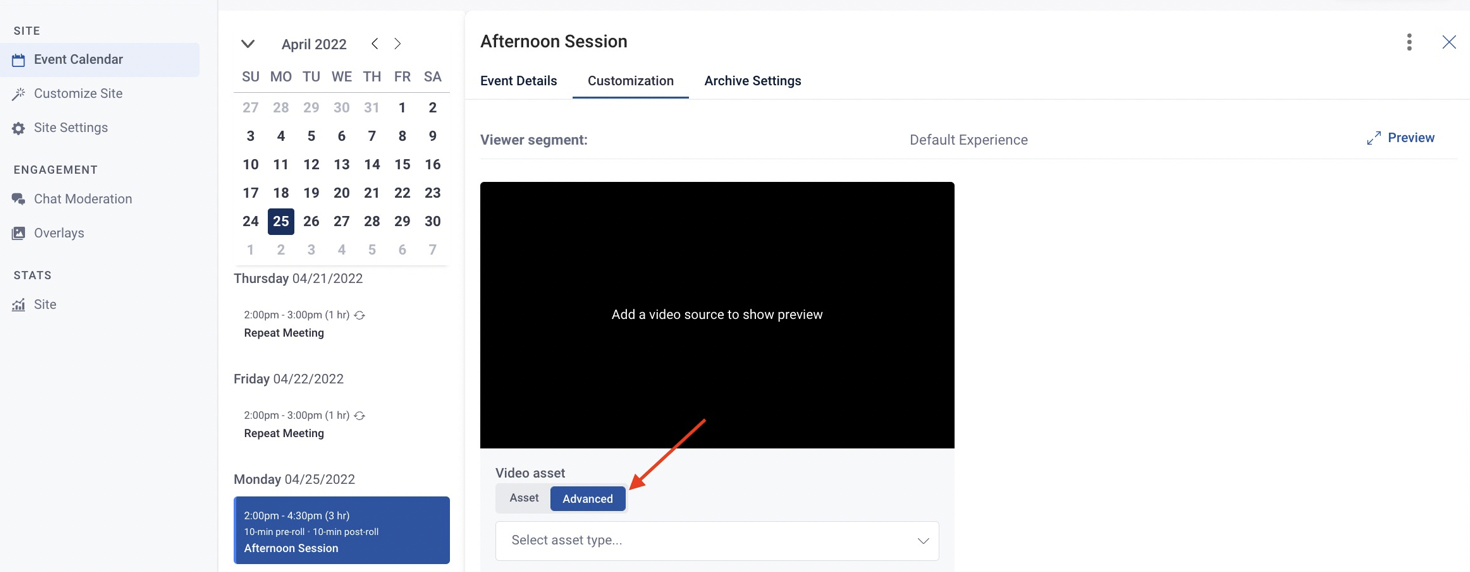
For advanced options, click on the blue Advanced button to select the asset type (example: SimLive, iFrame, YouTube, etc.)
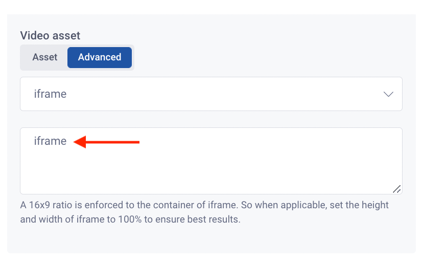
For an iframe assets, enter your HTML code in the box under the drop-down
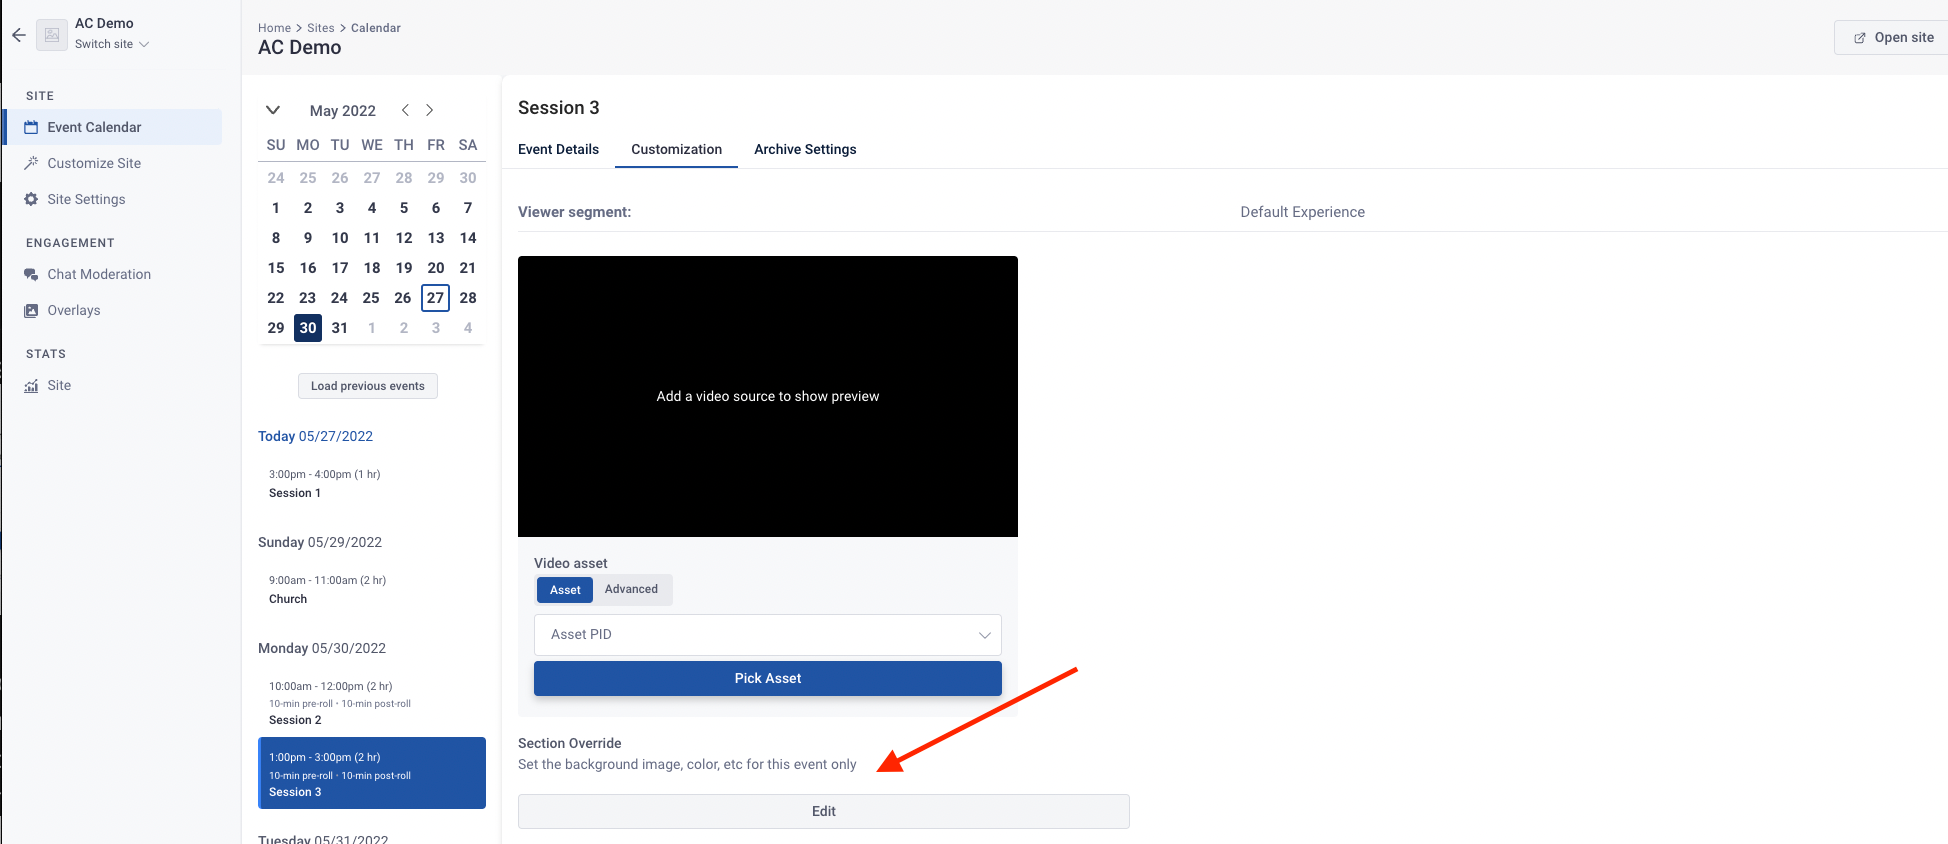
Section Override
If you desire to change the section image, color, etc. for this event only, select Edit. This will update the background image, color, etc for this event only
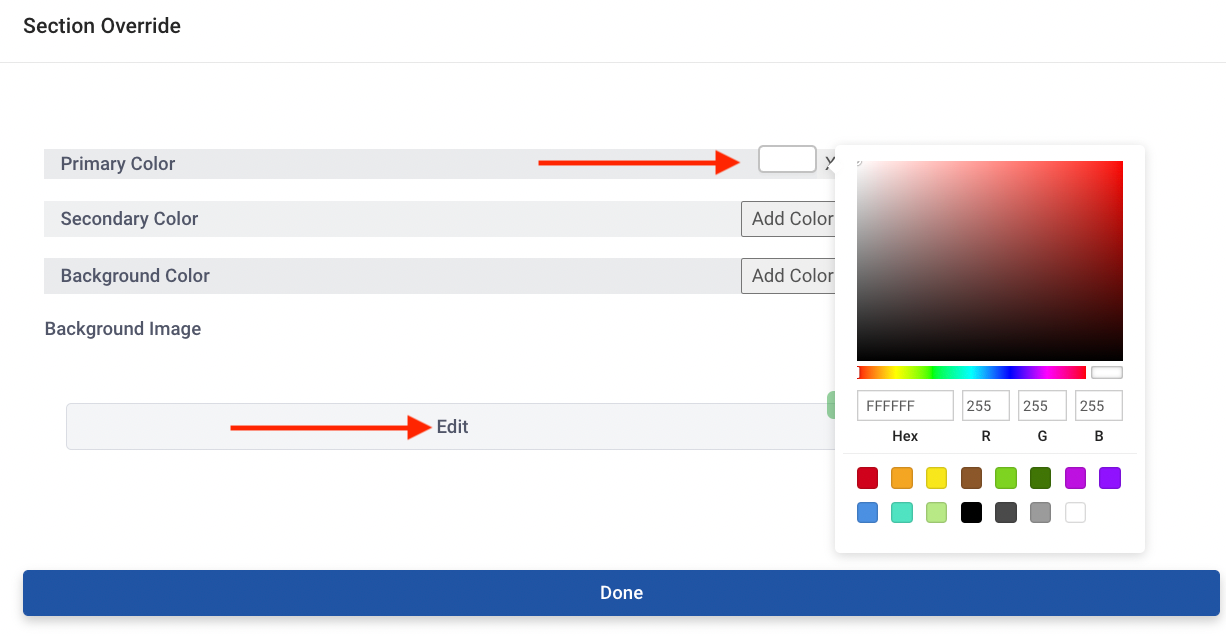
To update your Primary, Secondary, and Background Color, click on the color box next to each field to select a new coloror add your Hex#
Click on the Edit button to update the background image
Click Done to save your changes
Next, determine if you will include Chat during this event. Toggle ON will disable chat.
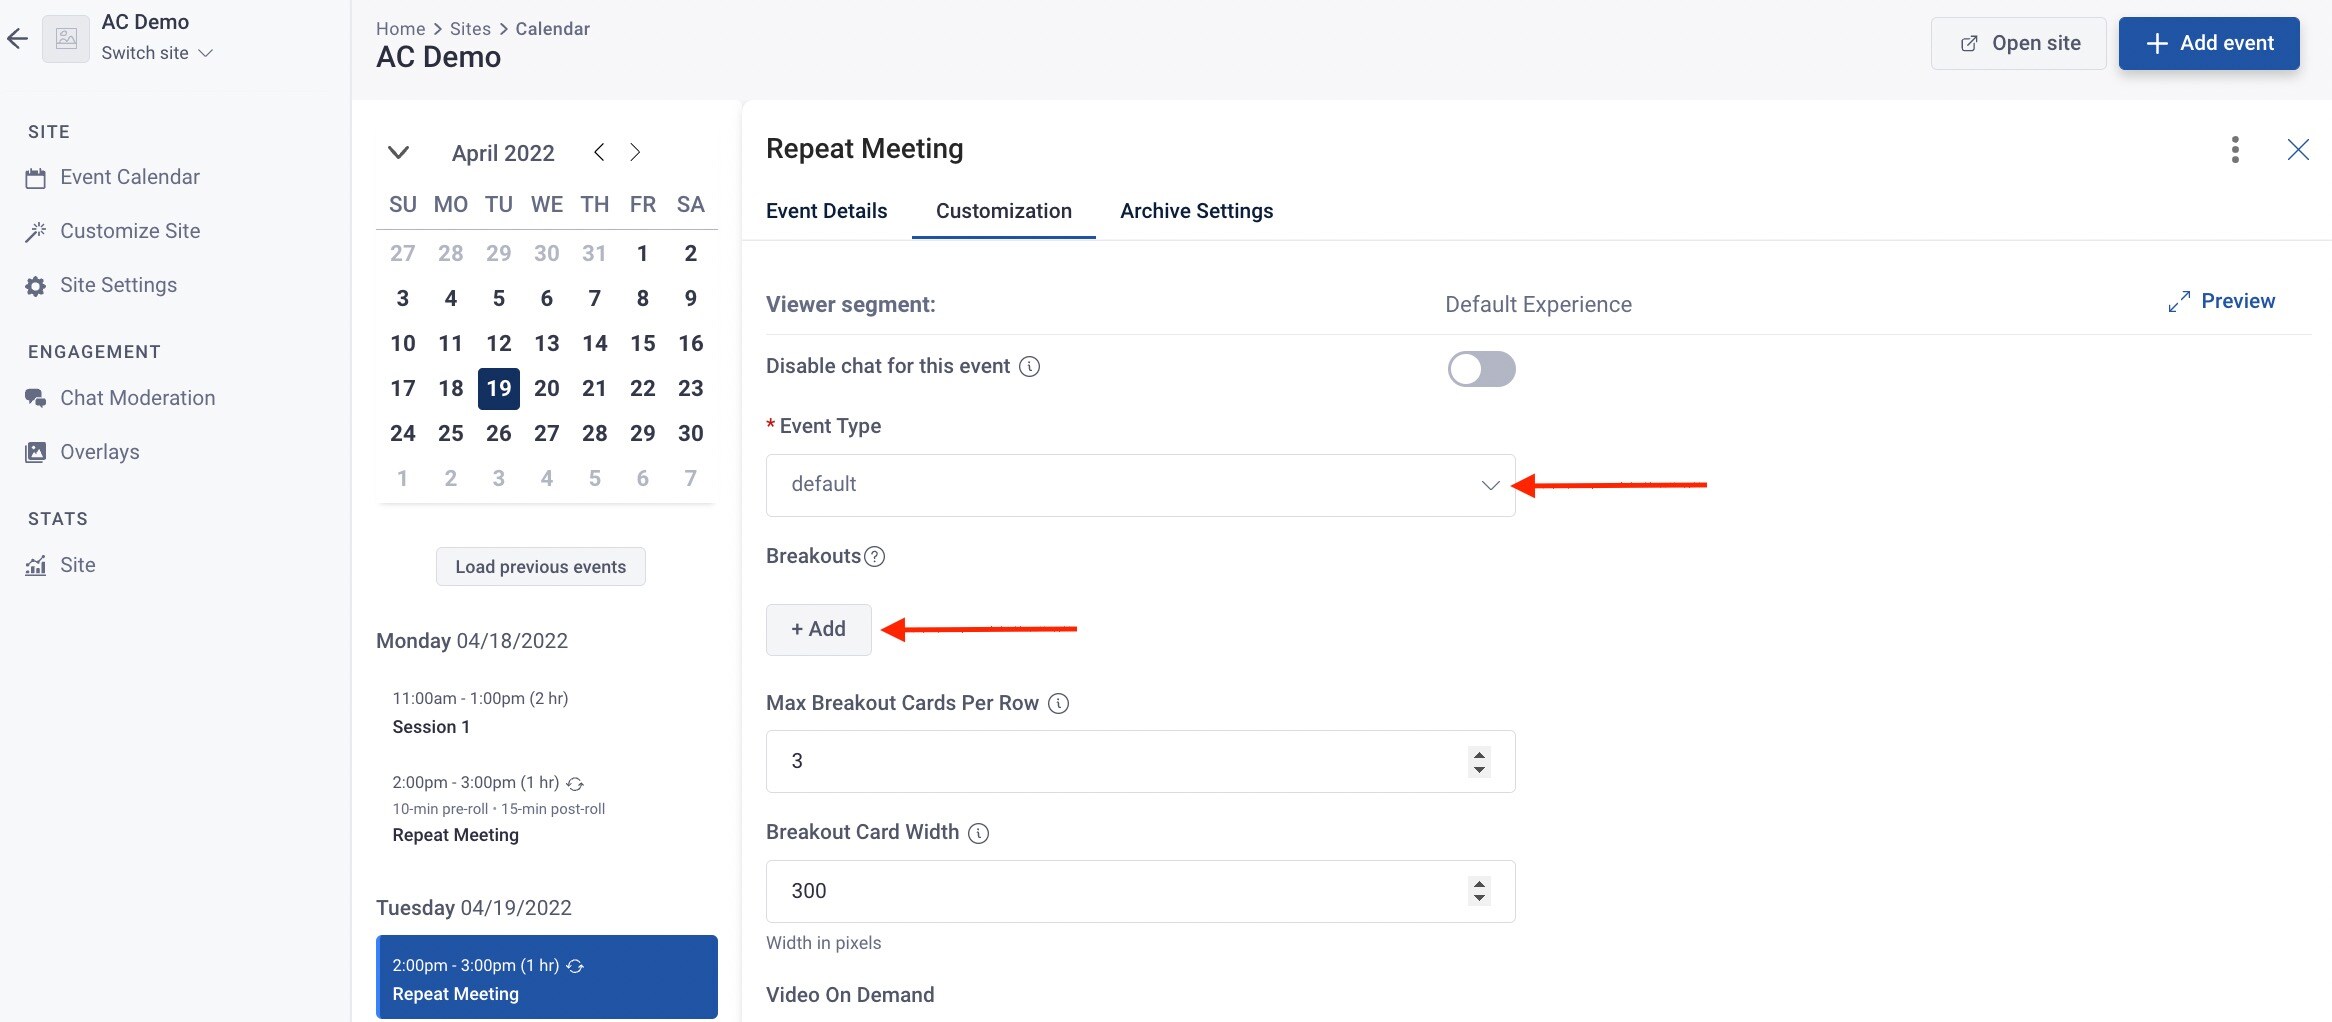
Select your Event Type (default, breakout or both) by clicking on the drop-down arrow

You have the option to add Breakouts to this scheduled event. Note that the Event Type needs to be Breakout
Click on the ‘Add’ button under Breakout
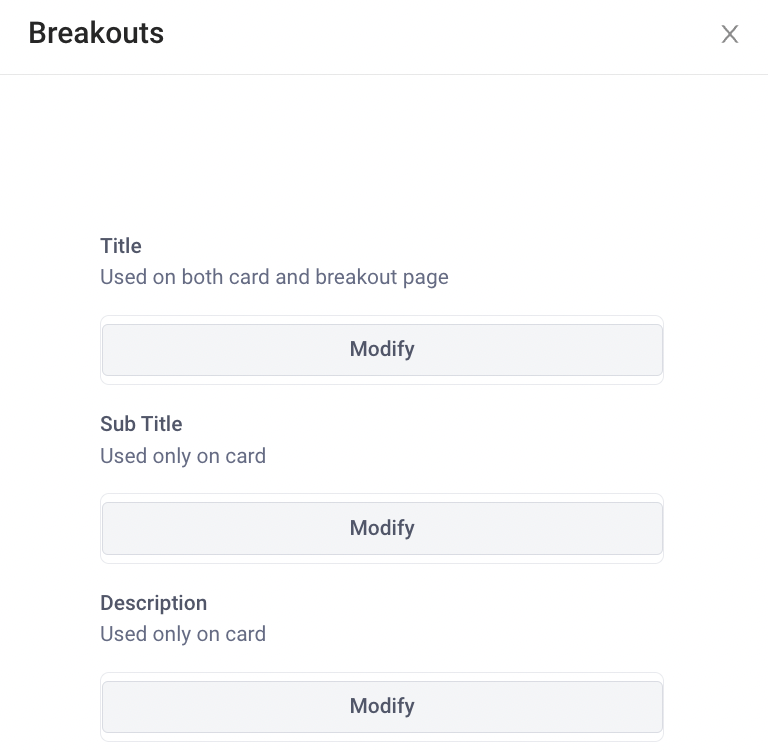
Next, click on the Modify button to enter your customized text for the Title, Sub Title, Breakout Description. Next, select Pick Asset for the video asset that will show only for this scheduled event.
To add additional text for the breakout session, select modify HTML to update your breakout session. Click on Speakers, to add your bios for the breakout session
Add Custom Links to your breakout session by clicking on Edit. You have the ability to add a URL link that takes the viewer to a separate page or Toggle ON to add modal content that displays the information on the page. An example of a custom link could be a website or a PDF


To enable Chat Room or Watch Party, enter the Chat Room ID

Reminder, Chat Rooms need to be set up prior to adding the Chat Room ID for your breakout sessions. Chat Rooms can be created by going to Site Settings and clicking on Chat Rooms

Breakout Session Access
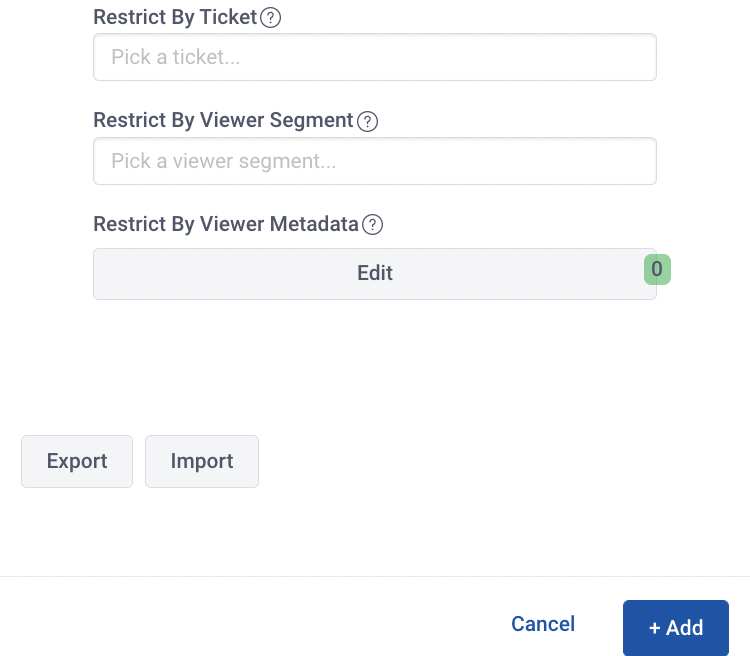
You can restrict access to Breakout Session content by Ticket Type, Viewer Segment or by Viewer Metadata by entering the relevant information.
- Restrict by Ticket: if authentication was through the Sardius registration system, you can restrict access to those who have purchased a ticket
- Restrict by Viewer Segment: if viewers segments are provided, you can restrict access to those who have at least one of the viewer segments
- Restrict by Viewer Metadata: if rules are provided, you can restrict access to those who have at least one of the rules to see the event
Click +Add to save updates
Next, select the number of breakout cards per row. Note that on the largest screen size, it will never exceed the number of cards selected per row. As the screen gets smaller, it will fit the number it can per row. Also, in selecting the breakout card width, note that the widest section can only be 1140px (there is a gridgap of 30px). These numbers must be factored into the calculation.

Determine if you will have a Video on Demand (VOD) section for this specific calendar event. To add VOD, click on +Add and edit your VOD details
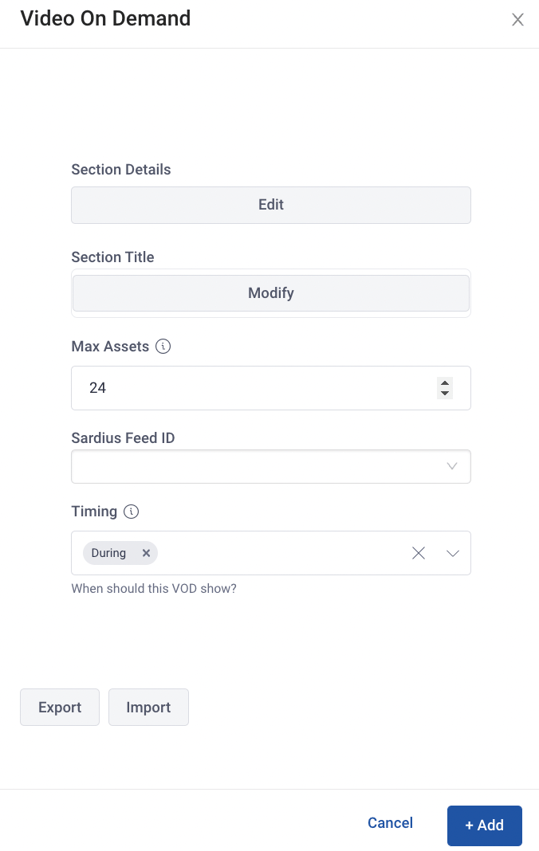
Click on Edit to add your Section Details (Order for where the VOD will be located on the page, colors, and background image)
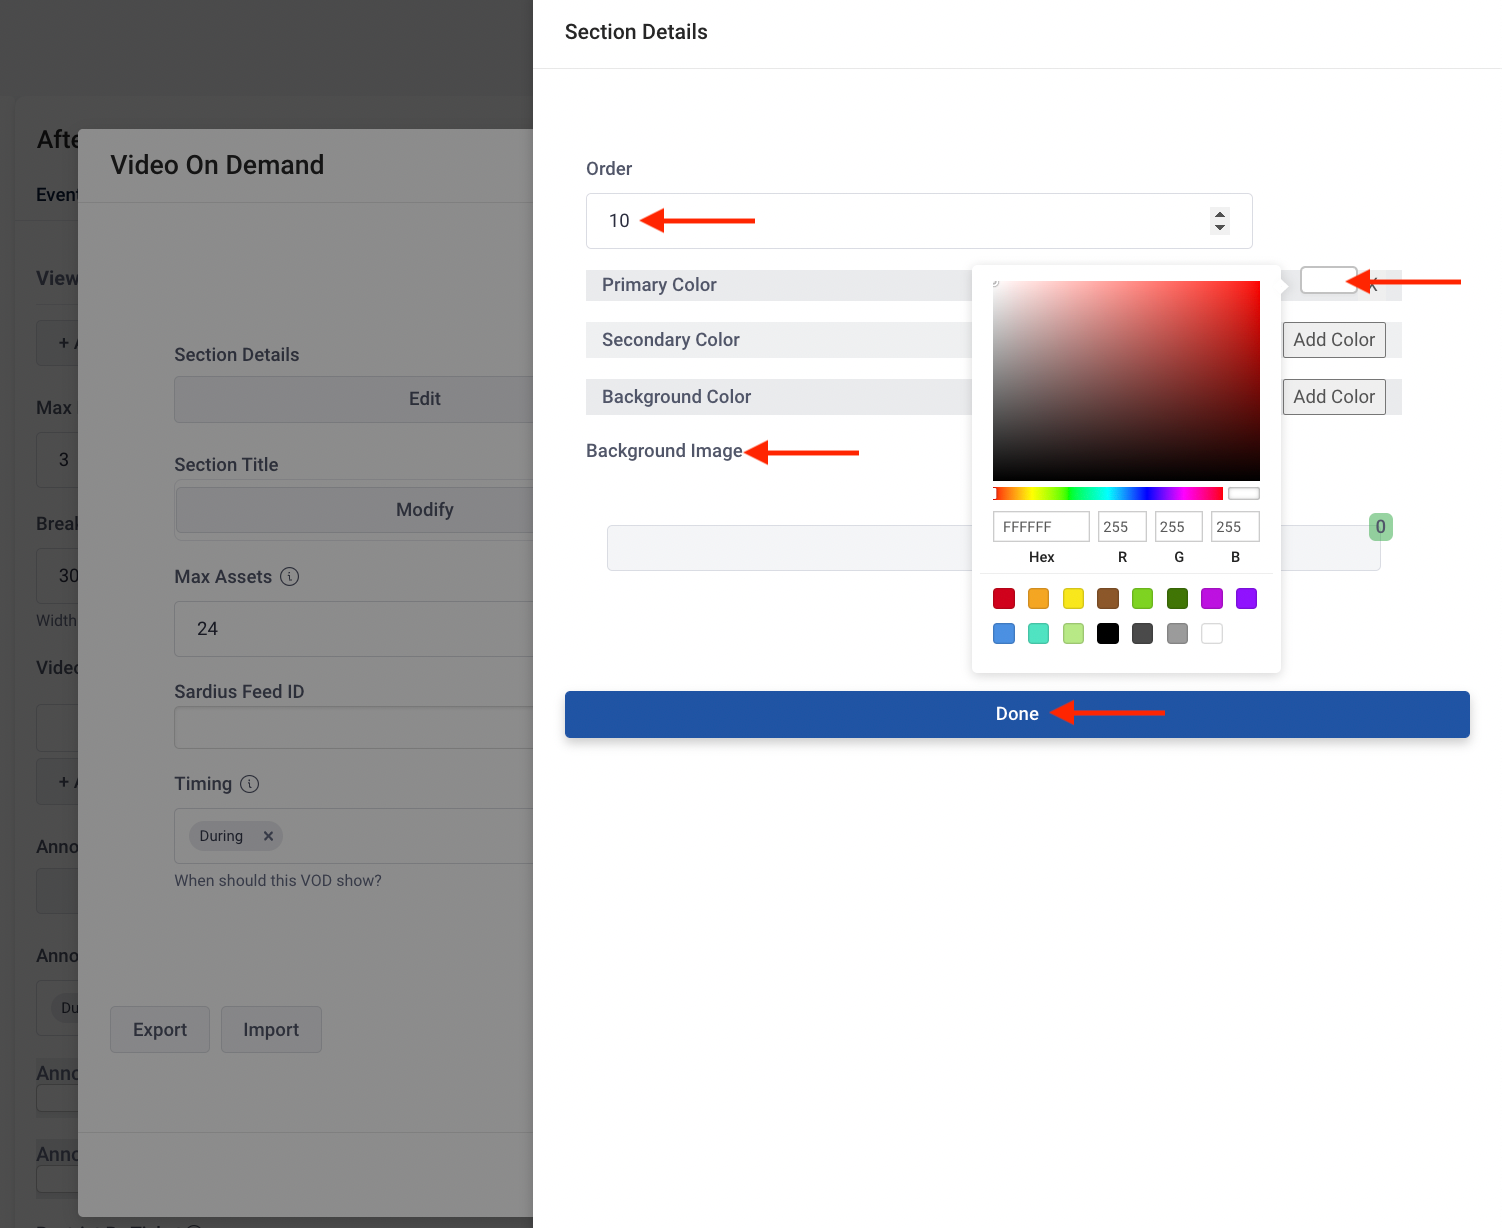
You will adjust numerically the Order of the VOD Sections for this event. It is important to note that each Section will need a numerical spot. You will insert additional sections above or below each section by adding or subtracting the number. We recommend setting the Player at 10 as it is generally at the top of your Site. Use lower numbers to put the section above the Player (example: if you would the schedule above the player, you would note it the number 5)
- Order Recommendation
- Player - 10
- Featured Speakers - 20
- Schedule - 30
- Sponsors - 40
- VOD - 50
To update your Primary, Secondary, and Background Color, click on the color box next to each field to select a new coloror add your Hex#
To update your Background Image, click Edit to add an image

A new pane will open, click Add Row

Click on the Image icon to choose from your library or to upload a new image

Select Done when complete

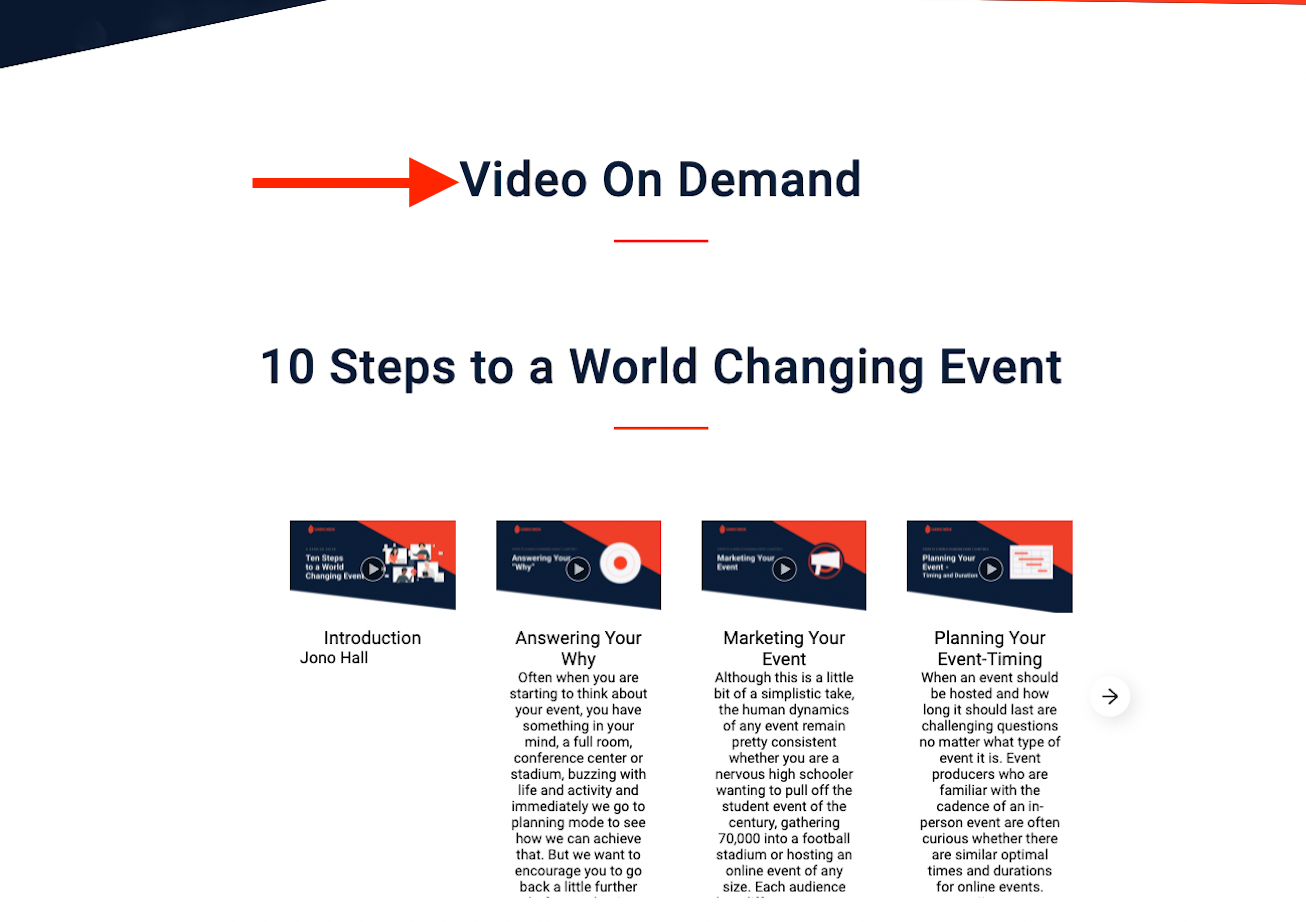
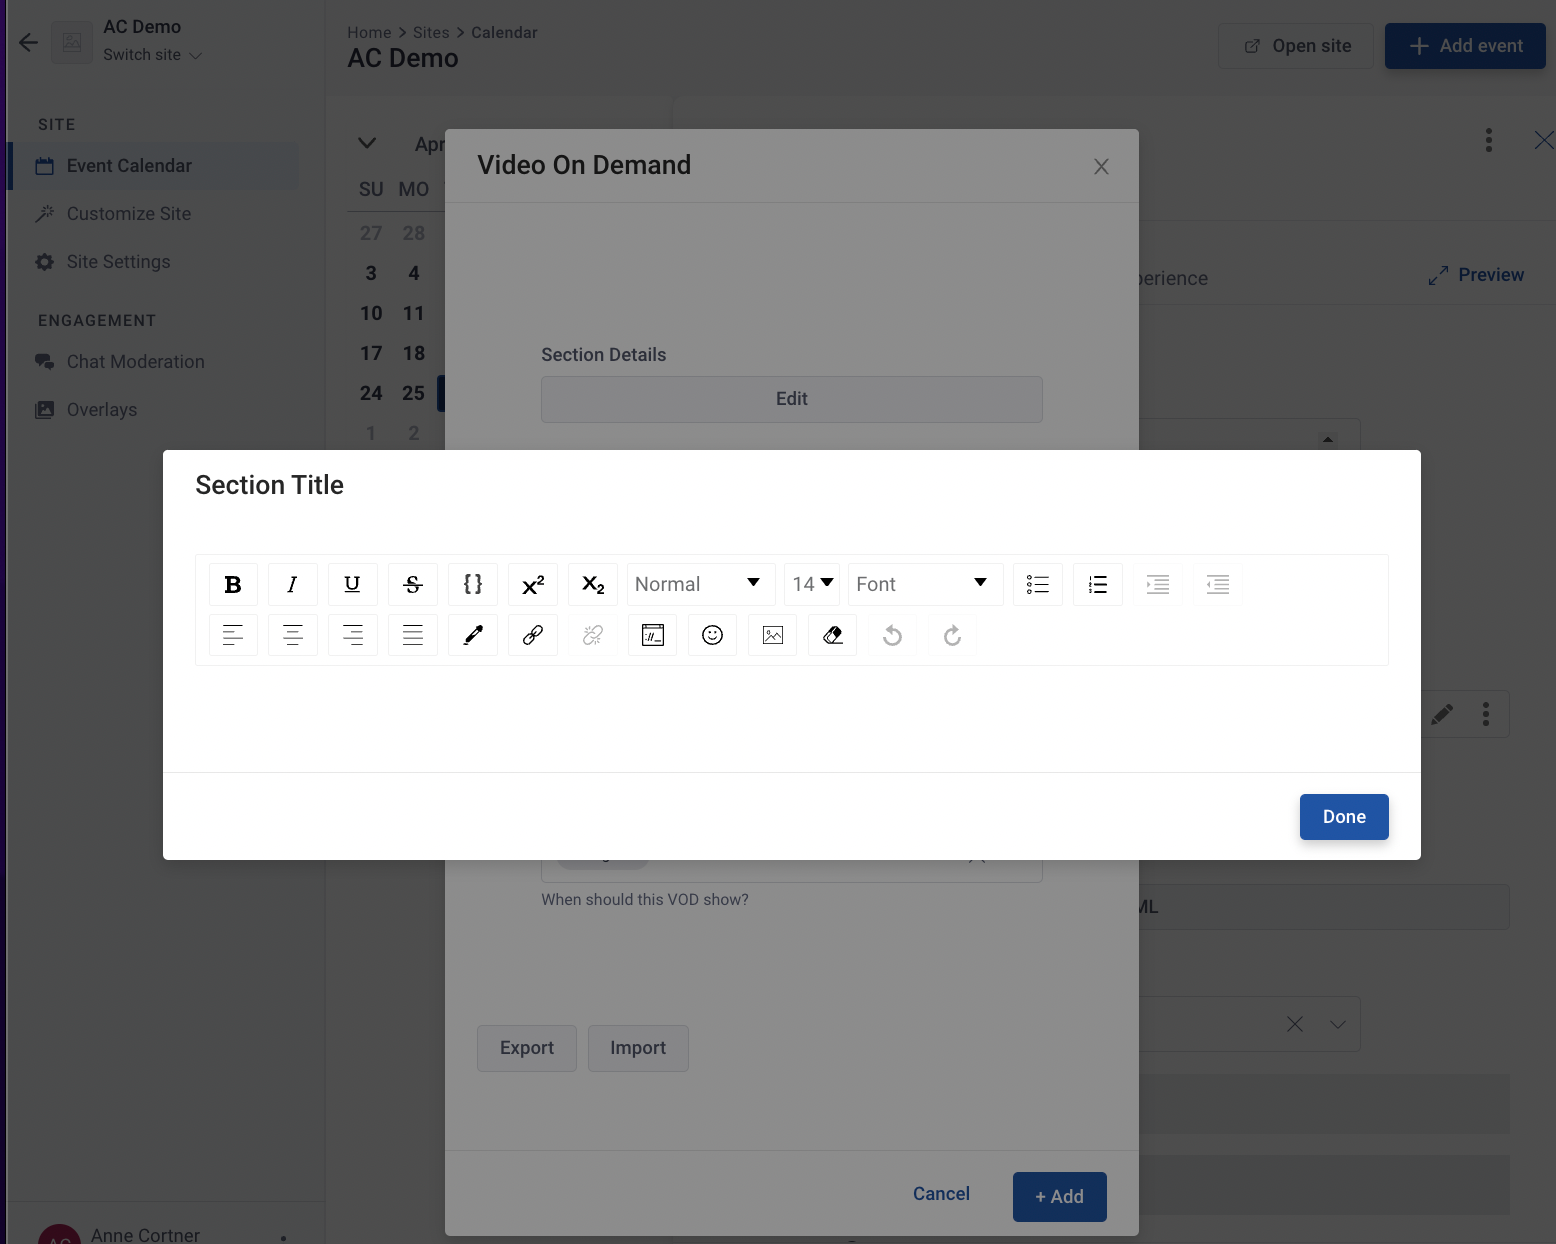
To update the VOD Section Title, select the Modify button and enter your custom text. Click Done to save your changes
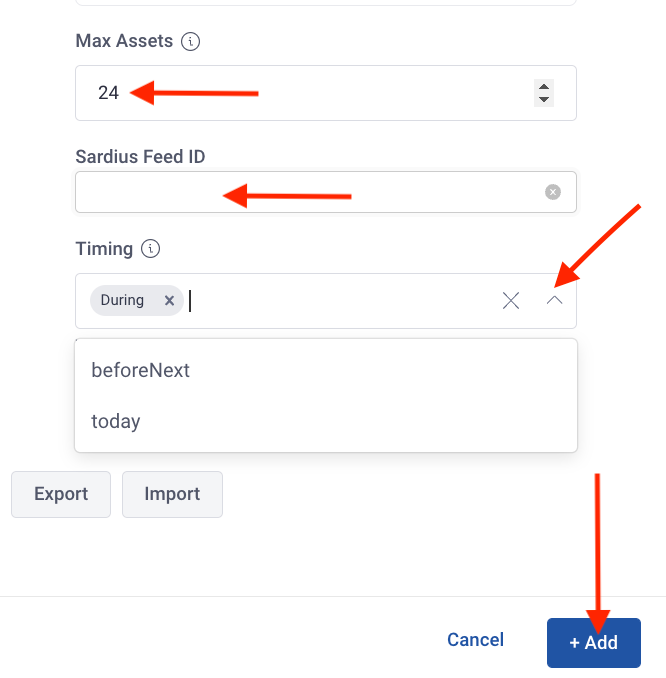
Choose the maximum number of assets that will be shown by the feed
Click on the dropdown arrow to select the Feed ID
Determine the timing for when the VOD will show:
- During: the VOD will show while the scheduled event is live on the page
- beforeNext: the VOD will show during the break (after the scheduled event)
- Today: Shows after the event and for the rest of the day
Click +Add to save your changes
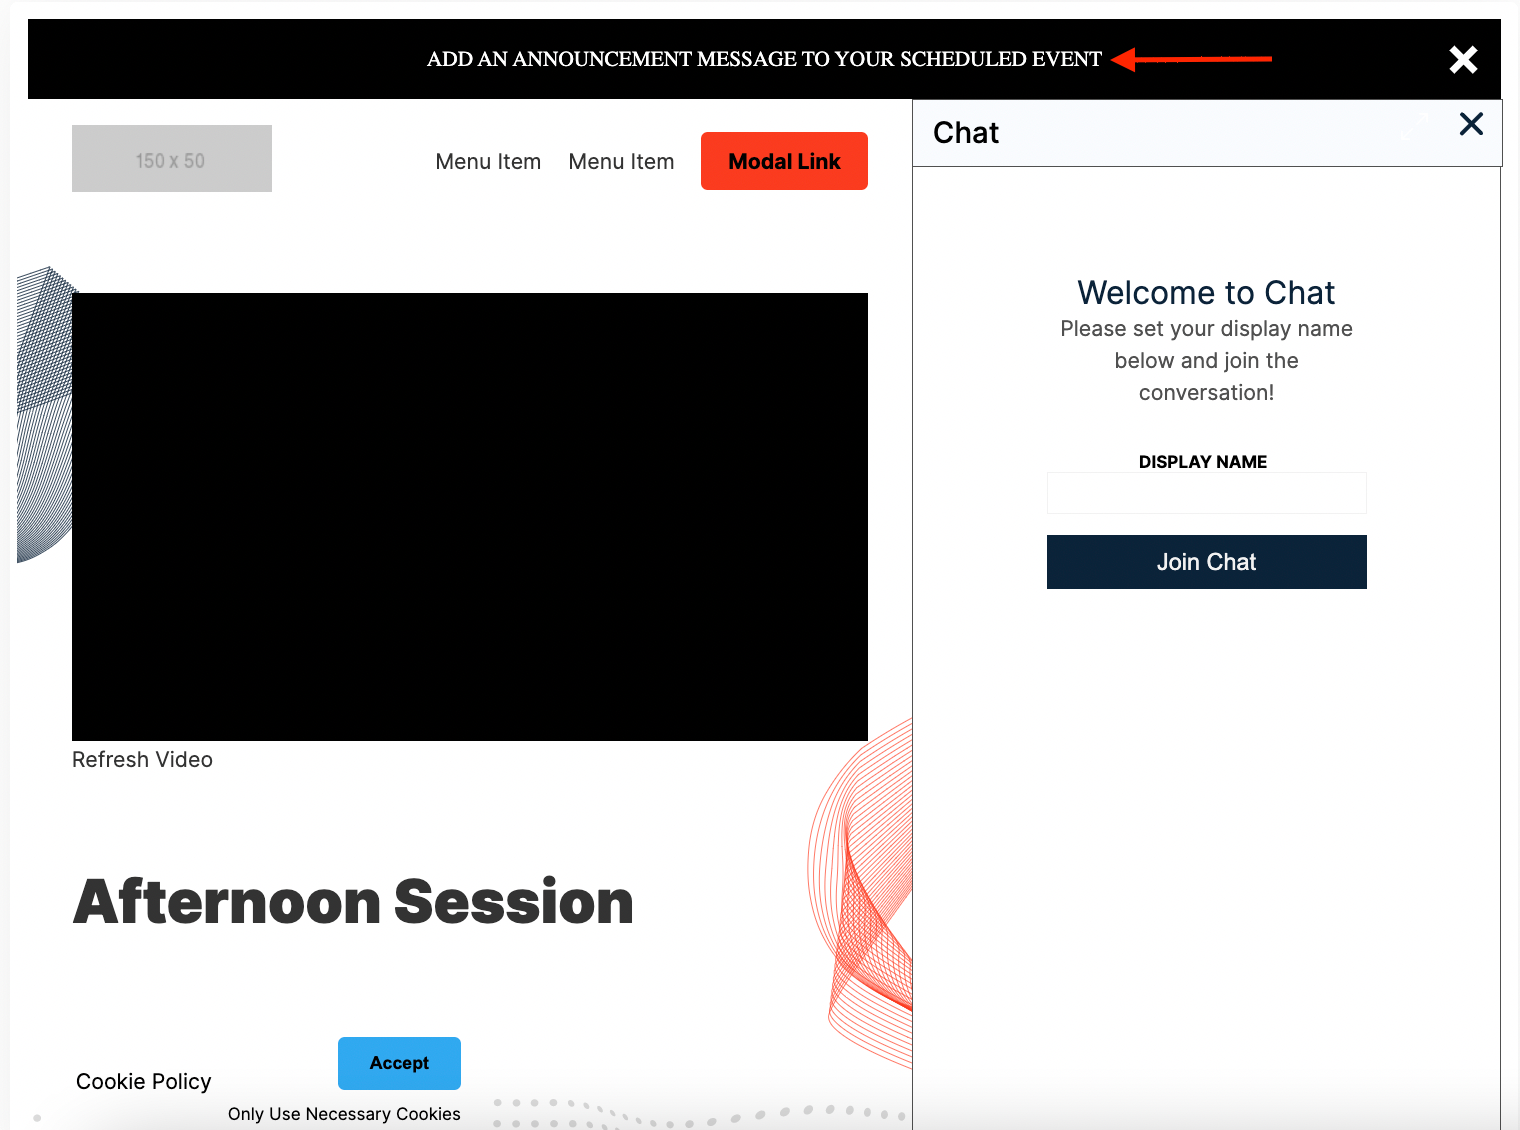
Announcement Message
You can add an announcement bar message that will be seen by viewers. It will be at the top of the page and the view can click on the X to remove the message
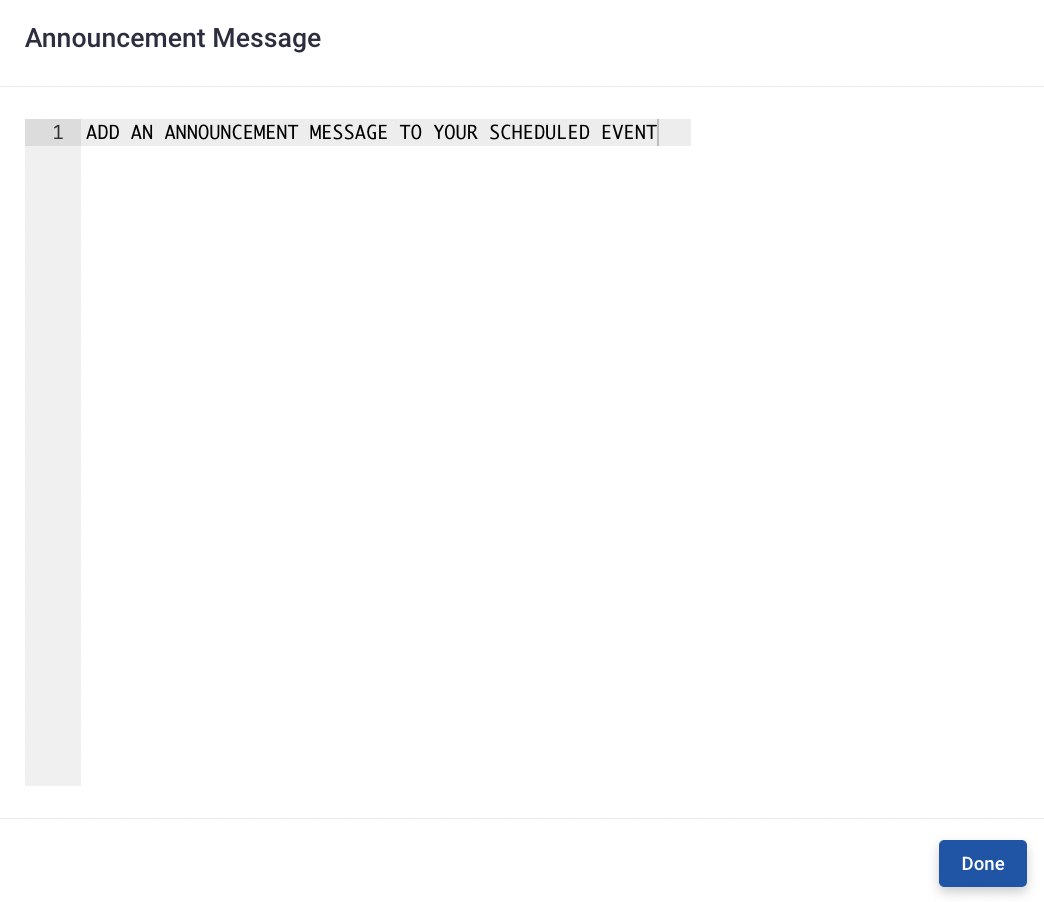
To begin, click on the Modify HTML button to add or update your message. Click the blue Done to save your updates
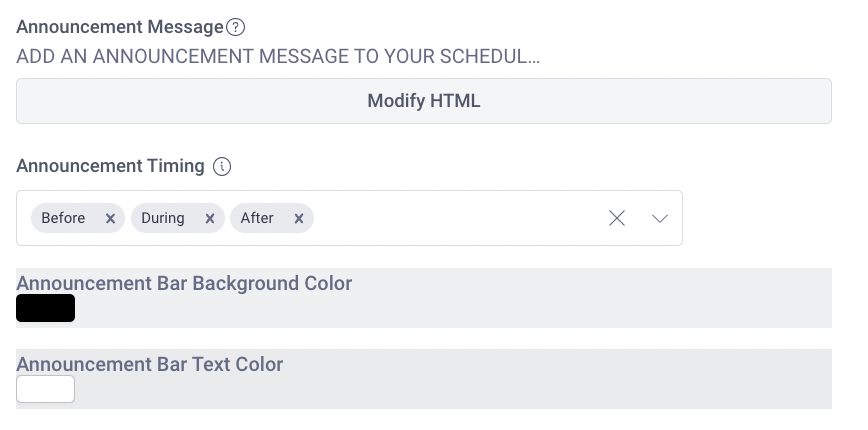
Next, determine the Timing of the Announcement Message by selecting the the state (Before, During, After). Click on the dropdown menu to add or click the X to remove
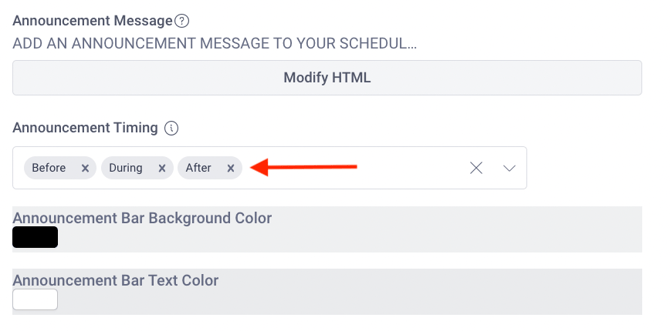
- Before: the message bar will show before the event is live on the page
- During: the message bar will show during the event (while the event is live)
- After: the message bar will show after the event, during the break
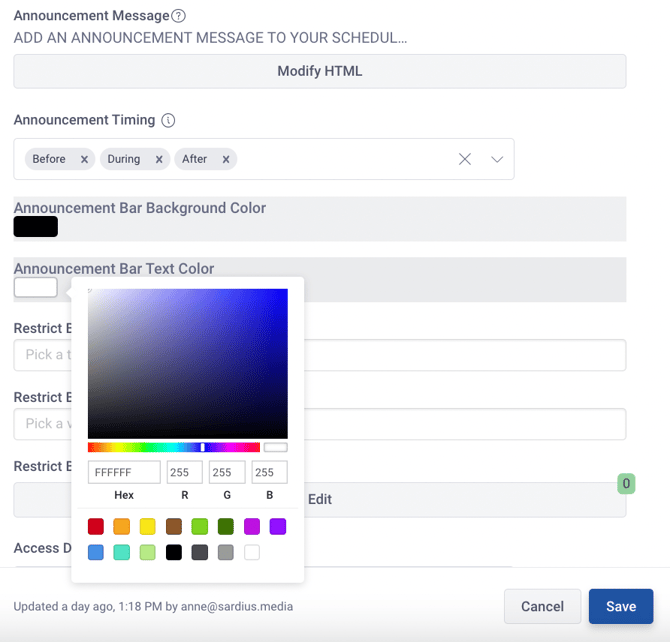
Lastly, determine the Announcement Bar background color and Announcement Bar text
Click on the color box next to each field to select a new color or add your Hex#
Viewer Access
You have the ability to restrict viewer access based on ticket type, viewer segment, and metadata
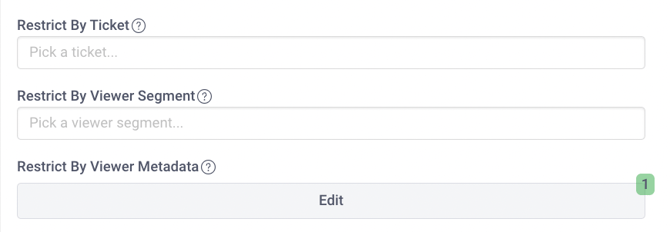
Restrict by Ticket: if authentication was through the Sardius registration system, you can restrict access to those who have purchased a ticket
Restrict by Viewer Segment: if viewers segments are provided, you can restrict access to those who have at least one of the viewer segments
Restrict by Viewer Metadata: if rules are provided, you can restrict access to those who have at least one of the rules to see the event
You can add text for when a viewer has their access denied
Click the blue Save button to save your changes
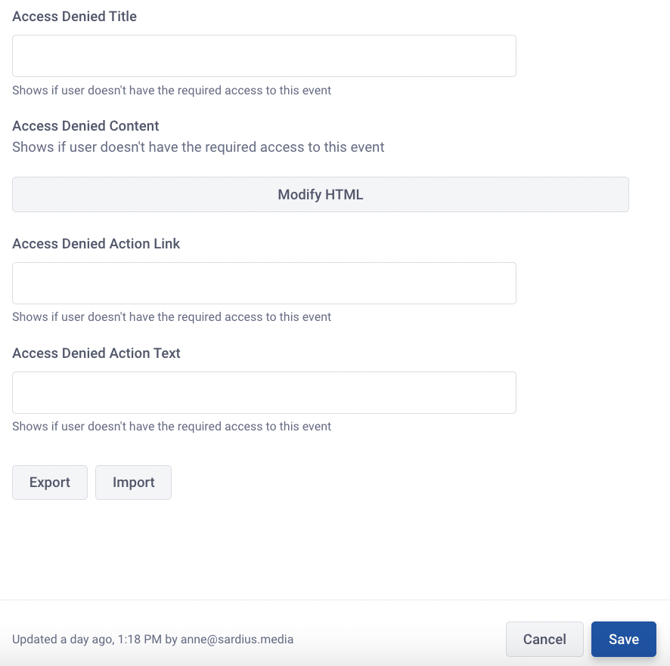
Save your changes.
