Adding a VTT File to an Asset (Closed Captions - CC)
VTT files are commonly used for closed caption purposes and can be used to provide the transcript information for a video file in English or another language from within the Player Controls.

Helpful Tip: To access this option, the user needs to initiate turning the Closed Caption option on. If you are wanting a caption option embedded in your asset instead, you should discuss that with your live production or post-production team, as appropriate.
Adding a VTT File to an Asset
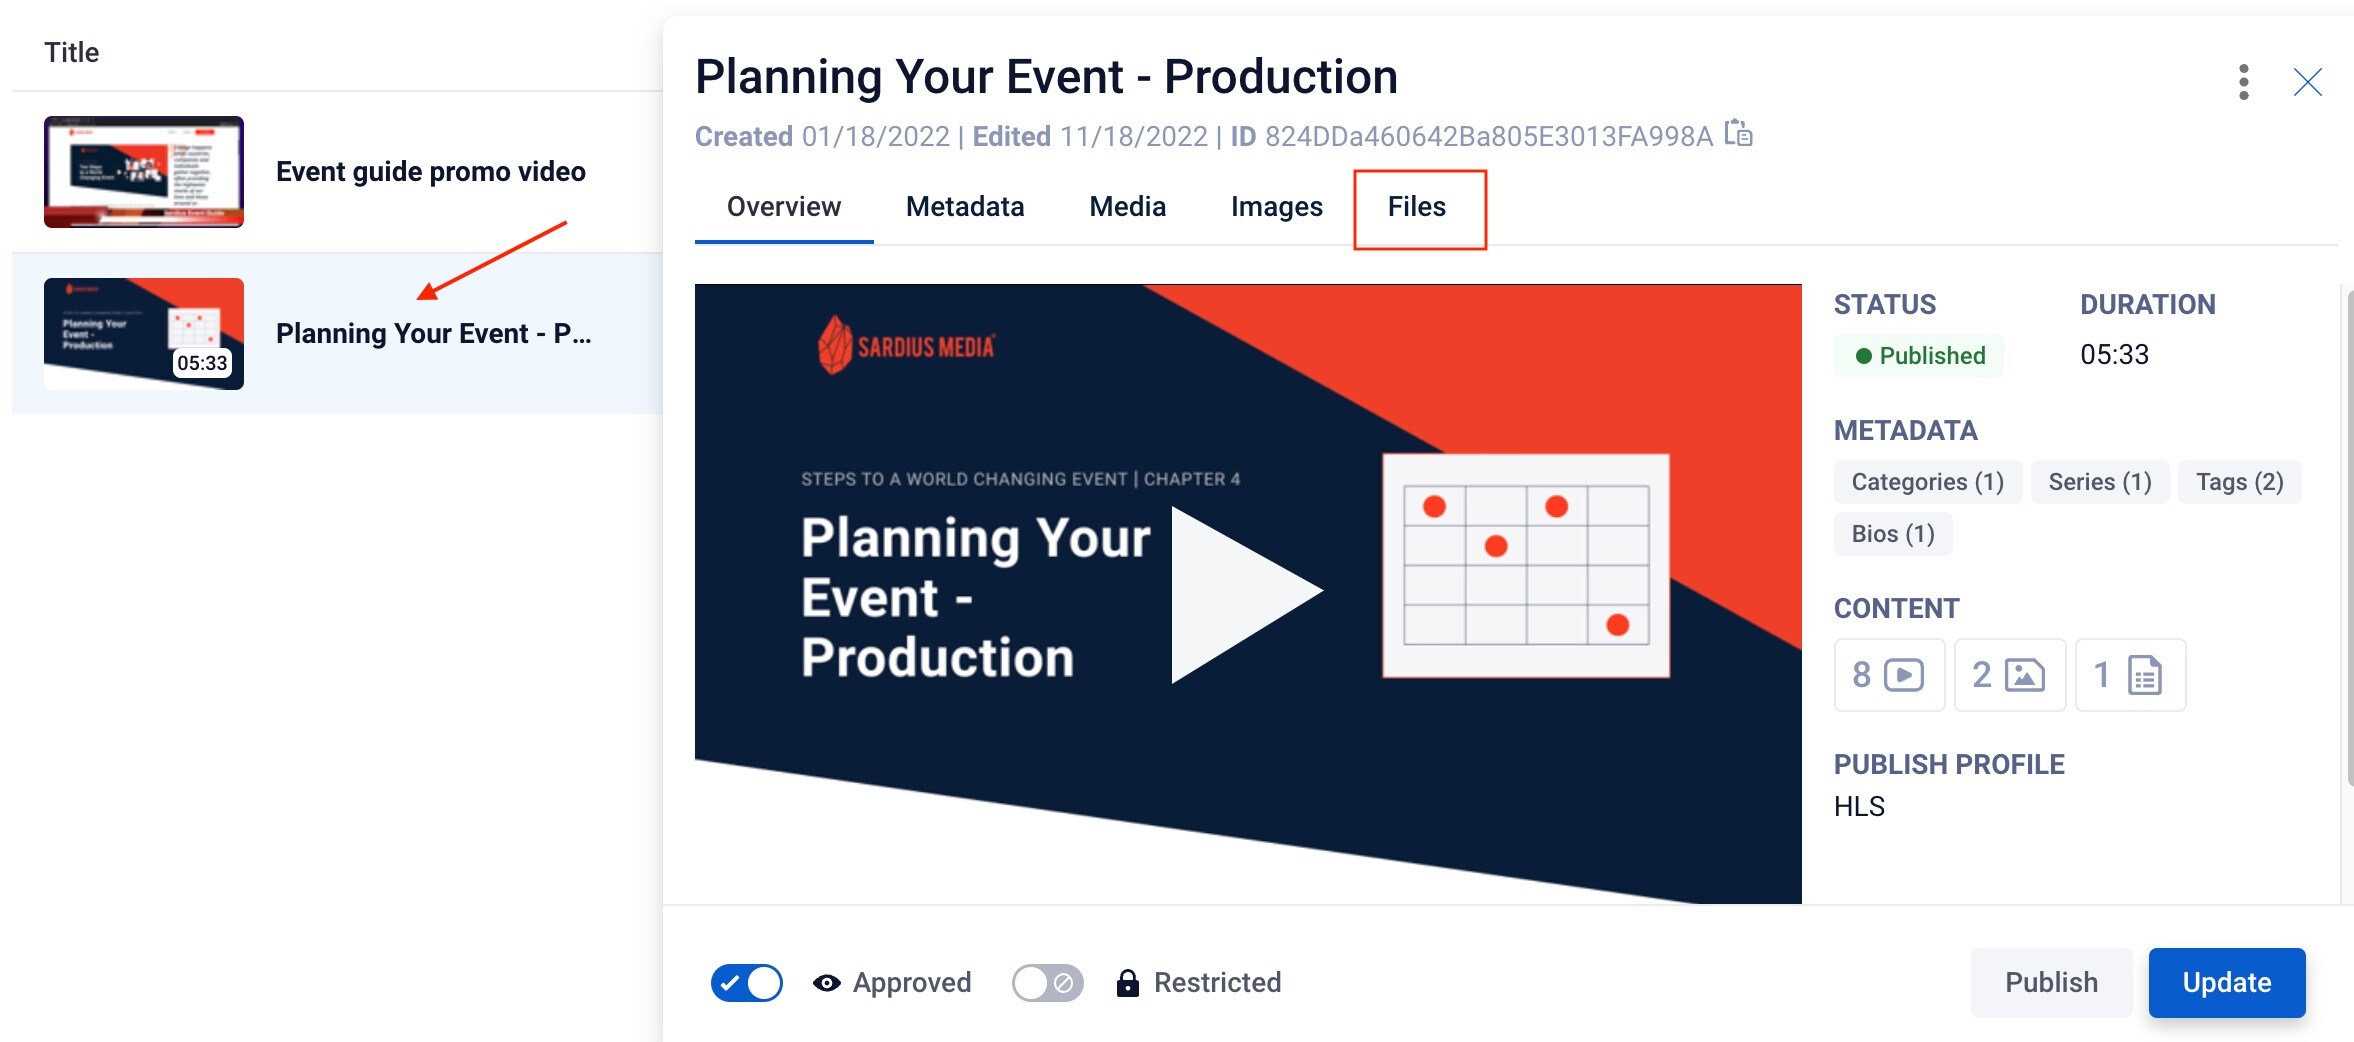
To add a VTT file to an asset, find the Asset you want to add your .vtt file to from the list of Assets. Click on the Asset to open the detailed window. This will default you to the Overview tab. From here select the Files tab.
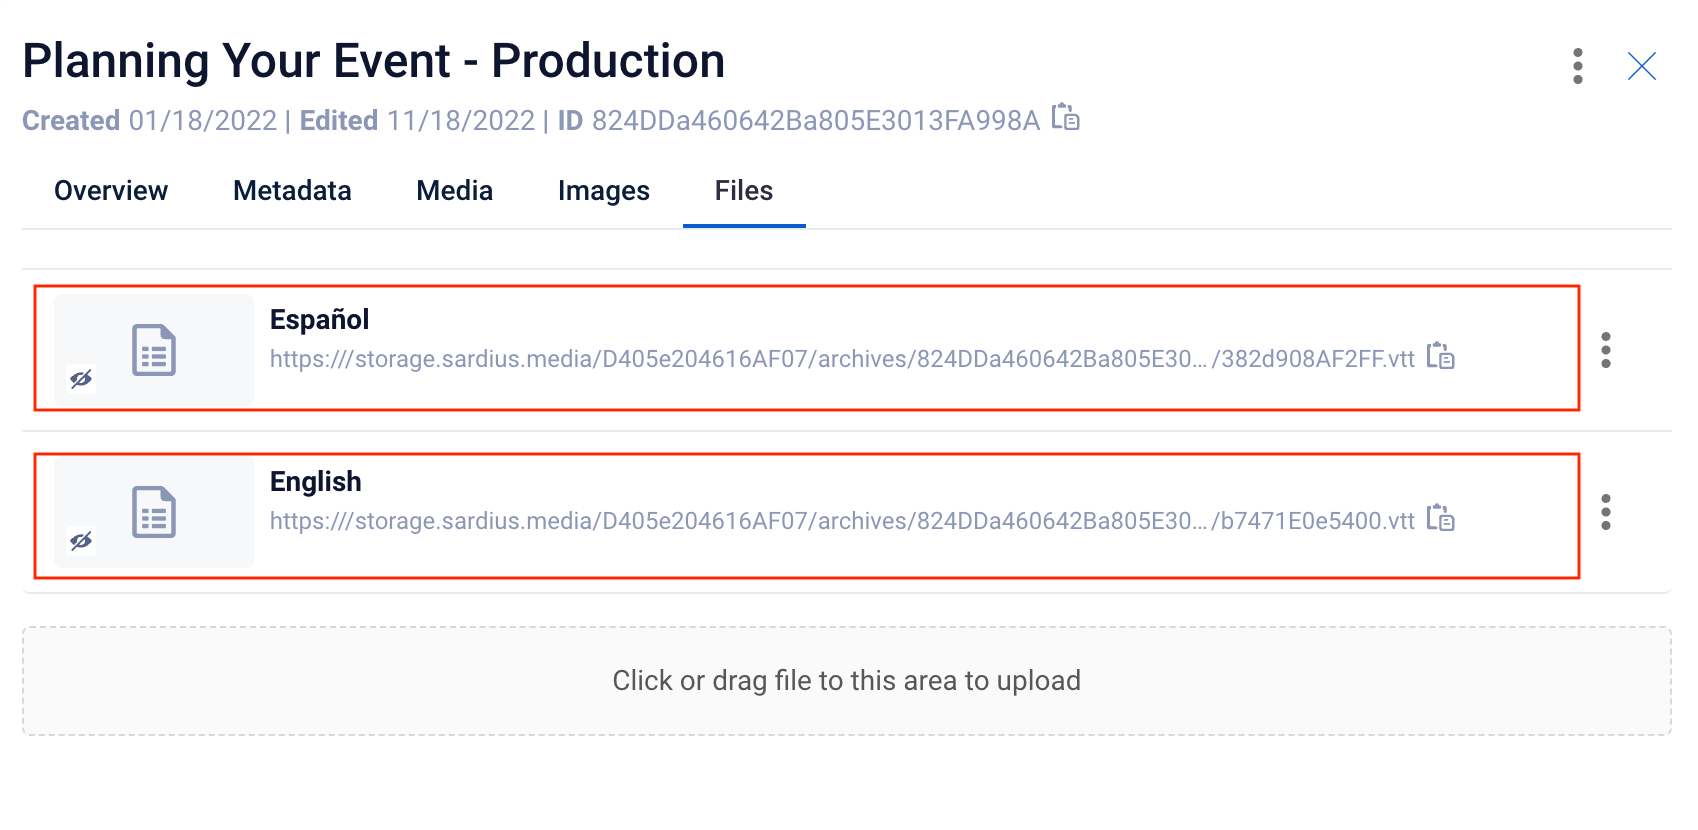
Once you are in the Files tab, you can either ‘drag and drop’ the .vtt file into the upload frame or click on it to navigate to the location on your computer where the image is located. Upload your file(s).
Once the .vtt files has been uploaded, they will appear in the list view in the Files tab.

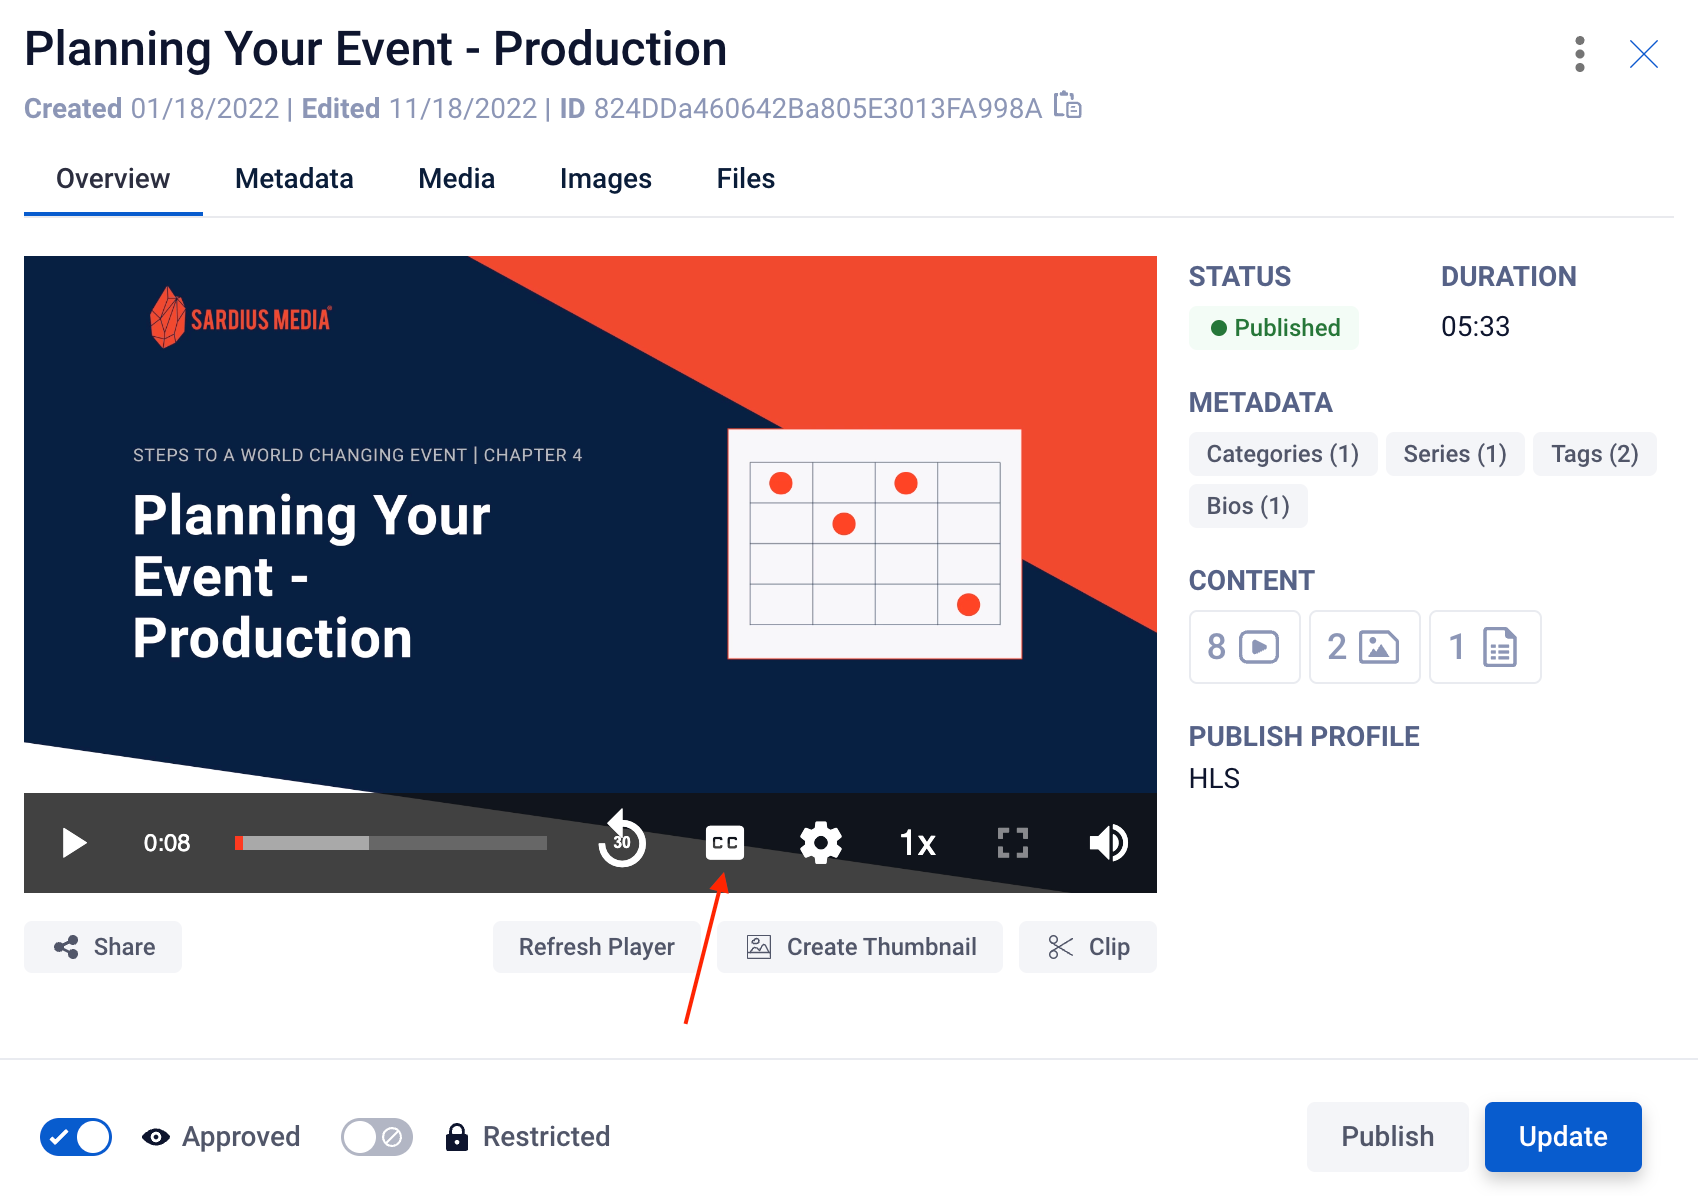
Helpful Tip: It may take a couple of minutes for the player to uncache but you will be able to see the "CC" button appear on the player in the Overview tab once the VTT file is connected. You can test how this works by following the steps outlined below.
Accessing Closed Captions
Your audience will be able to access the Closed Caption options by hovering over the Closed Caption symbol (CC) in the Player and selecting their desired language.
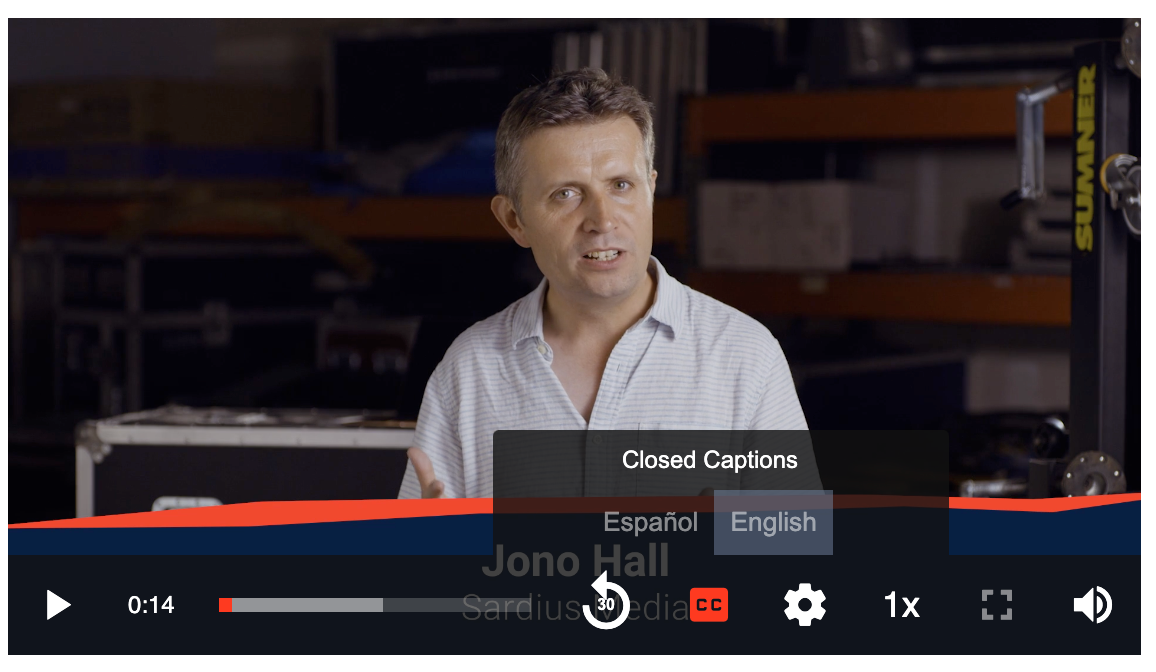
They will then see the captions in the language selected.

Editing File Information
If you would like to edit the file information, you can do so from the Edit option found in the hamburger menu to the right of your file.
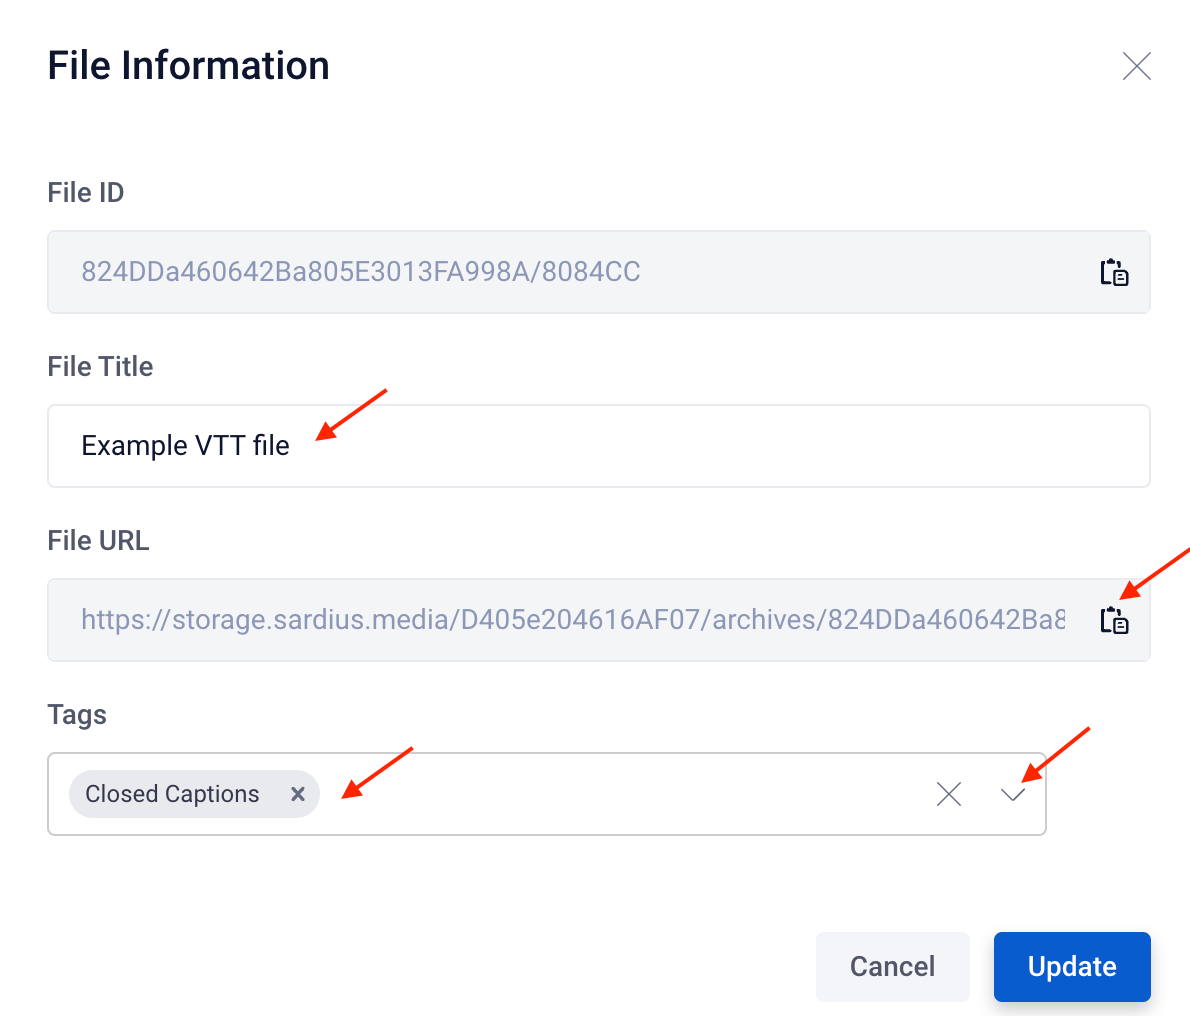
This will open a File Information modal where you can update the File title, copy the file URL or add tags to help organize your files.
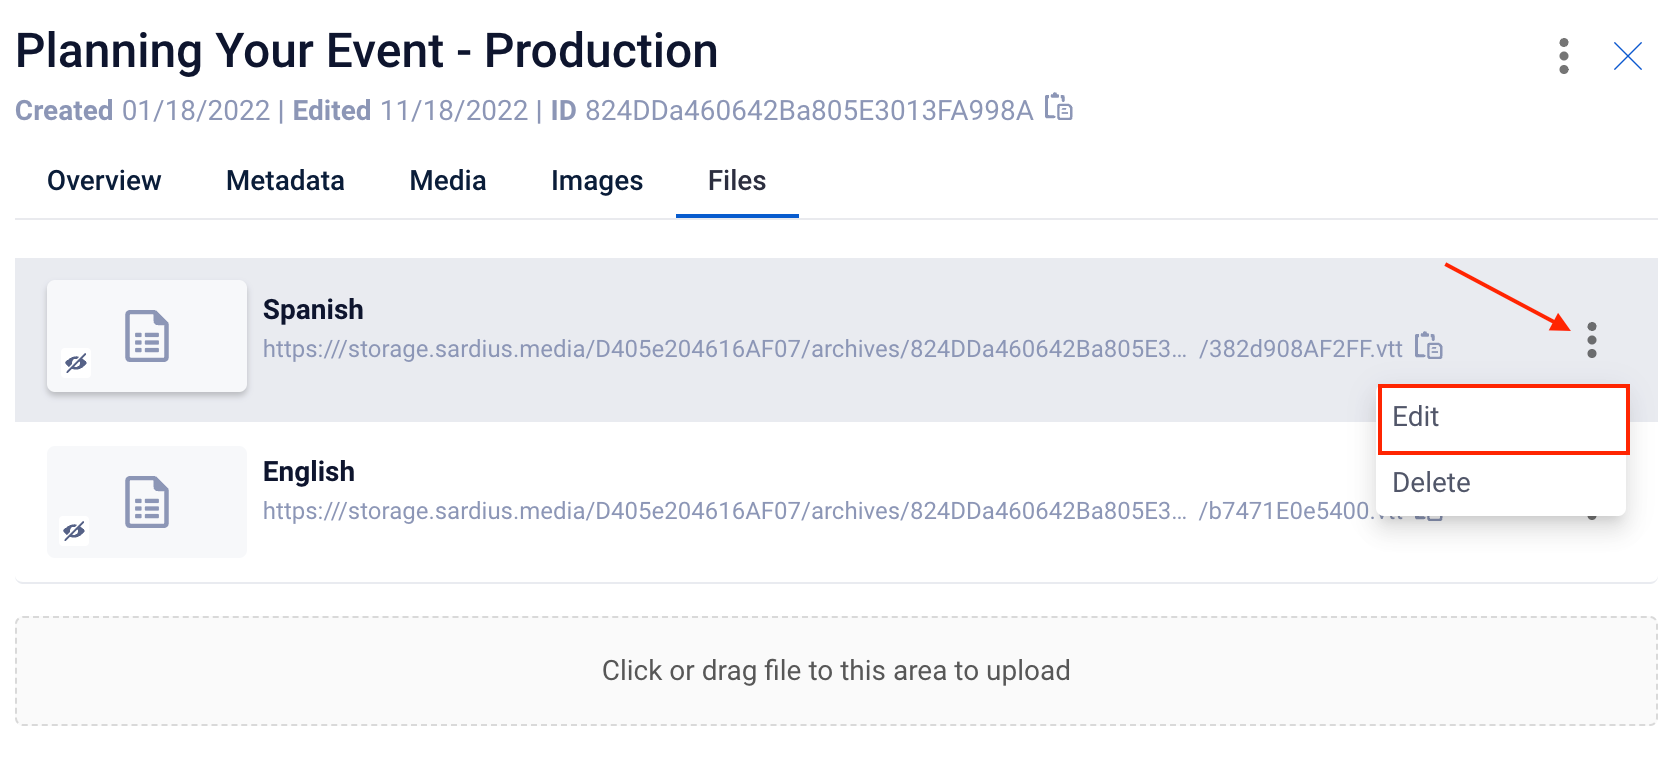
To edit your File Title: simply type your new name into the field and click the blue Update button.
To copy your File URL: click on the clipboard icon to the right of the URL to copy your file URL to your clipboard.
To add a Tag: select an available option from the dropdown menu or add a custom tag by typing directly into the field and clicking enter.
Important: Whenever updating File Information fields, be sure to click the blue Update button on the bottom right when finished.
Helpful Tip: You can also preview your file image at the bottom of this modal as well.
